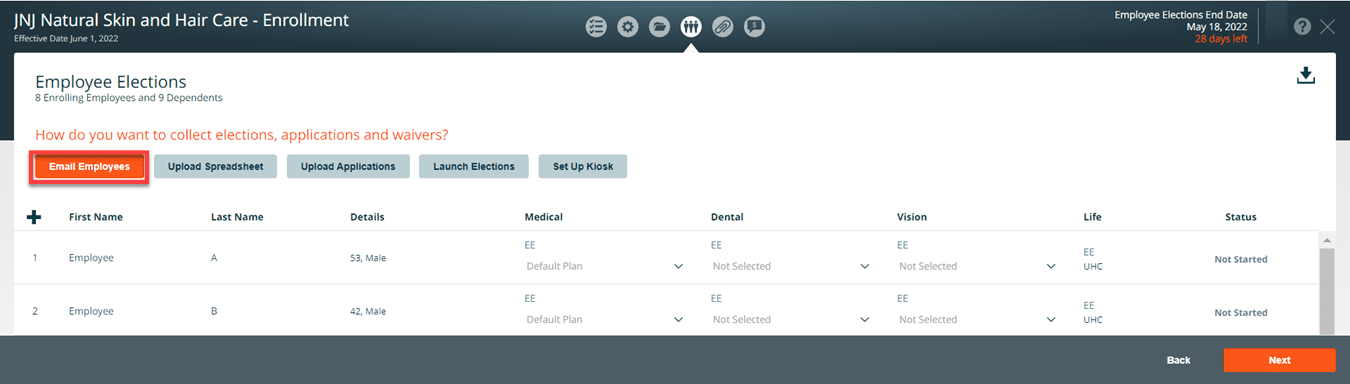
The following options available to collect employee elections:
Email Employees
To give employees access to the employee experience and notify them that they can begin their benefit election, navigate to the Employee Election screen within the Enrollment module and select the Send Email button.
Click on the select all checkbox or select the employees who should receive an email notification, add any missing email addresses, and press next.

The message to be sent to the employees you selected will be displayed.
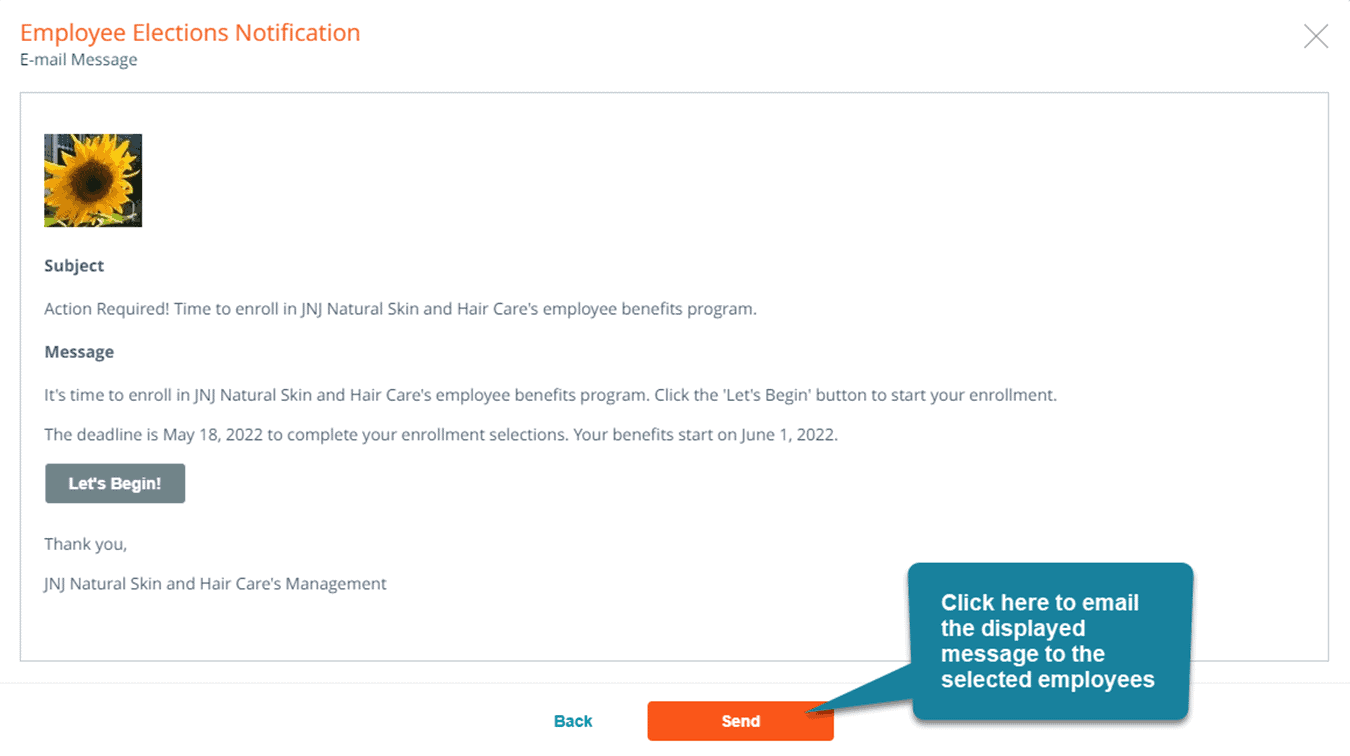
Note: You can return to the notification wizard at any time before the enrollment end date to send additional notifications to employees; you may wish to do so to remind them when the enrollment end date is approaching.
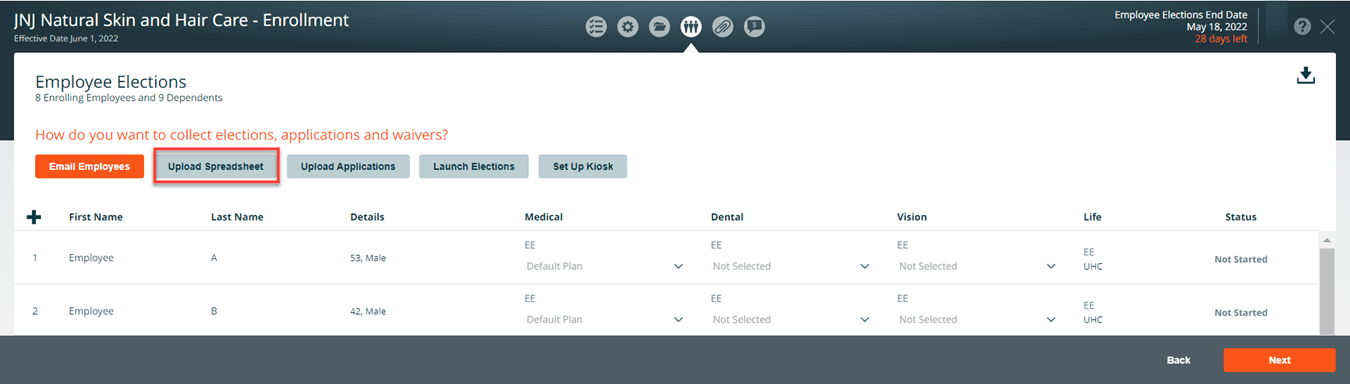
Download Employee Enrollment Spreadsheet (All Savers/Level Funded Groups only)
To download the enrollment election spreadsheet, click Upload Spreadsheet.
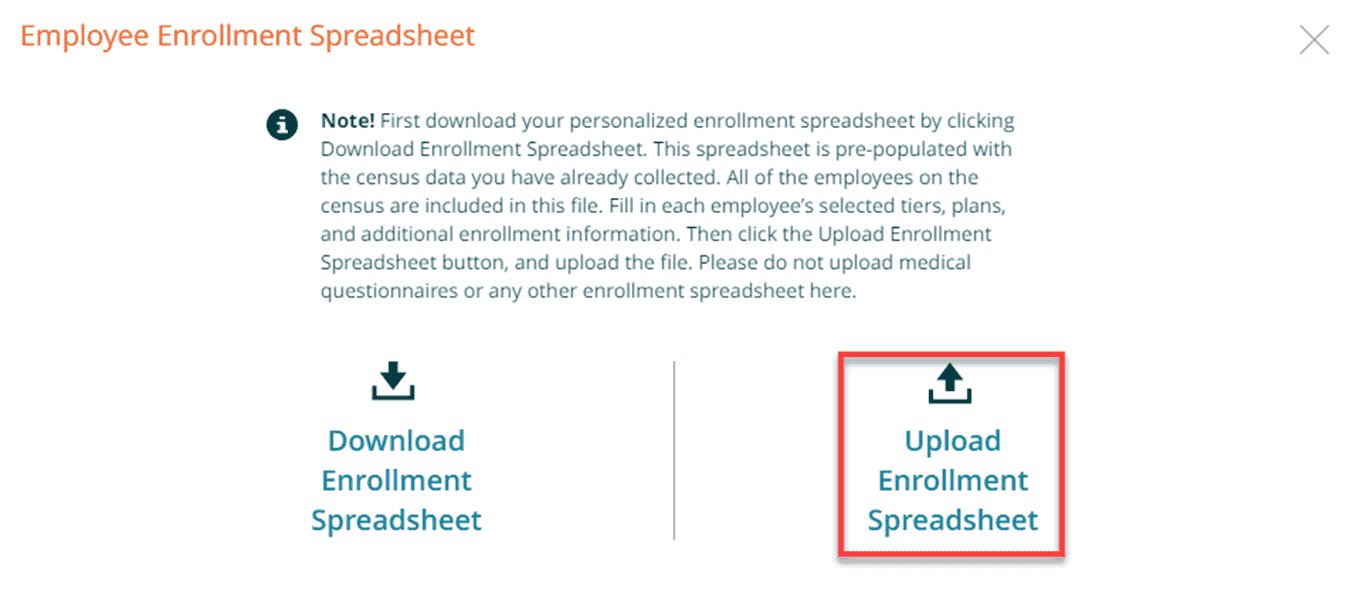
Download the enrollment spreadsheet, click on the Download Enrollment Spreadsheet link or download icon.
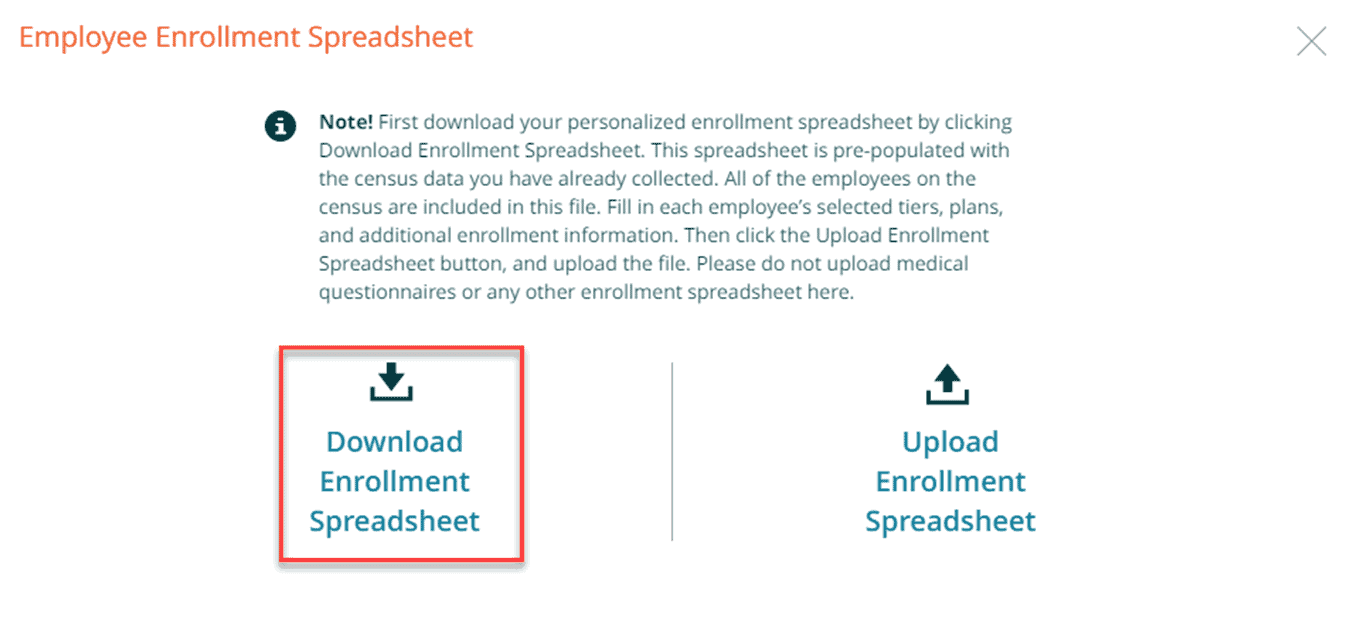
Please do not upload medical questionnaires or any other enrollment spreadsheet here. Upload Employee Enrollment Spreadsheet (All Savers/Level Funded Groups only). To upload the enrollment spreadsheet, click on the Upload Enrollment Spreadsheet link or click on the upload icon.
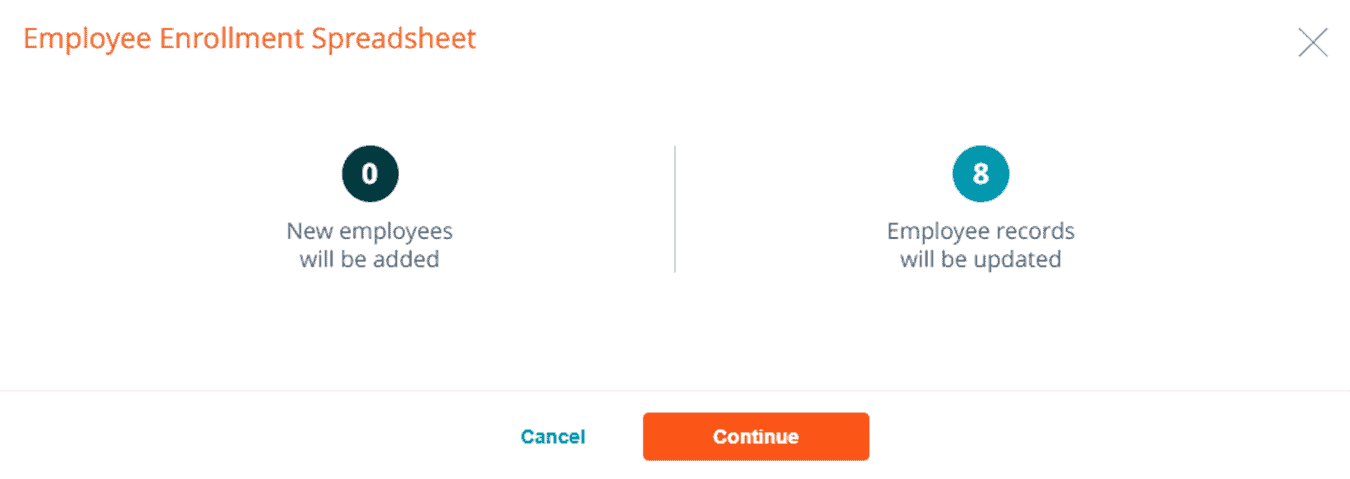
Press continue to upload the election spreadsheet, to add the enrollment elections to the enrollment.
Upload SAMx UHC Final Enrollment Spreadsheet – (All Savers/Level Funded Groups only)
You can upload the UHC Final Enrollment Spreadsheet, the same spreadsheet you use on SAMx. To upload the Final Enrollment spreadsheet:
- Click on the upload application button
- Click on the upload employee election link or upload icon
Press Continue
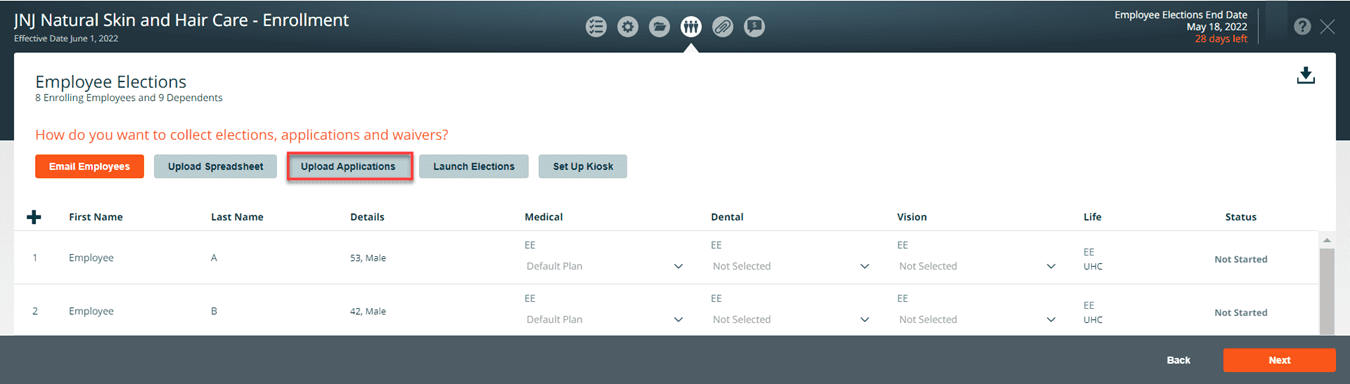
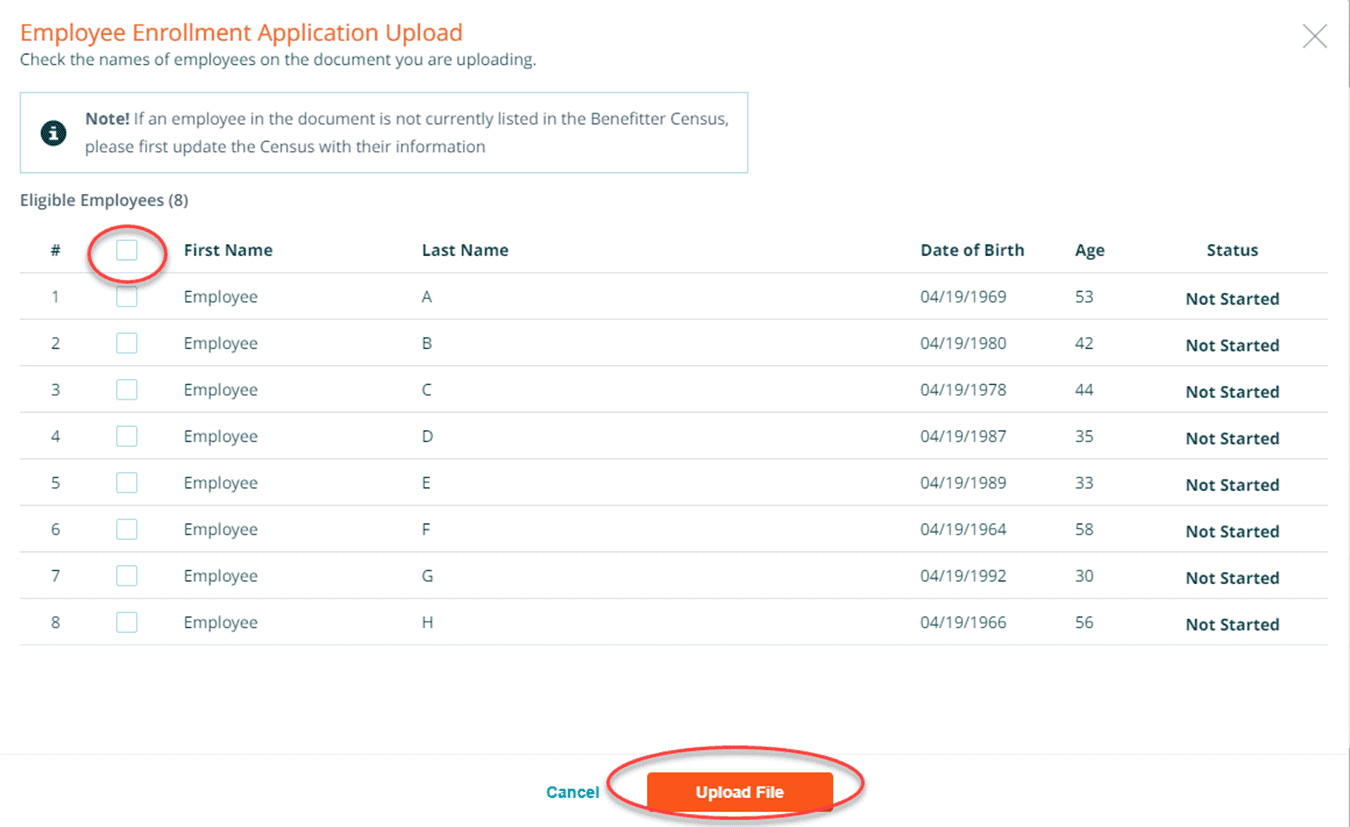
Upload Applications – (All Savers/Level Funded Groups only)
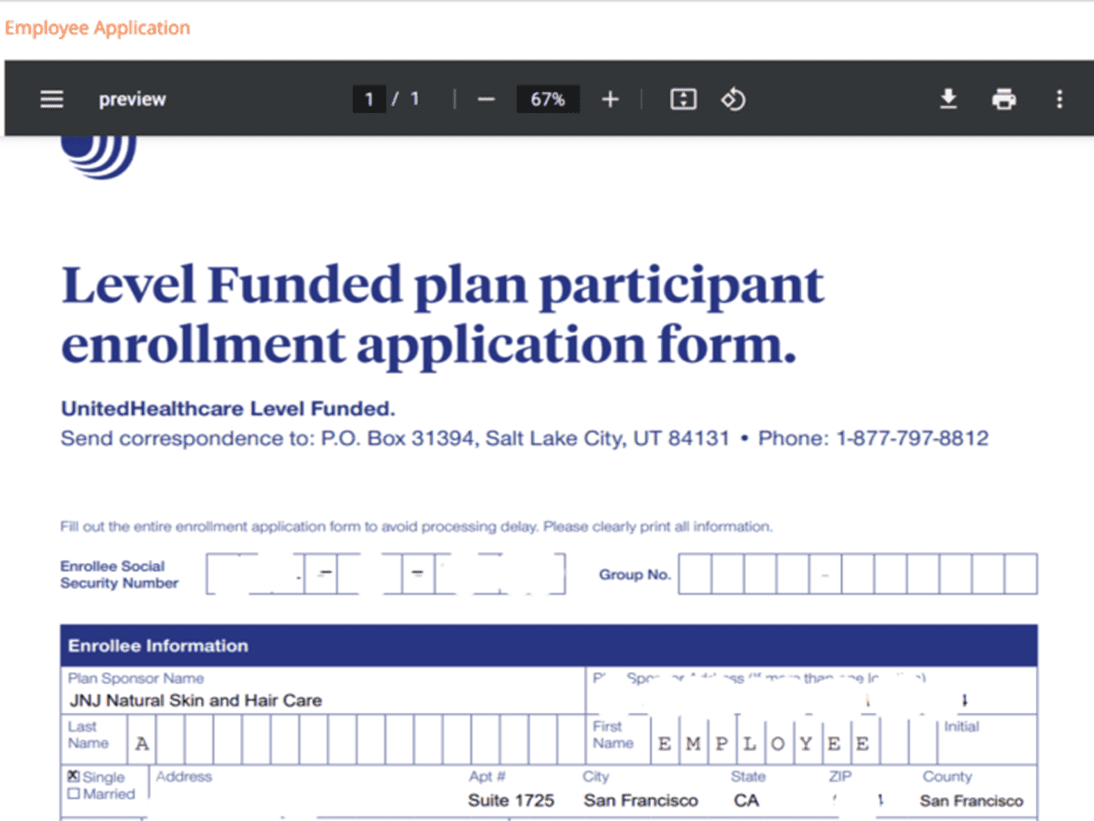
On the employee election page, click on the download indicator to download a blank copy of the employee application.
Attach a copy of the blank application to an email and send it to the employer/employees. When you receive the completed documents. On the employee elections page, click on the upload application button and upload the completed applications. To upload the completed applications, click on the upload application button.
Check the names of employees on the document you are uploading. If an employee in the document is not currently listed in the Benefitter Census, please first update the Census with their information
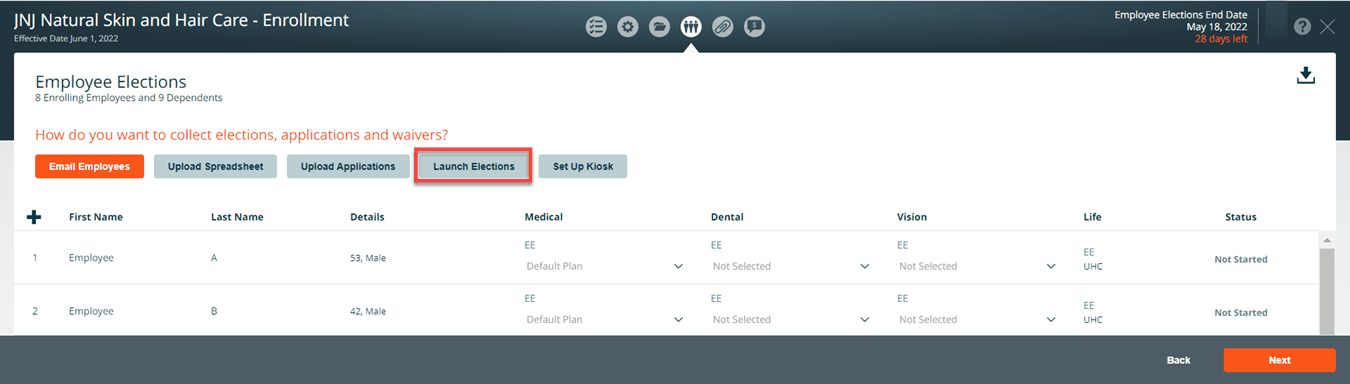
Launch Elections
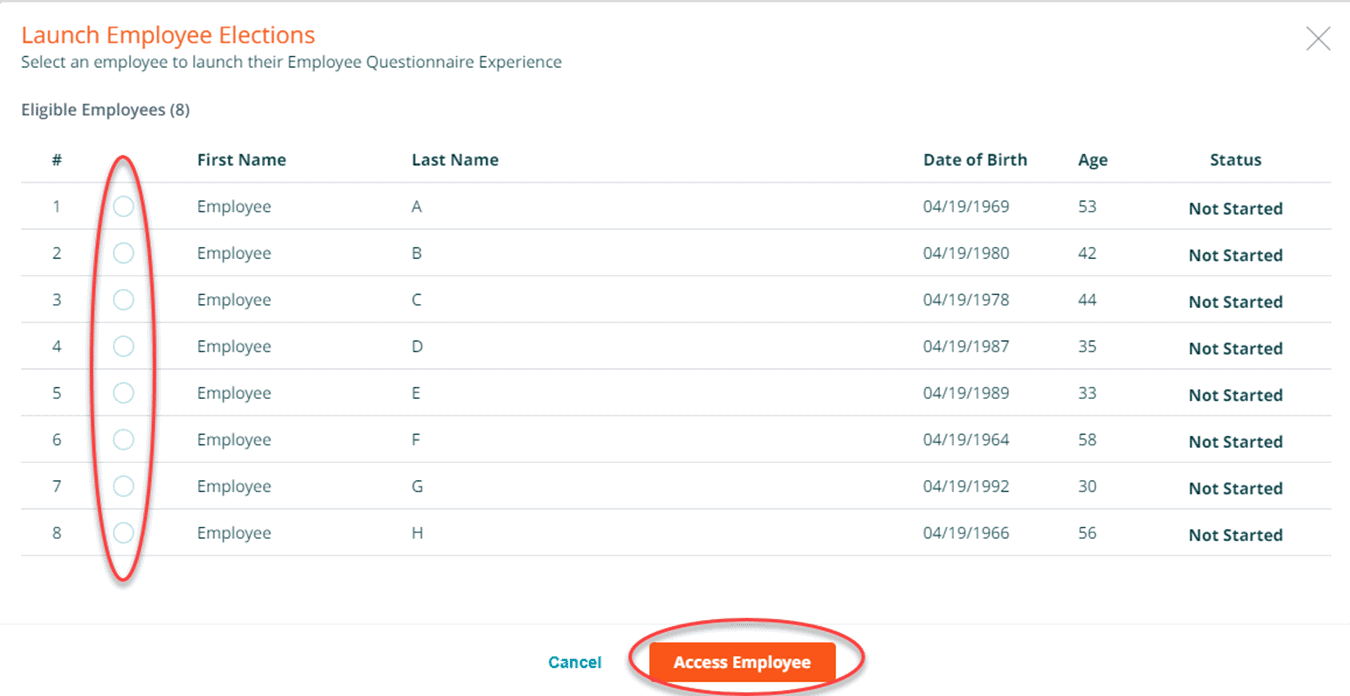
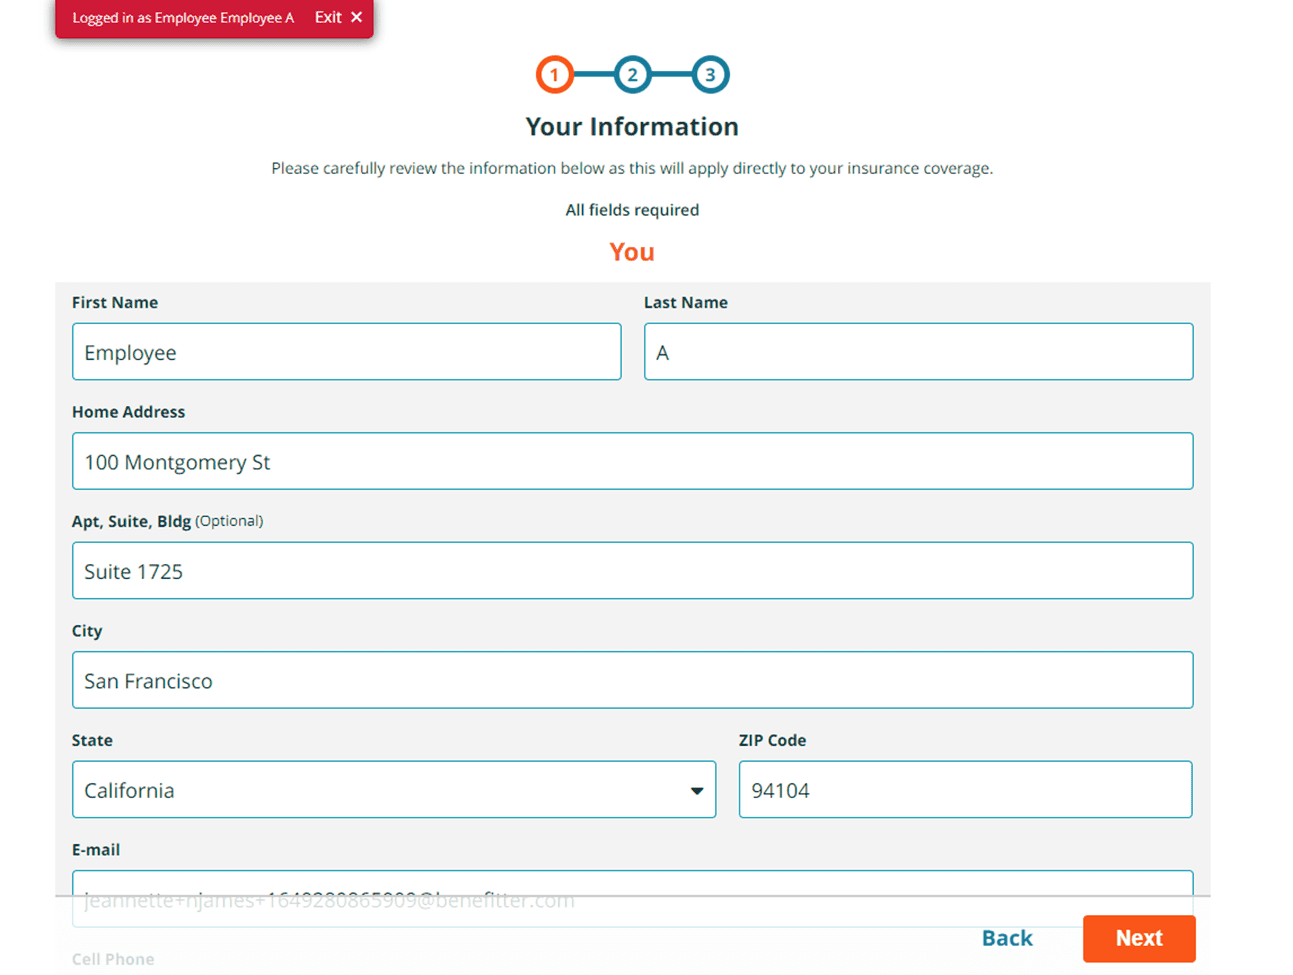
You can access the employee experience to walk an employee through their benefit election, or so that you can complete or correct their responses. To complete their benefit election, the employee should have on hand (for themselves and their dependents): Dates of birth; Social security numbers and Home Addresses. If enrolling in HMO plans their current primary care physician names & ID numbers. To access the employee experience on behalf of an employee click on Launch Elections.
Select an employee name and press access employee.
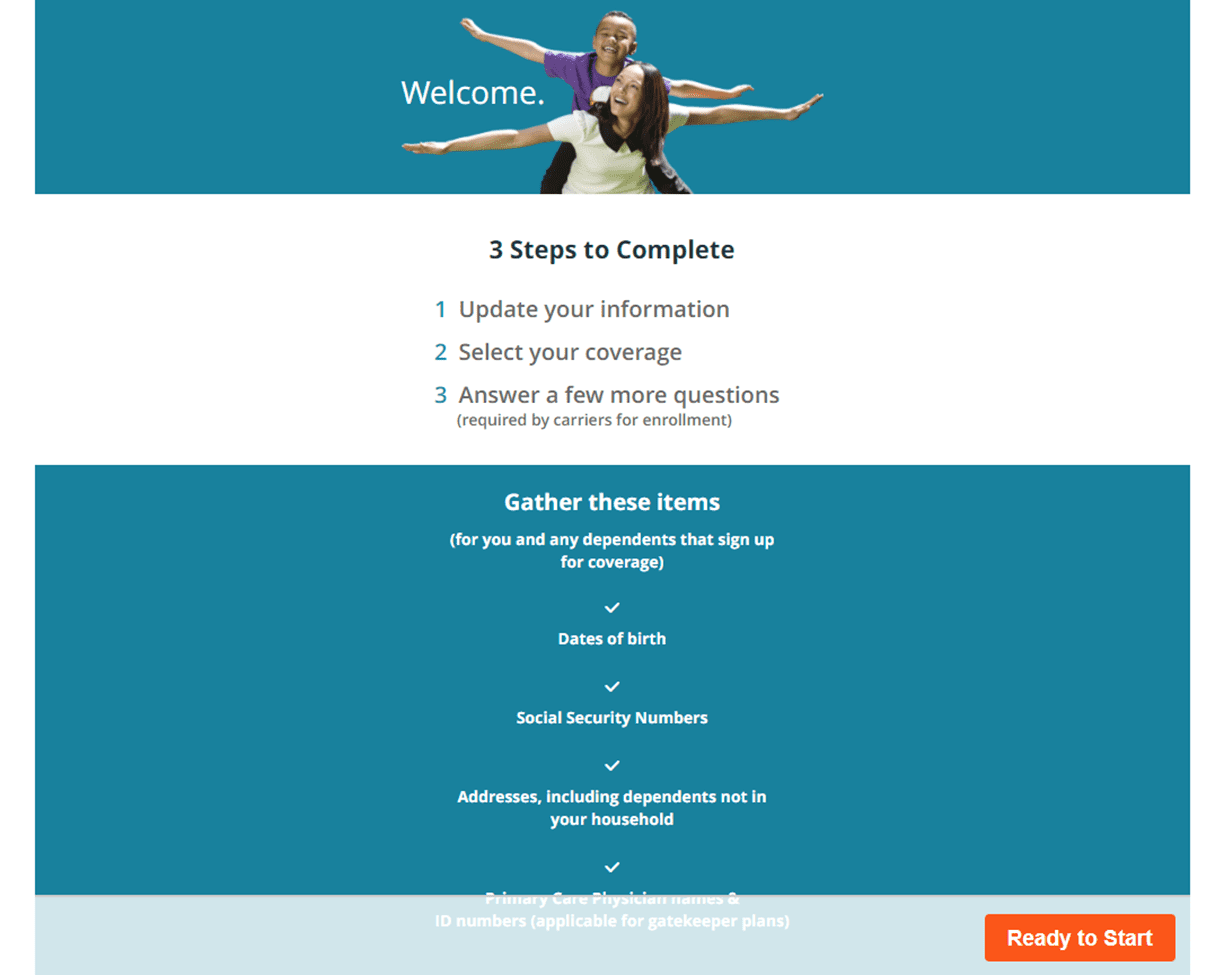
You will briefly see the employee login page; the system will automatically sign you in as the employee and take you to the Welcome screen.

The employee’s name that you accessed will appear in the upper left corner of the screen.
You/and the employee) can:
- Complete and correct their census information
- Select the coverage they would like for them and their family
- Answer any additional questions required by the insurance companies for enrollment
Reminder: Any changes that are made may impact which questions are asked in the Additional Questions state of the enrollment. Please be sure to review and complete all screens following any changes.
Setting up a Kiosk
The kiosk functionality enables you or your client to set up a computer in the workplace where employees can access the employee experience. This is particularly useful when the client does not have an email address for all eligible employees. To access the kiosk feature, click on Set Up Kiosk.
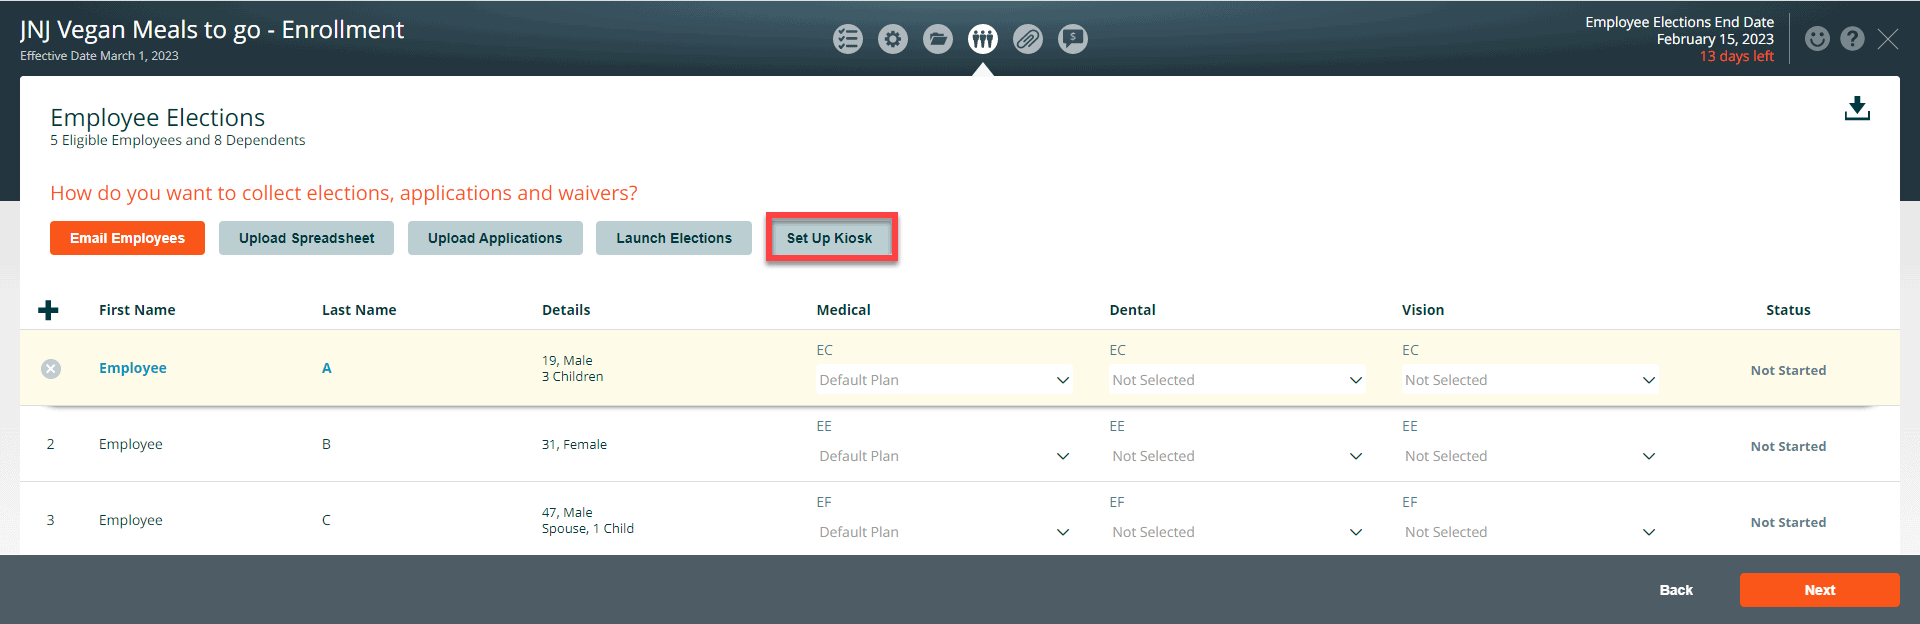
Employees will need an access code to use the employee experience via the kiosk feature. To download letters with employee access codes, click on the Launch Kiosk button on the Employee Elections page, then select the download icon in the upper-right. You can launch the kiosk functionality by clicking on the link on this screen. Doing so will log you out of Benefitter, so make sure you have the employee access codes before you proceed!
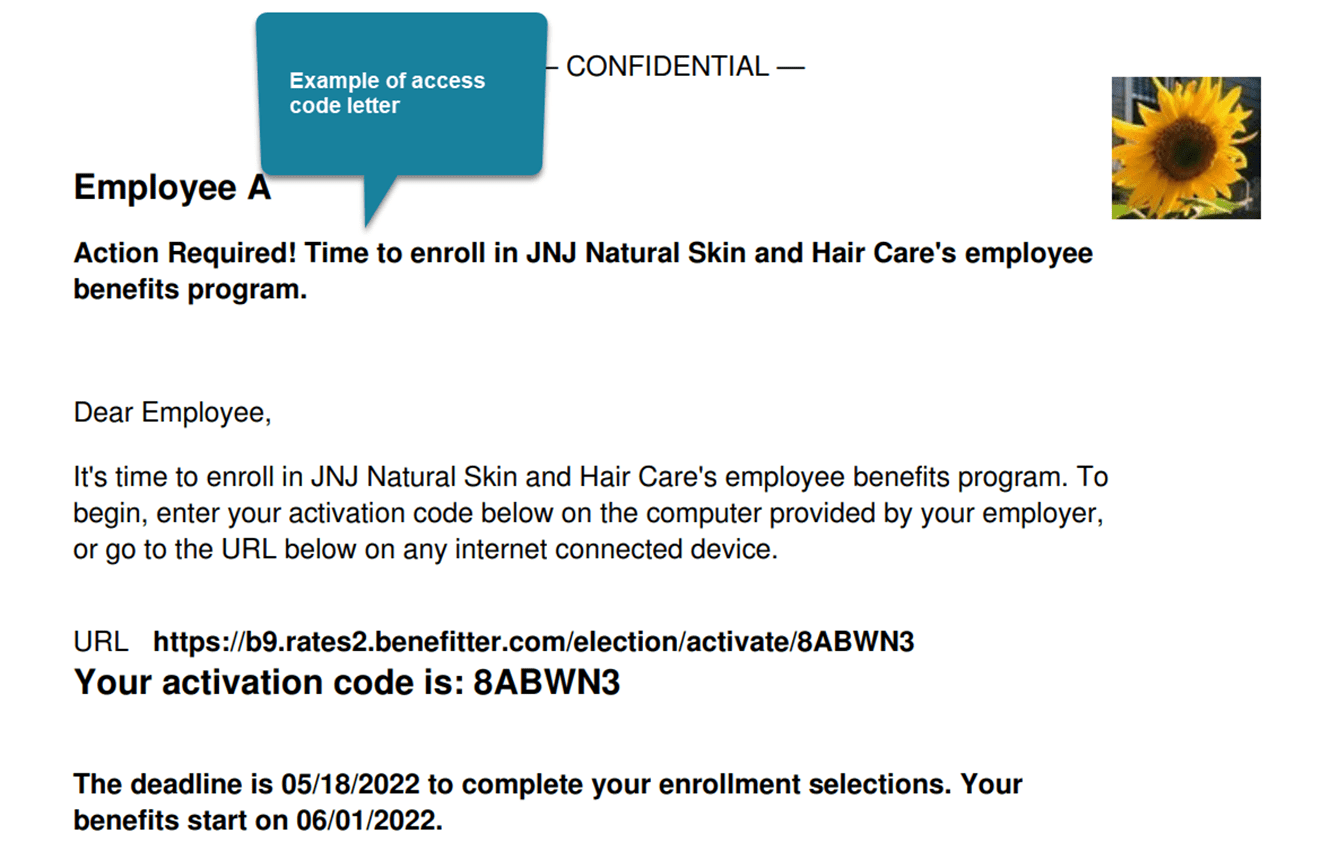
You (or your client) can also launch the kiosk by typing https://ei.benefitter.com/kiosk into an internet browser; you do not need to first log into Benefitter. The employee will enter the access code from the kiosk code pdf and press verify.

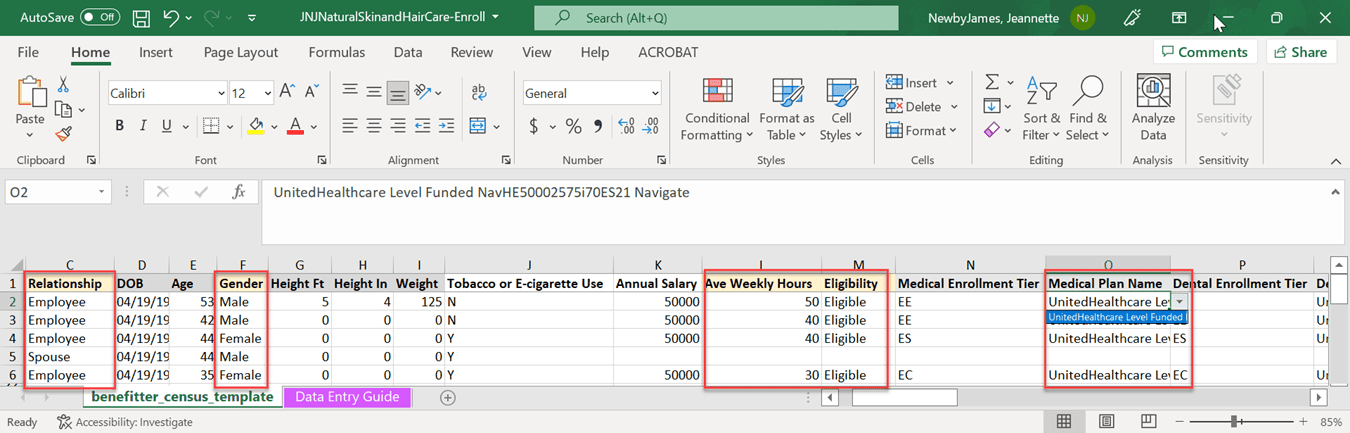
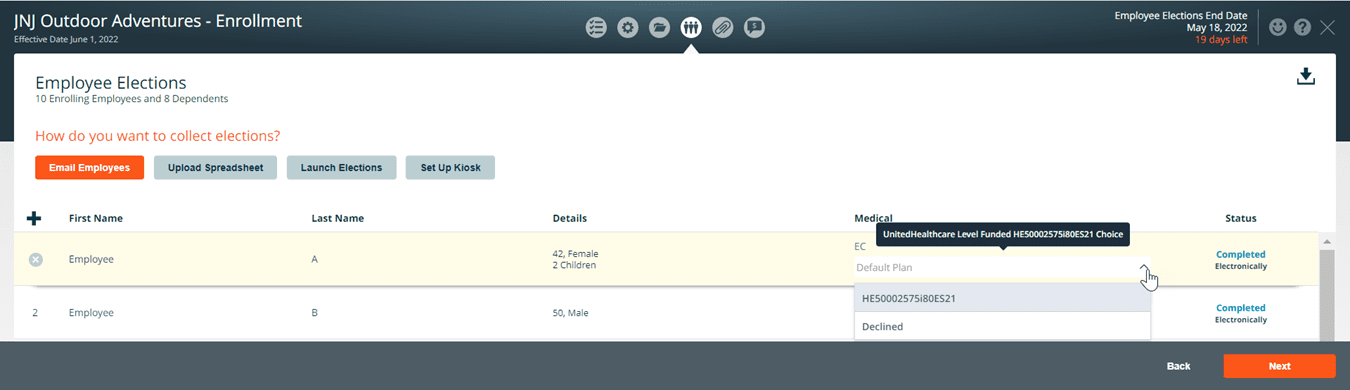
Enroll Employees in plans on the Employee Elections page – Click on the down arrow under each coverage tier and select the plan. Press save after enrolling the group in the plan(s).
Track Employee Election Status
The Status field on the Employee Elections page shows where each employee is in the enrollment election process.
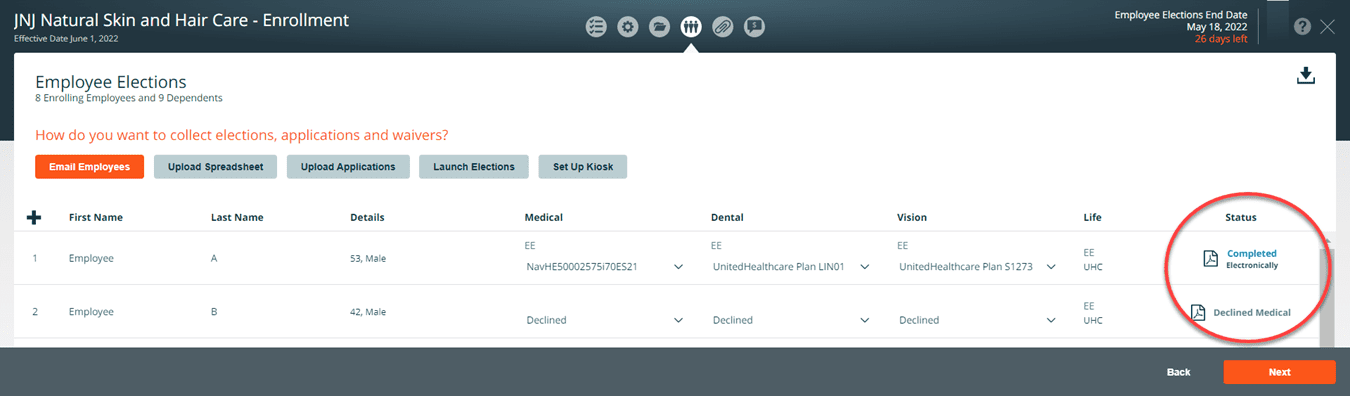
The enrollment statuses are as follows:
- Completed: The employee has made their coverage choices and provided all required additional information. They can still make changes to their coverage choices until the enrollment end date
- In Progress: The employee has logged into the employee experience
- Not Started: The employee has not been sent an email notification, nor have they logged into the employee experience
- Declined: The employee has logged into the employee experience and declined coverage
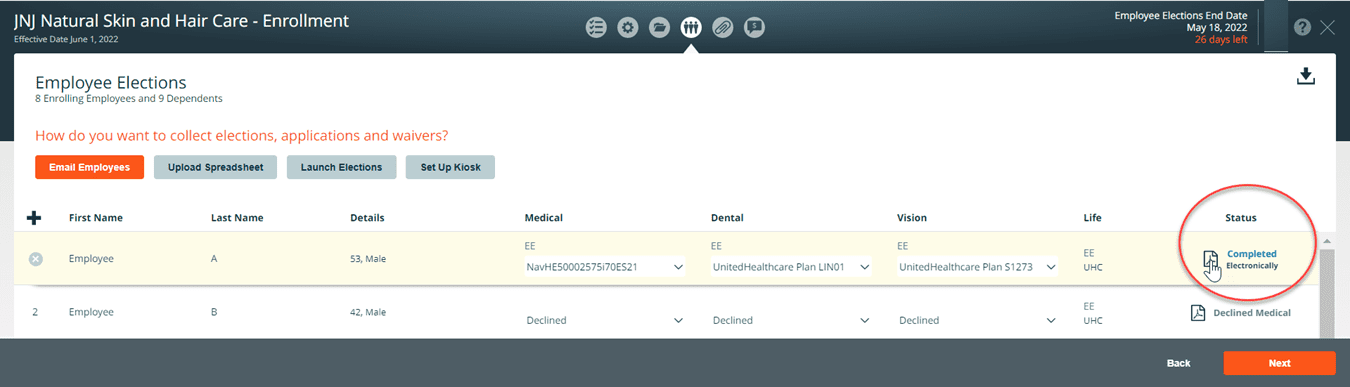
- To encourage employees to complete their enrollment, you can resend the enrollment email notification to the employee by clicking on the envelope icon.
Click on the paper icon to review, download, and print out a copy of the employee’s application.
After the enrollments have been completed, click on the next button.