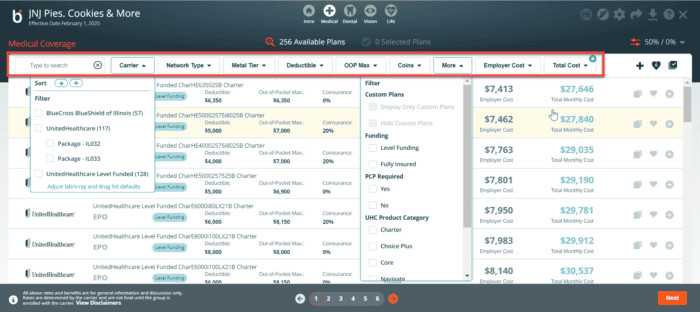
Click on any of the four coverage icons (medical, dental, vision, and life) to bring up plans available in the client’s geographical area. Use the search or filter settings to narrow the available plans.
Choose plans to propose
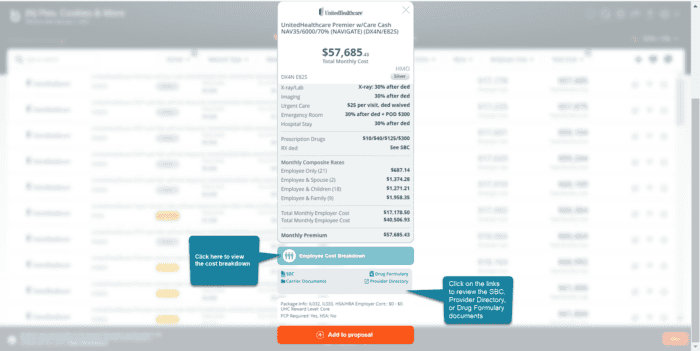
To add a plan to the proposal, click on the + icon on the far right of a plan row. (The count on the Selected Plans link increments as you add plans). To view the plan card and cost details, click anywhere on that plan row on the Available Plans screen. Links to the employee-by-employee cost details, SBCs, provider directories, and drug formularies (if available) are found near the bottom of the plan detail view.
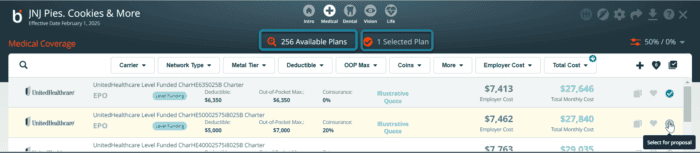
Click on Selected Plans to see a side-by-side comparison of your selected plans. Once you have selected the plans, navigating to that line of coverage will take you to the Selected Plans list rather than the Available Plans list to facilitate your presentation to the client.
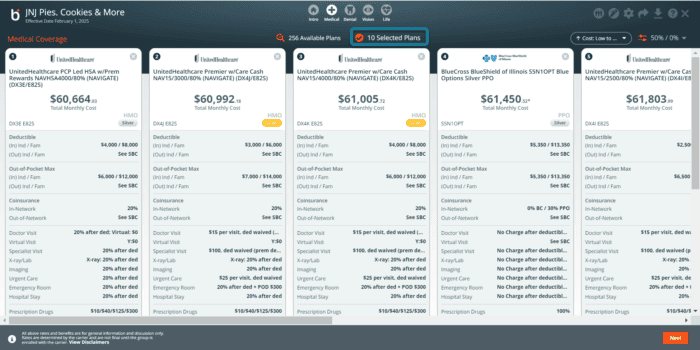
You can look at the plan card by clicking on the plan

Rearrange plans on the selected plans list selected plans list
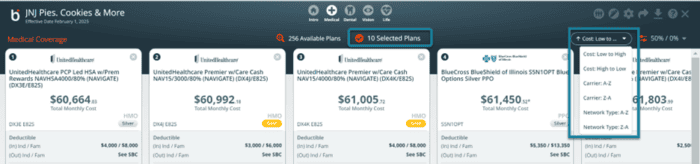
Medical, Dental, Vision, and Basic Life AD&D can be re-arranged on the proposal. The plans can only be sorted by one criterion at a time. The default sort criteria are by Monthly Cost, from lowest price to highest price. If another Sort is selected, that will unselect Monthly Cost. Similarly, if another Sort is selected after that, all previous Sorts are unselected. The plans can be reordered by Cost (Low to High or High to Low), Carrier (A-Z or Z-A), or Network Type: (A-Z or Z-A).