Finalize the Census and Proposal
Enrollments in Benefitter are based on a proposal. Once a client has chosen the benefits they wish to offer their employees, please check to ensure that the proposal off of which you will base the enrollment:
- Has the correct effective date;
- Contains as “selected plans” all of the plans, across all coverage types, that the client has chosen;
- Is based on a census that contains all employees;
- Has accurate contribution levels for each coverage type.
In additional, please fill in as much census information as you have available; this information will be pre-filled in the employee experience and will make the employees’ experience easier. In particular, please make sure that the date of hire is filled in for each employee.
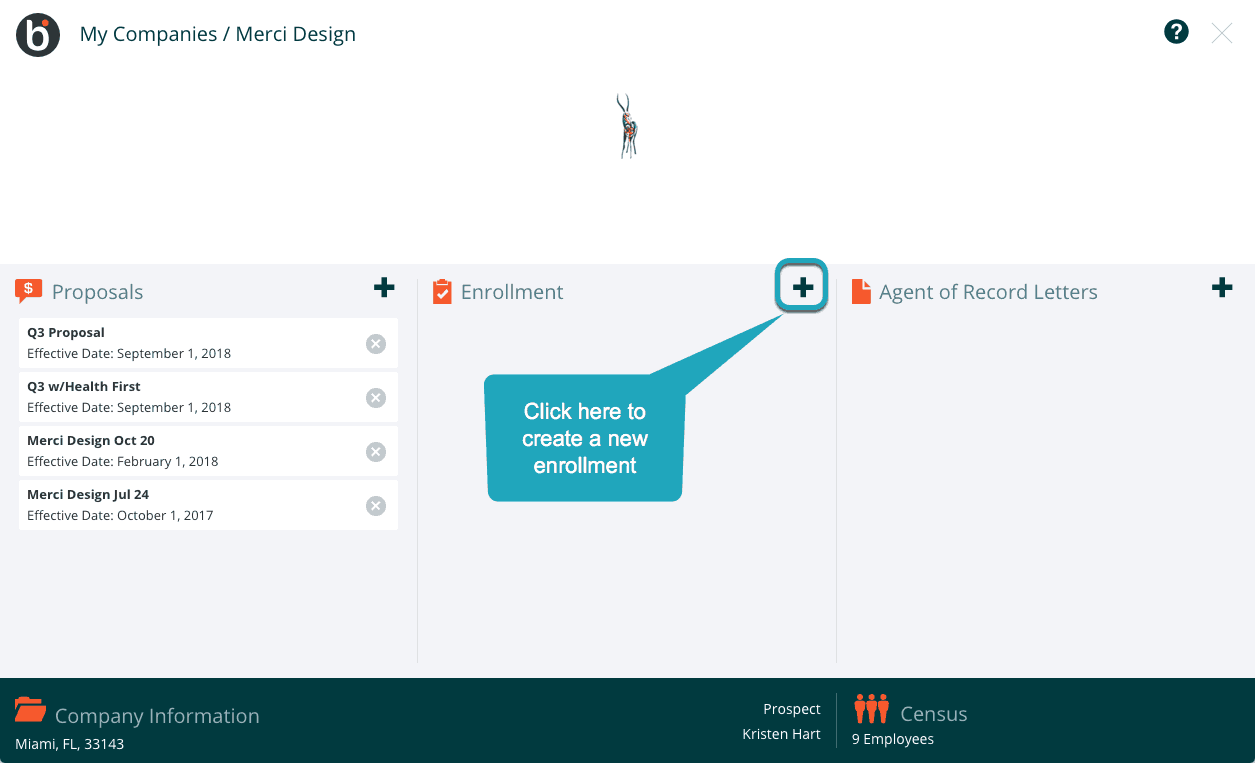
Create an Enrollment
On the client homepage, click on the plus sign (+) in the Enrollments section to create a new enrollment.
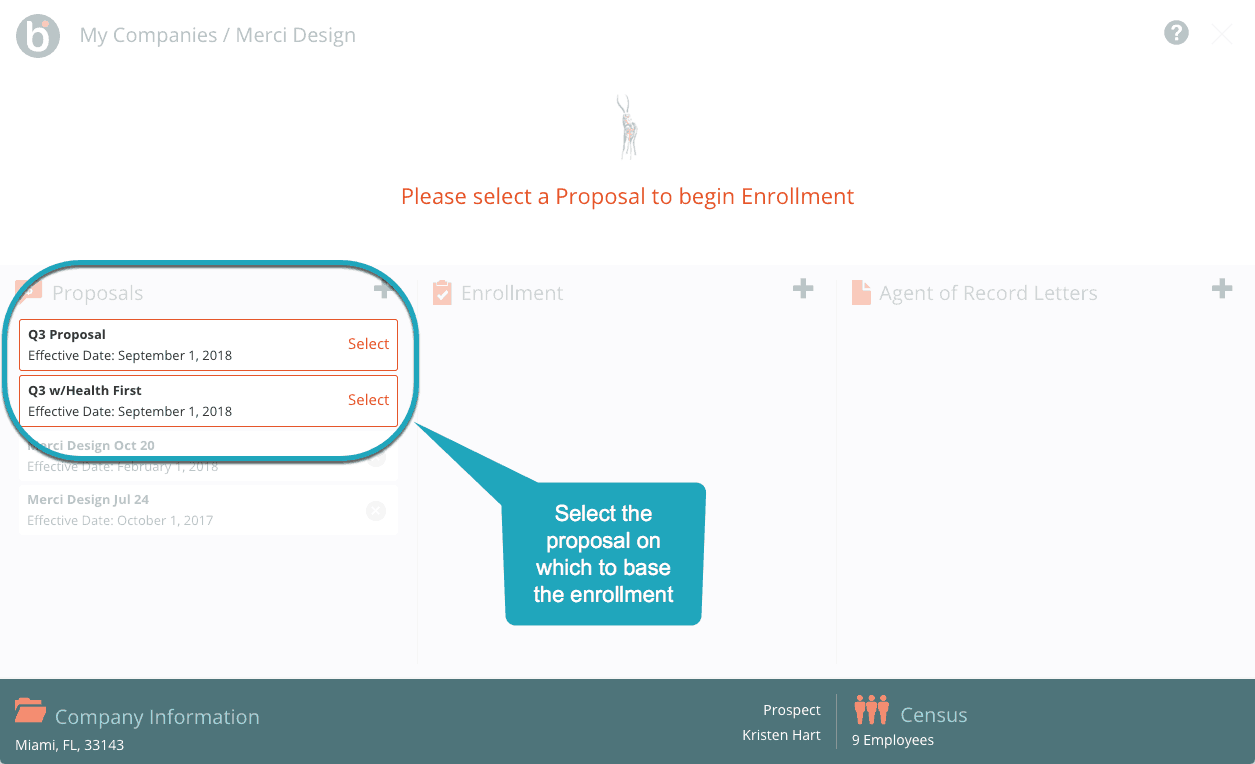
Benefitter will ask you to select the proposal containing the products the client has chosen. Note that only proposals with effective dates in the future will be available to select.
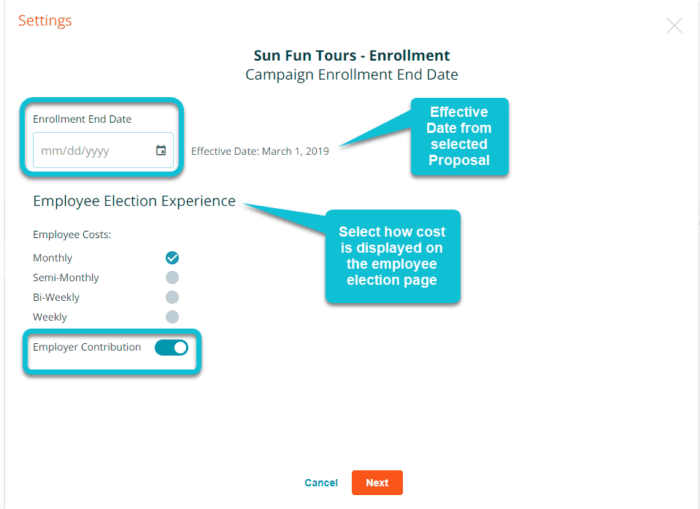
You will be asked to select the end date for the enrollment. This is the date on which the enrollment will stop accepting new enrollee information. We recommend that you set this date at least 2 weeks before the effective date.
For the Employee Election Experience, the default Employee Costs display for this setting is monthly. You can choose another setting (semi-monthly, bi-weekly, or weekly). This setting should correlate to the employer’s pay schedule so the employee can see how much money will be taken out of their paycheck each pay period.
If you do not want to display the Employer Contribution on the medical coverage details page, use your mouse to slide the toggle switch to the left.
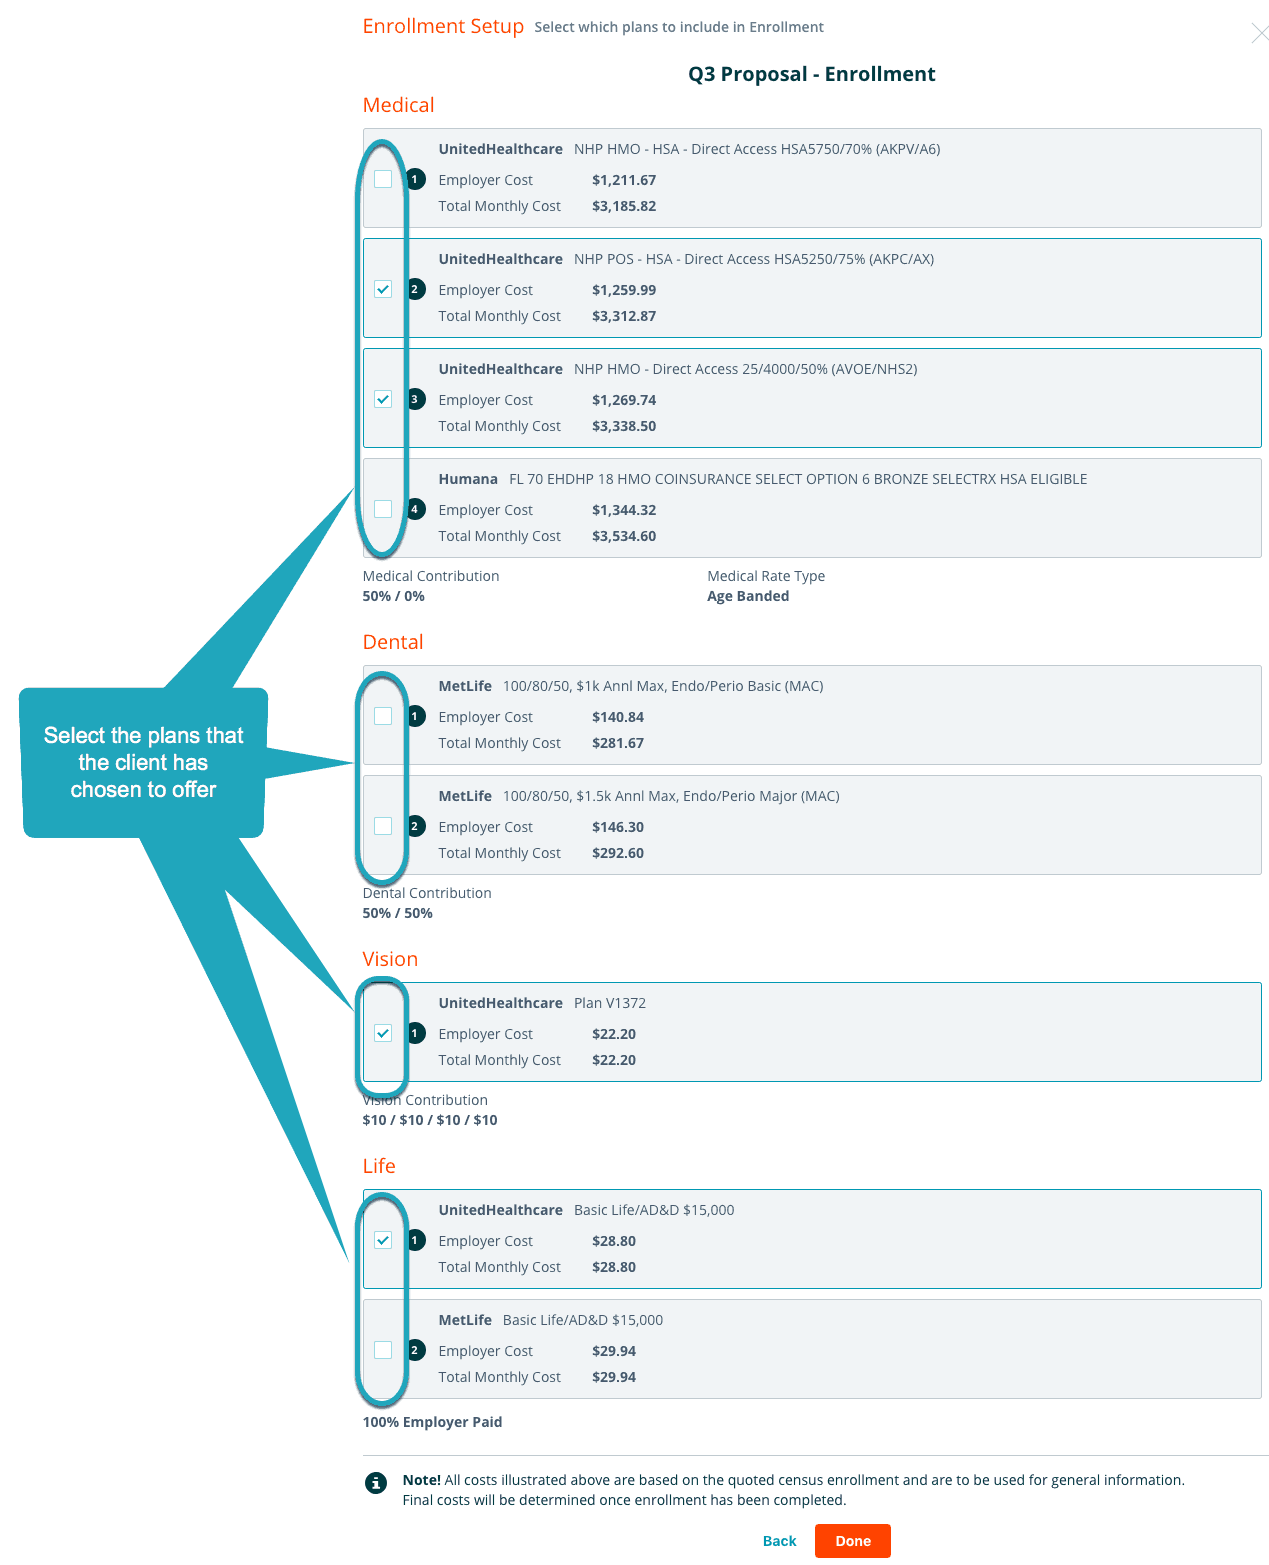
You will next be asked to choose which plans, of those that were selected in the proposal, you would like to include in the enrollment. Manually added plans are not currently available to be included. Note that you will not be able to edit these selections later; if the plans to be included change, you will need to delete the enrollment and create a new one.
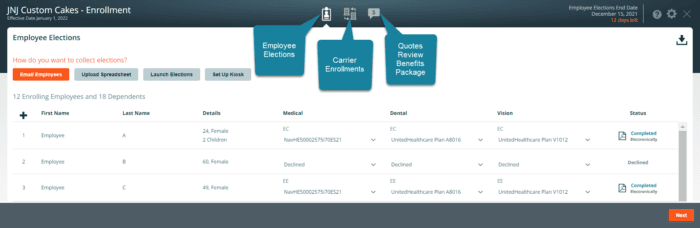
Upon selecting plans to be included and pressing Done, you will be taken to the Employee Elections screen. From here, you will manage and track the employee benefit election process.
You can review the plans included in the enrollment by selecting the quotes icon, or update the enrollment end date by selecting the gear (settings) icon.