Step 1: Start proposal and select effective date
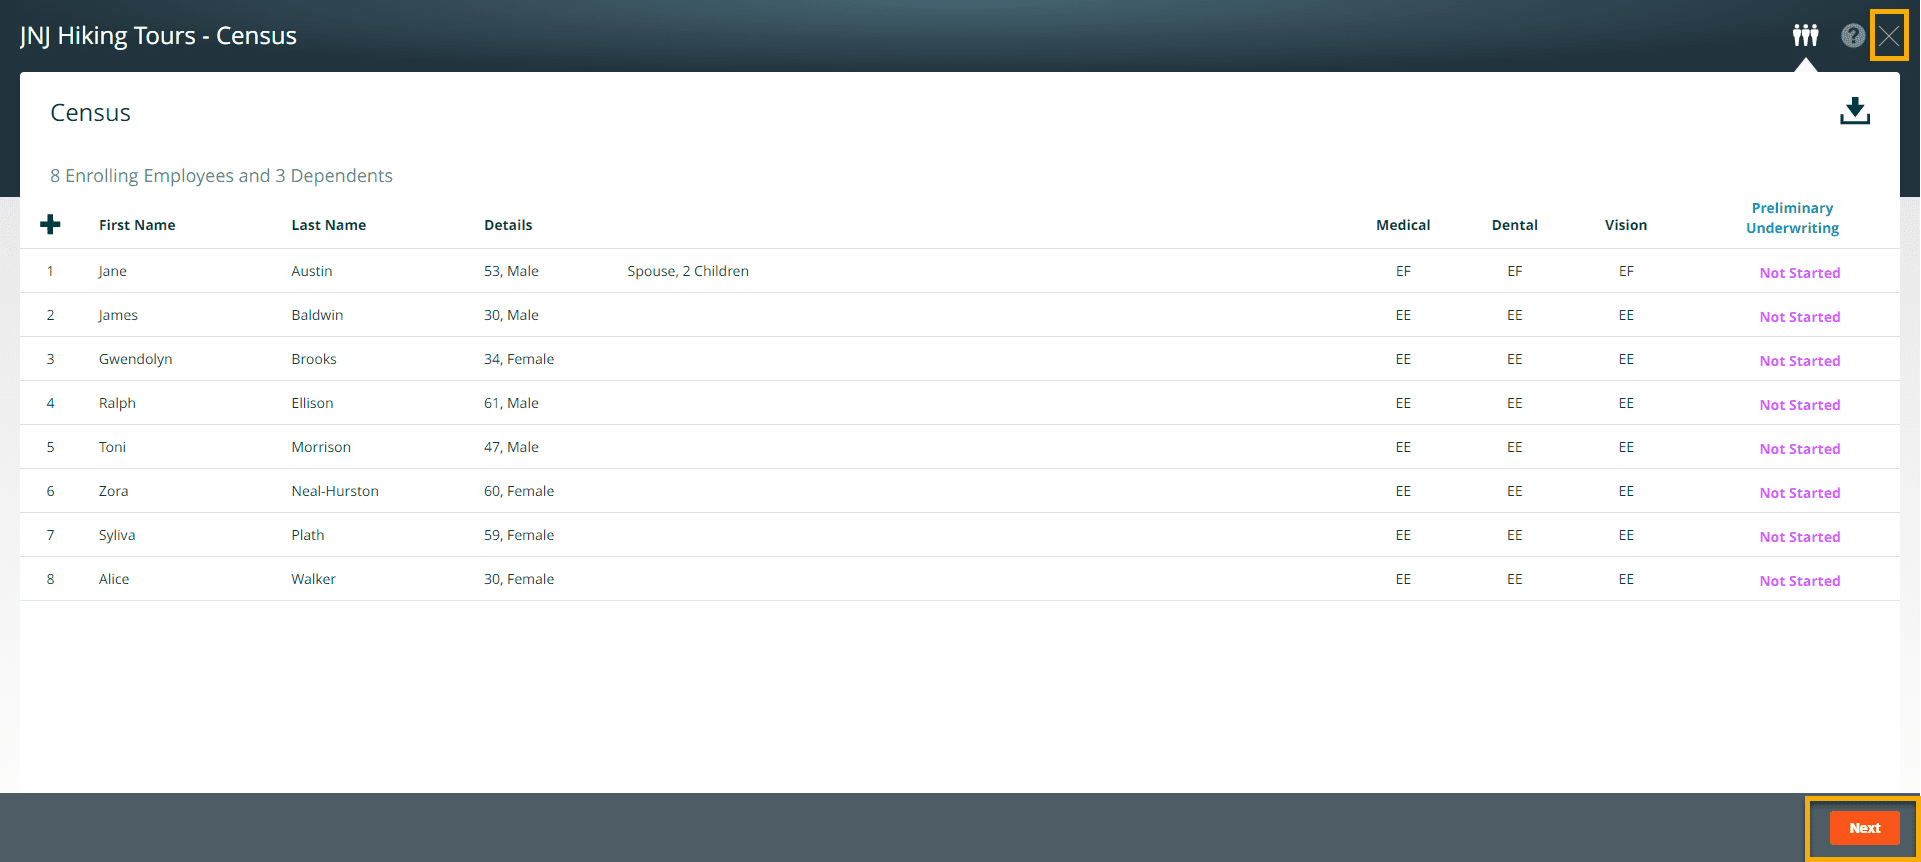
After creating a census, you will be on the employee overview page. Click on the ‘X’ or Next to go to the client homepage.
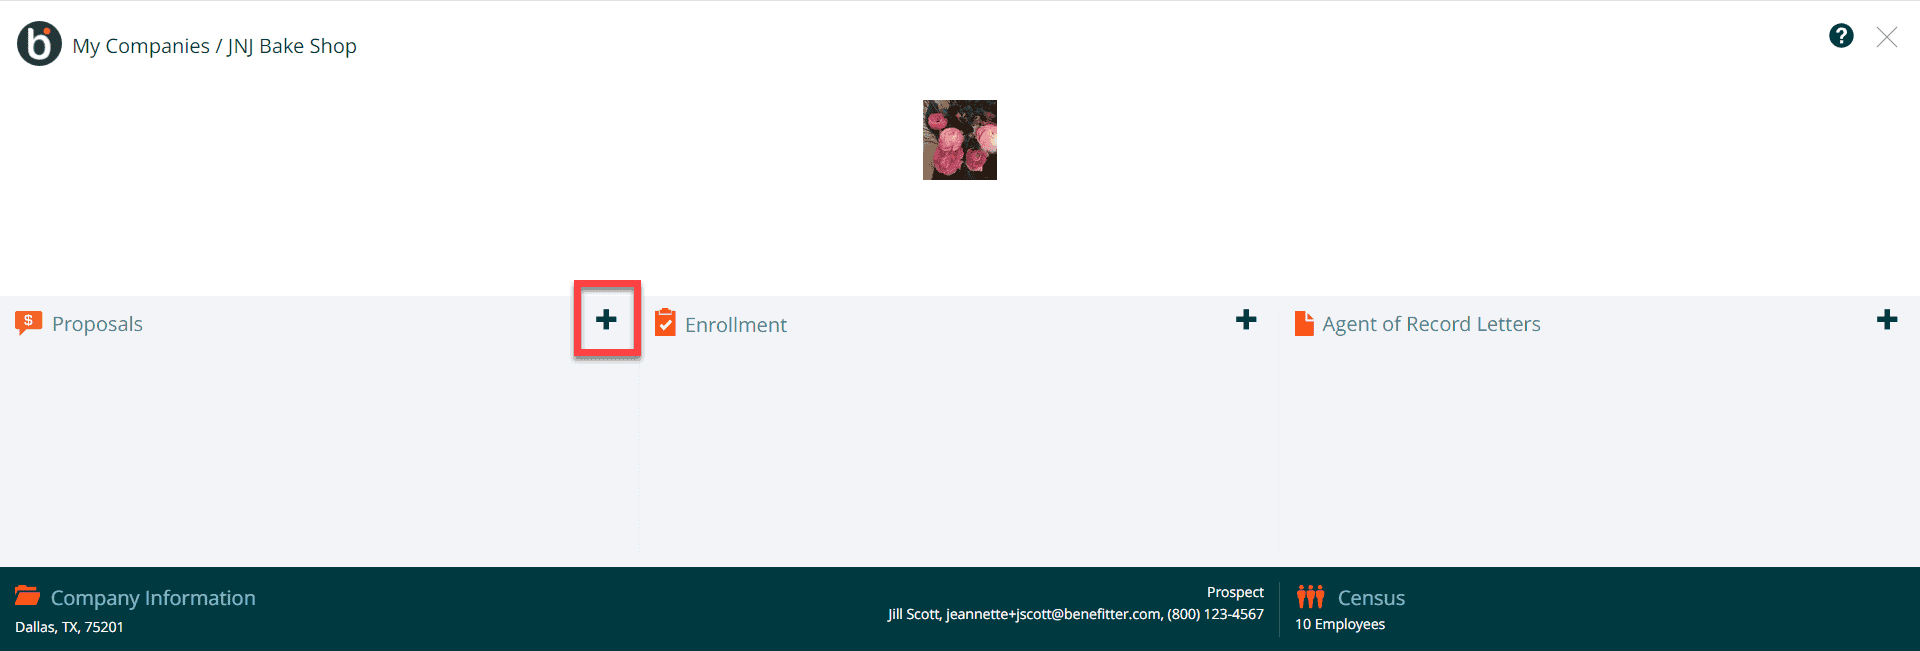
Start a new proposal by clicking on the ‘+’ icon in the Proposals section.
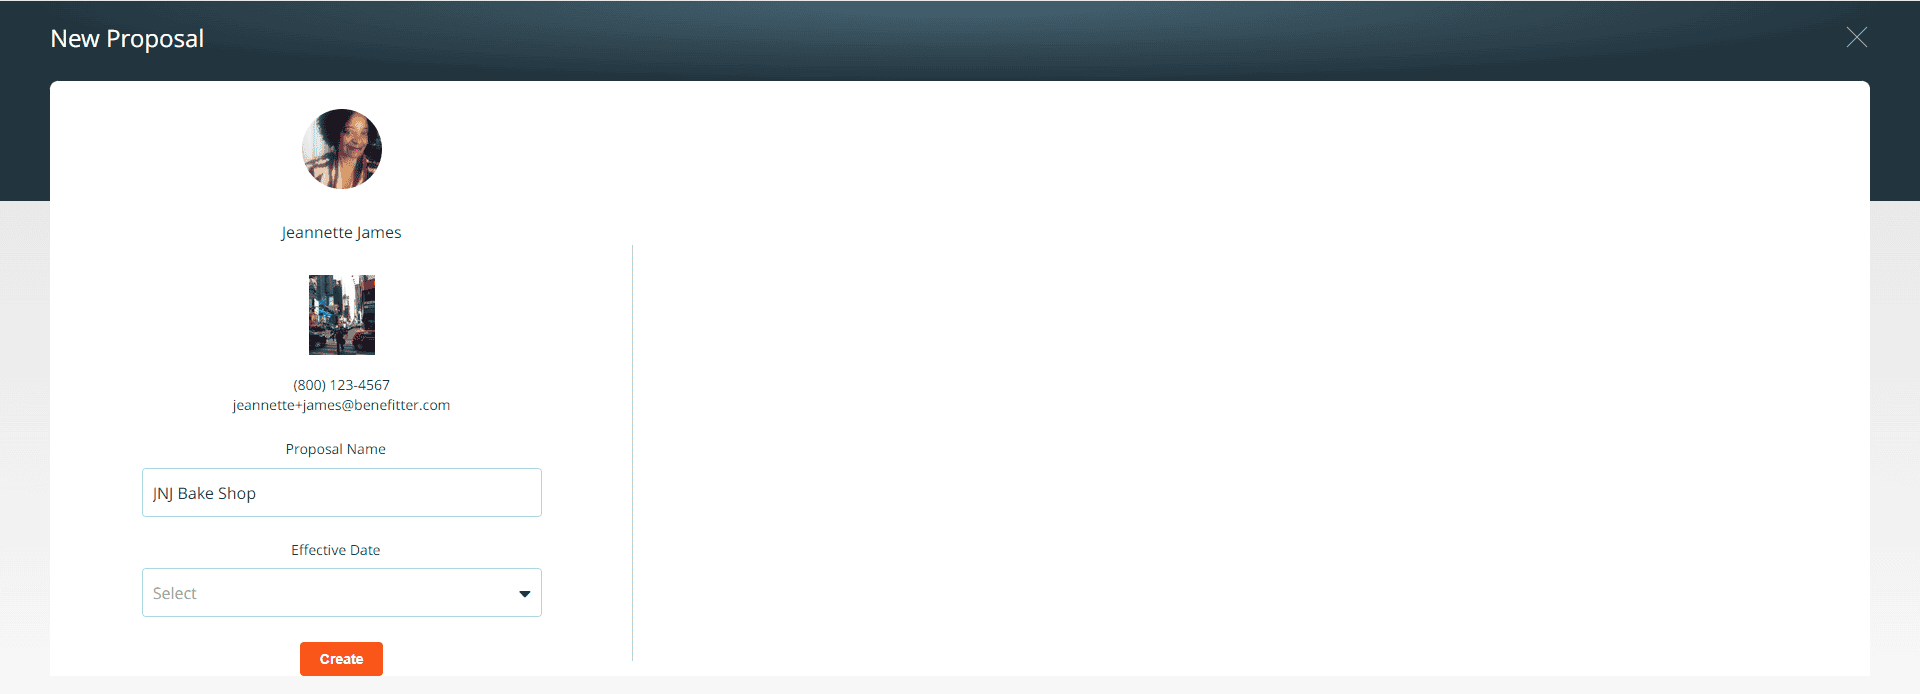
Select the proposal effective date
Proposal Introduction page
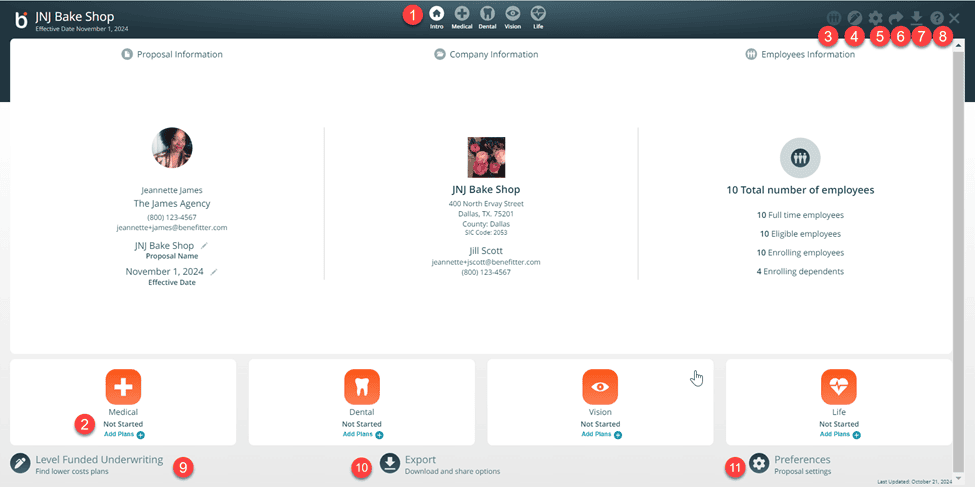
- Add plans to the cover tiers by clicking on the icons for medical, dental, vision, and life.
- You can also add plans for each coverage tier by clicking on the links
- The icon will allow you setup the proposal election scenario. To understand how to use this feature refer to the Quick Start Quoting Guide
- Click on the ink pen icon to access the preliminary underwriting screens
- The wheel icon allows you to access the proposal settings screen
- Click on the arrow icon to share the proposal with your team
- You can download the proposal in PDF, CSV or Excel format
- Click on the question mark icon to be routed to the help center
- You can access the preliminary underwriting screens by click on the ink pen icon
- Click on Export to download the proposal in PDF, CSV or Excel format. You can also share the proposal with you colleagues
- The preferences icon allows you to modify the proposal settings