Finalize Proposal
Enrollments in Benefitter are based on a proposal. Once a client has chosen the benefits they wish to offer their employees, please check to ensure that the proposal off of which you will base the enrollment:
Has the correct effective date;
- Contains as “selected plans” all of the plans, across all coverage types, that the client has chosen;
- Is based on a census that contains all employees;
- Has accurate contribution levels for each coverage type.

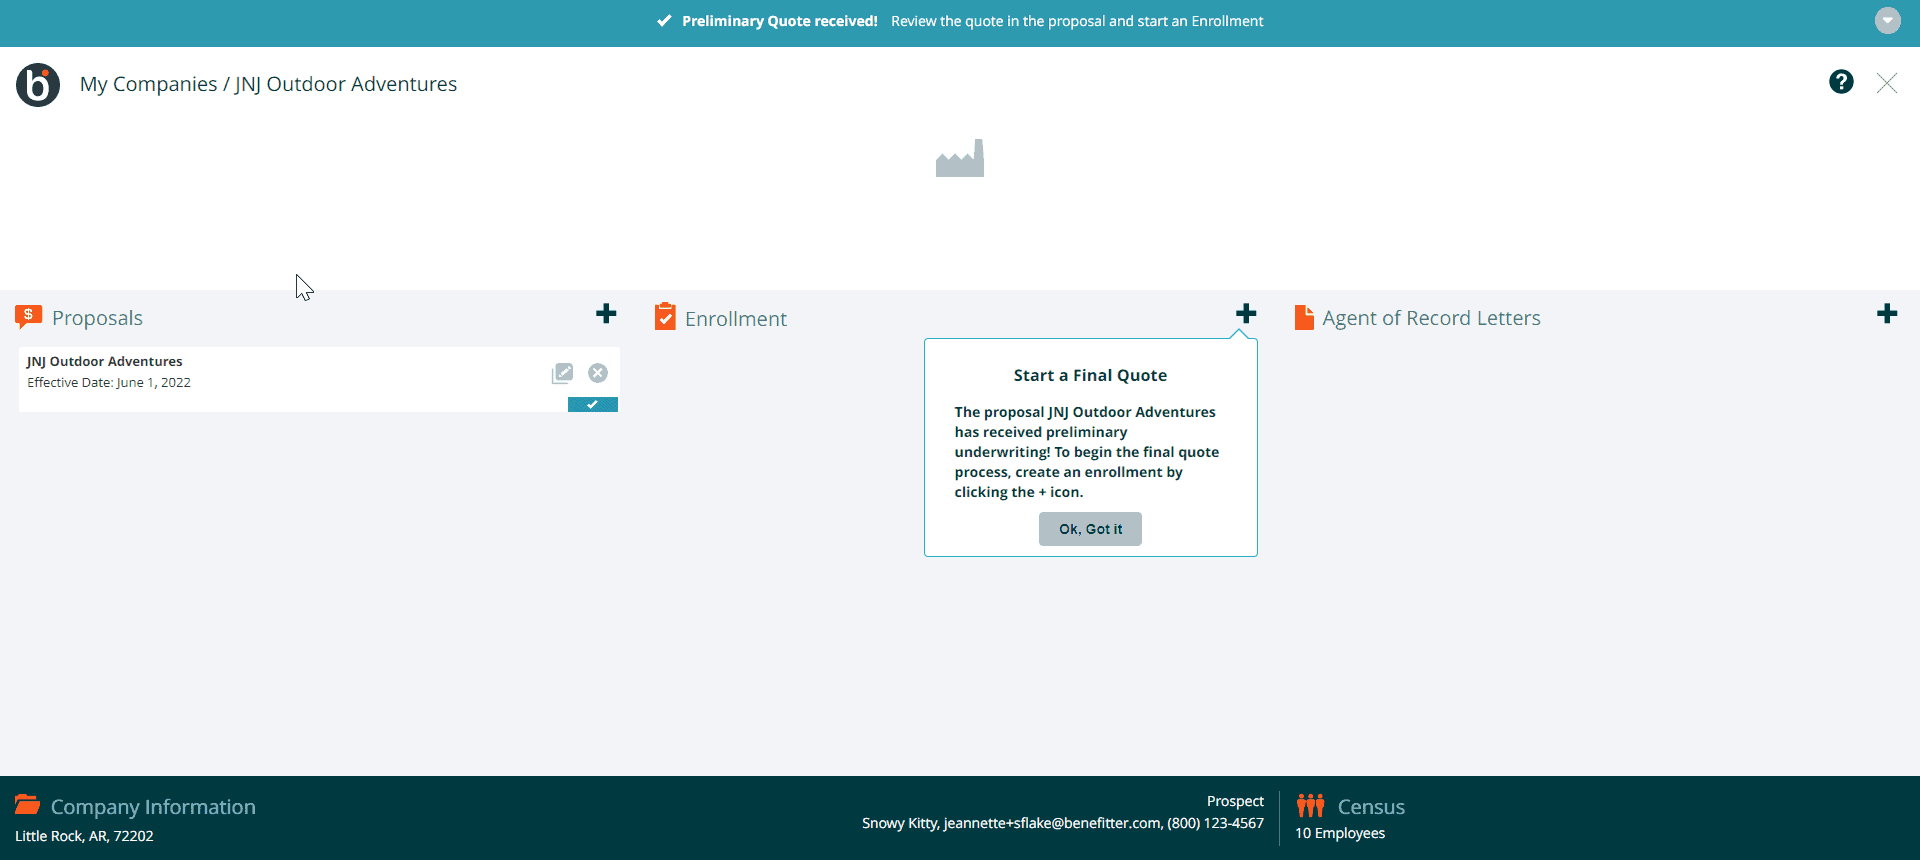
Create the Enrollment
To begin the final quote process, create an enrollment by clicking the + icon.
Enrollment Settings
Page 1 of 3
Select the plans to include in Enrollment by clicking on the + icon to add the plan to the enrollment. Plans can’t be updated after Enrollment creation. If you have more than one medical plan in the enrollment, click on the default plan link to choose the default plan. Click Next to proceed to page 2.
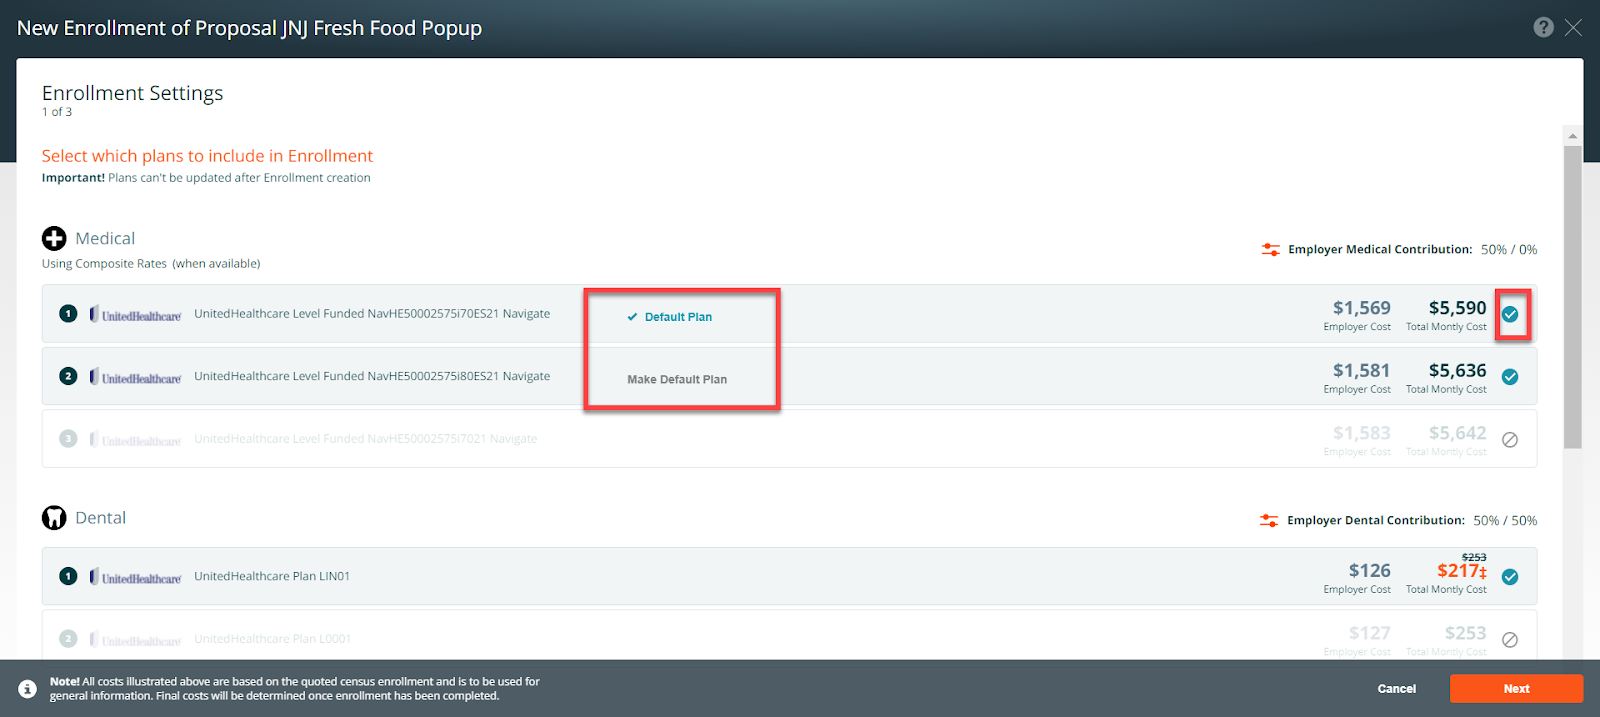
Important! Plans can’t be updated after Enrollment creation. Life Insurance plans cannot be submitted electronically. You will need to enroll via UeS or Specialty Quick Quote. Once employee elections are complete, download the UnitedHealthcare ACA Elections Spreadsheet from the Employee Elections page, and the Employer Specialty Application from Enrollment Supporting Documents, and then enroll the Life plan using those tools.
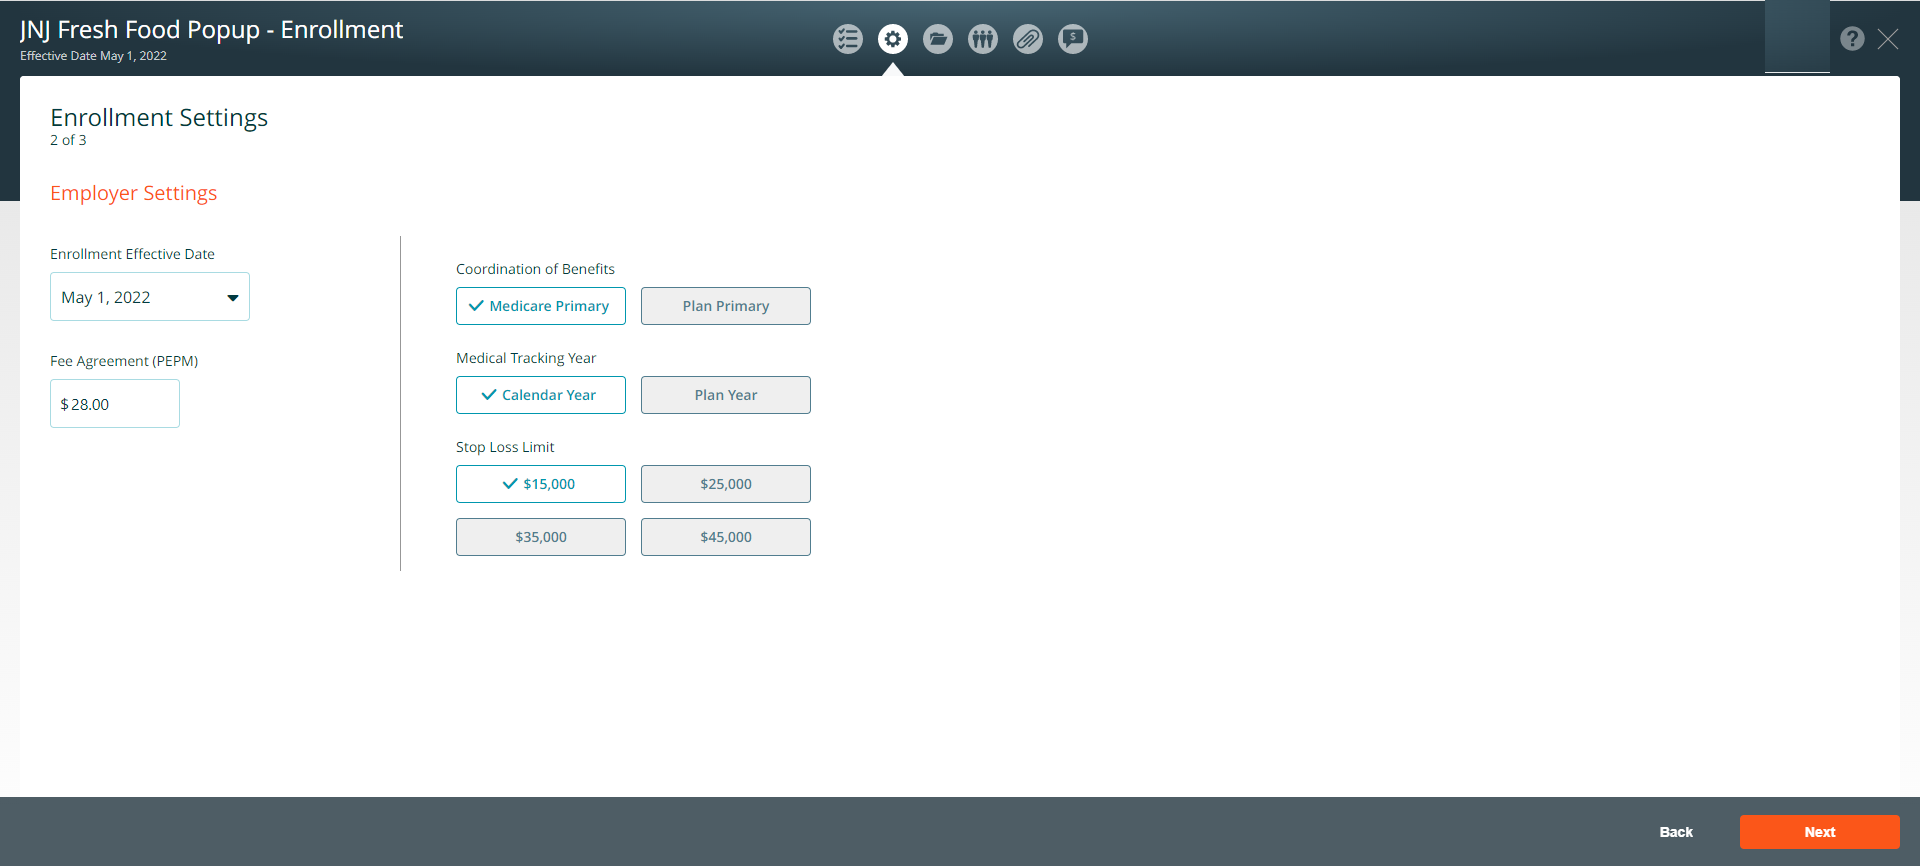
Enrollment Settings
Page 2 of 3
If applicable, you can change the default settings:
- Enrollment Effective Date – Make sure the enrollment effective date and the proposal effective date are the same
- Fee Agreement (PEPM)
- Coordination of Benefits
- Medical Tracking Year
- Stop Loss Limit
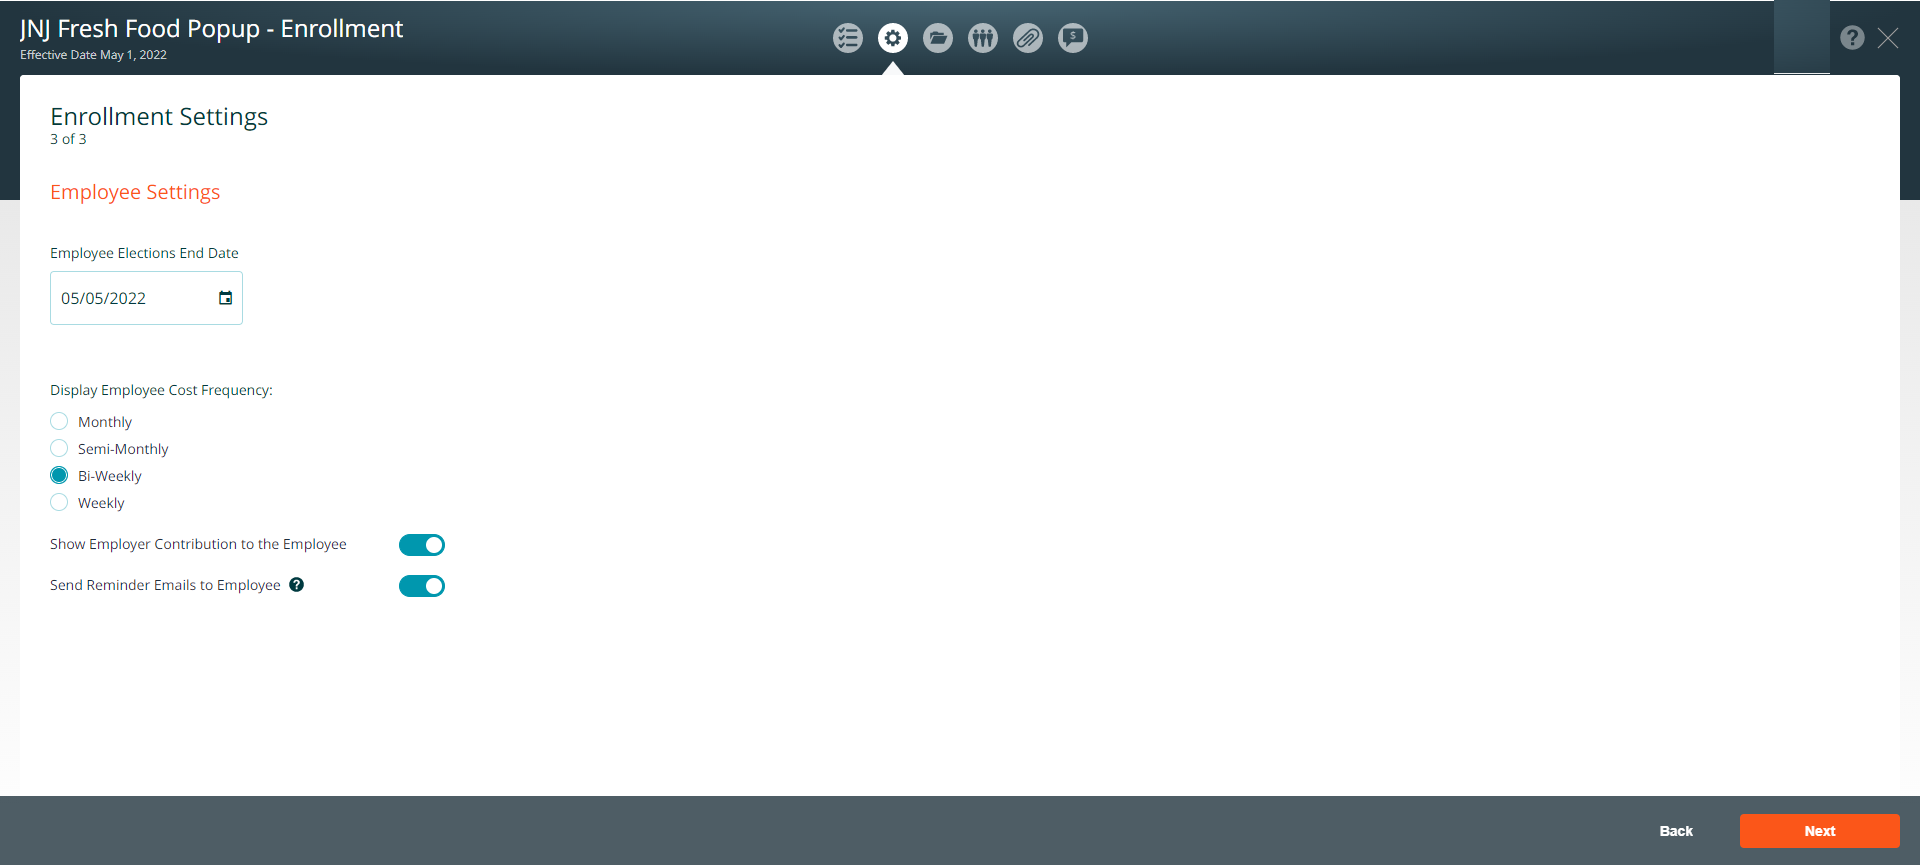
Level Funded Enrollment Settings
Page 3 of 3
Employee Settings
- Choose a deadline for employee elections
- Select the period for showing employee costs (monthly, semi-monthly, bi-weekly, or weekly)
- If desired, turn off the Employer Contribution toggle to hide the contribution amount from employees
- Use the Reminder Emails toggle to activate follow up emails for employee elections
Need to change the plans added to enrollment?
- We don’t support plan changes at enrollment yet, but you can easily update the enrollment by following these 5 steps:
- Save any updated employee information, by downloading the election spreadsheet
- Later you can upload this spreadsheet to save time
- Delete the enrollment
- Update the proposal with the plans that you want to add
- Start a new enrollment, with the plans that you want to add
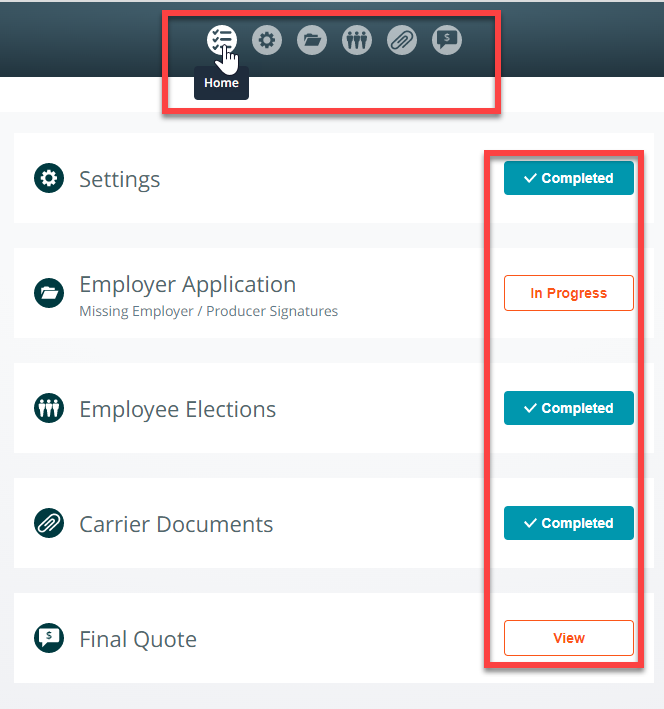
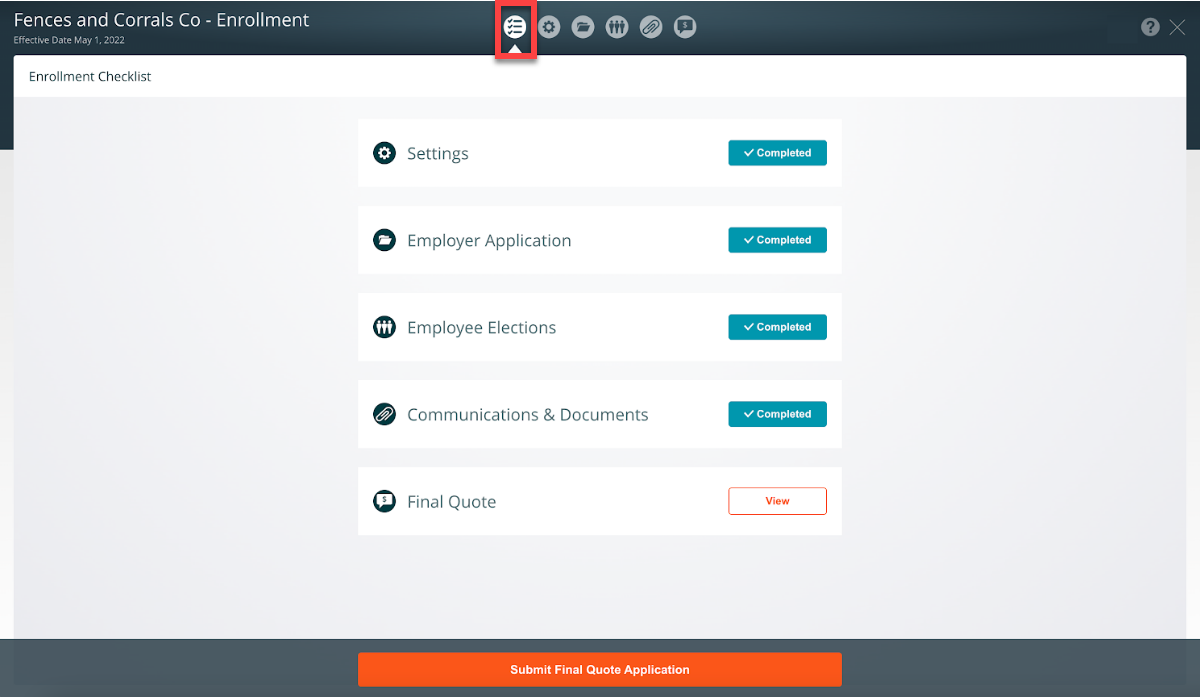
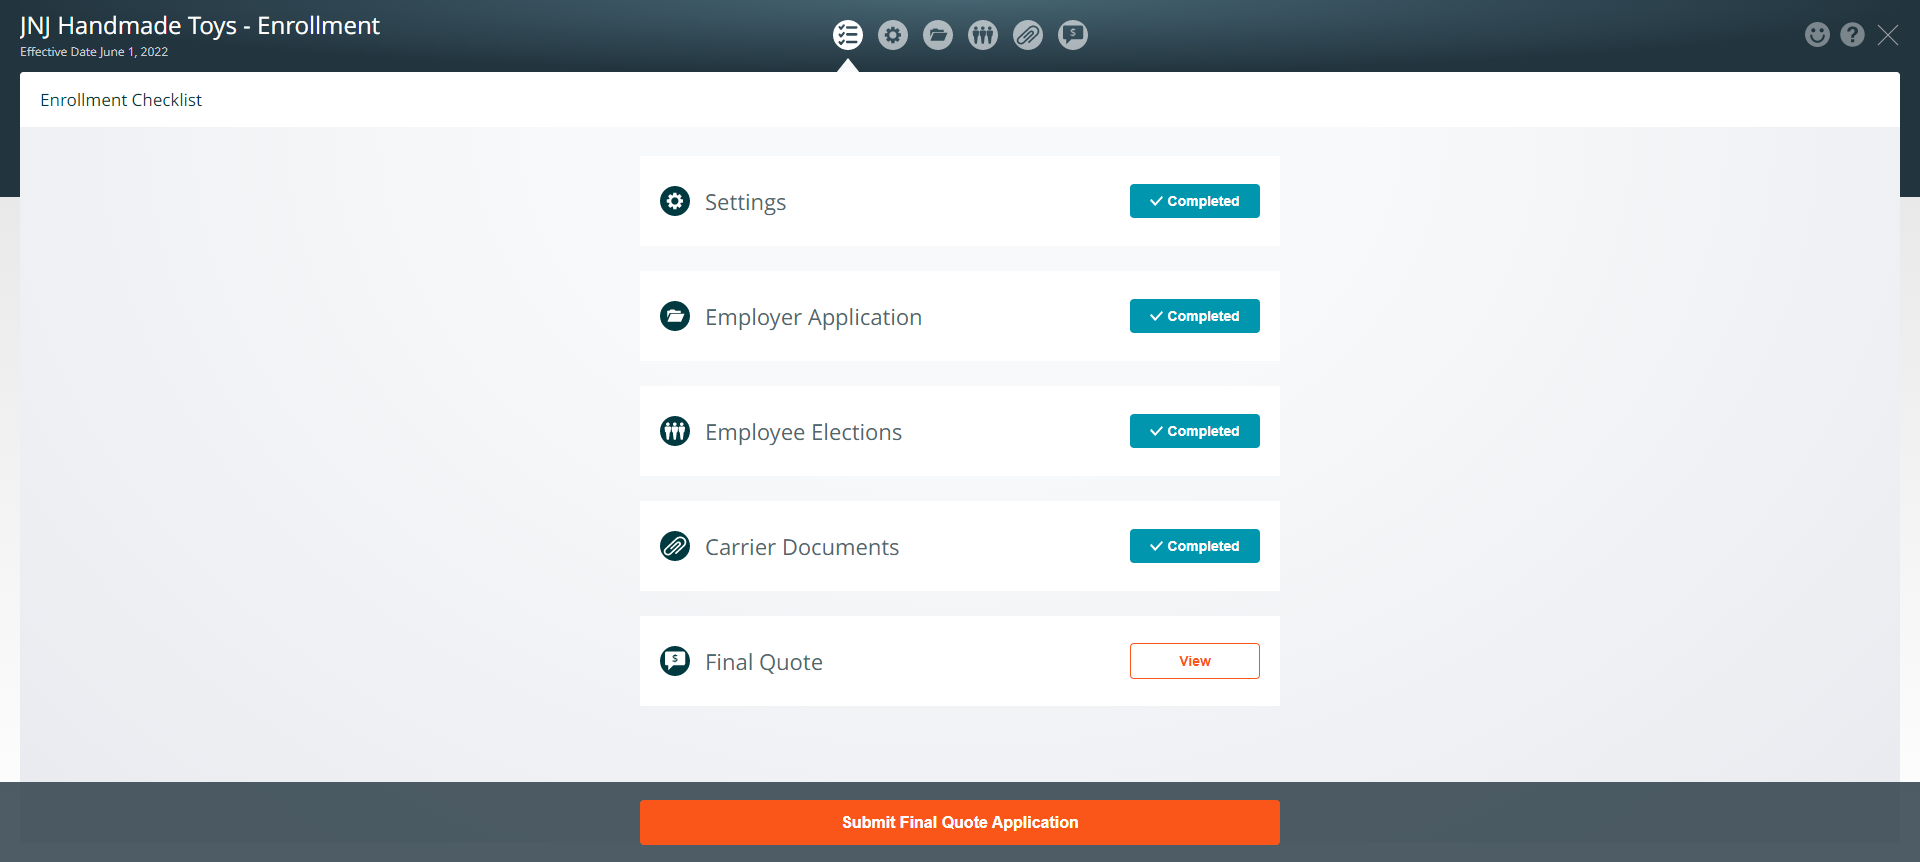
Enrollment Checklist
The enrollment checklist guides you through the All Savers enrollment processes. To access the checklist items, click on the icons (employer application, employee elections, carrier documents, or final quote) located in the top center of the enrollment screen. Or click on the start button on the checklist item to complete the enrollment steps. The status of each checklist step will be set to: Start, In Progress, Completed, or View. The Submit Final Quote Application button will be disabled until all of the required steps are completed.
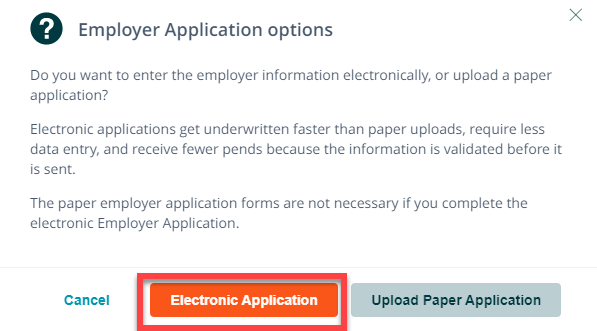
Employer Application Options Message
When you click on the employee election checklist item, the system will display a message which advises that you can enter the employer information electronically, or upload a paper application. Electronic applications get underwritten faster than paper uploads, require less data entry, and receive fewer pends because the information is validated before it is sent. The paper employer application forms are not necessary if you complete the electronic Employer Application.
Employer Application Electronic Option
The Employer Application streamlines All Savers enrollment documents (Employer Application, Excess Loss Application, Commissions Billing and Collections Agreement, and New York Surcharge Form).
Page 1 of 5 Employer Application
The system populates the company and administrative contact information that was entered on the company information page on the application. If the Administrative Contact is the same as the Executive Contact (Authorized Signature) click on the checkbox next to Executive Contact same as Administrative Contact. Enter the date the business started. Select the answer to the General Agent question. Press Continue to advance to the next page of the application.
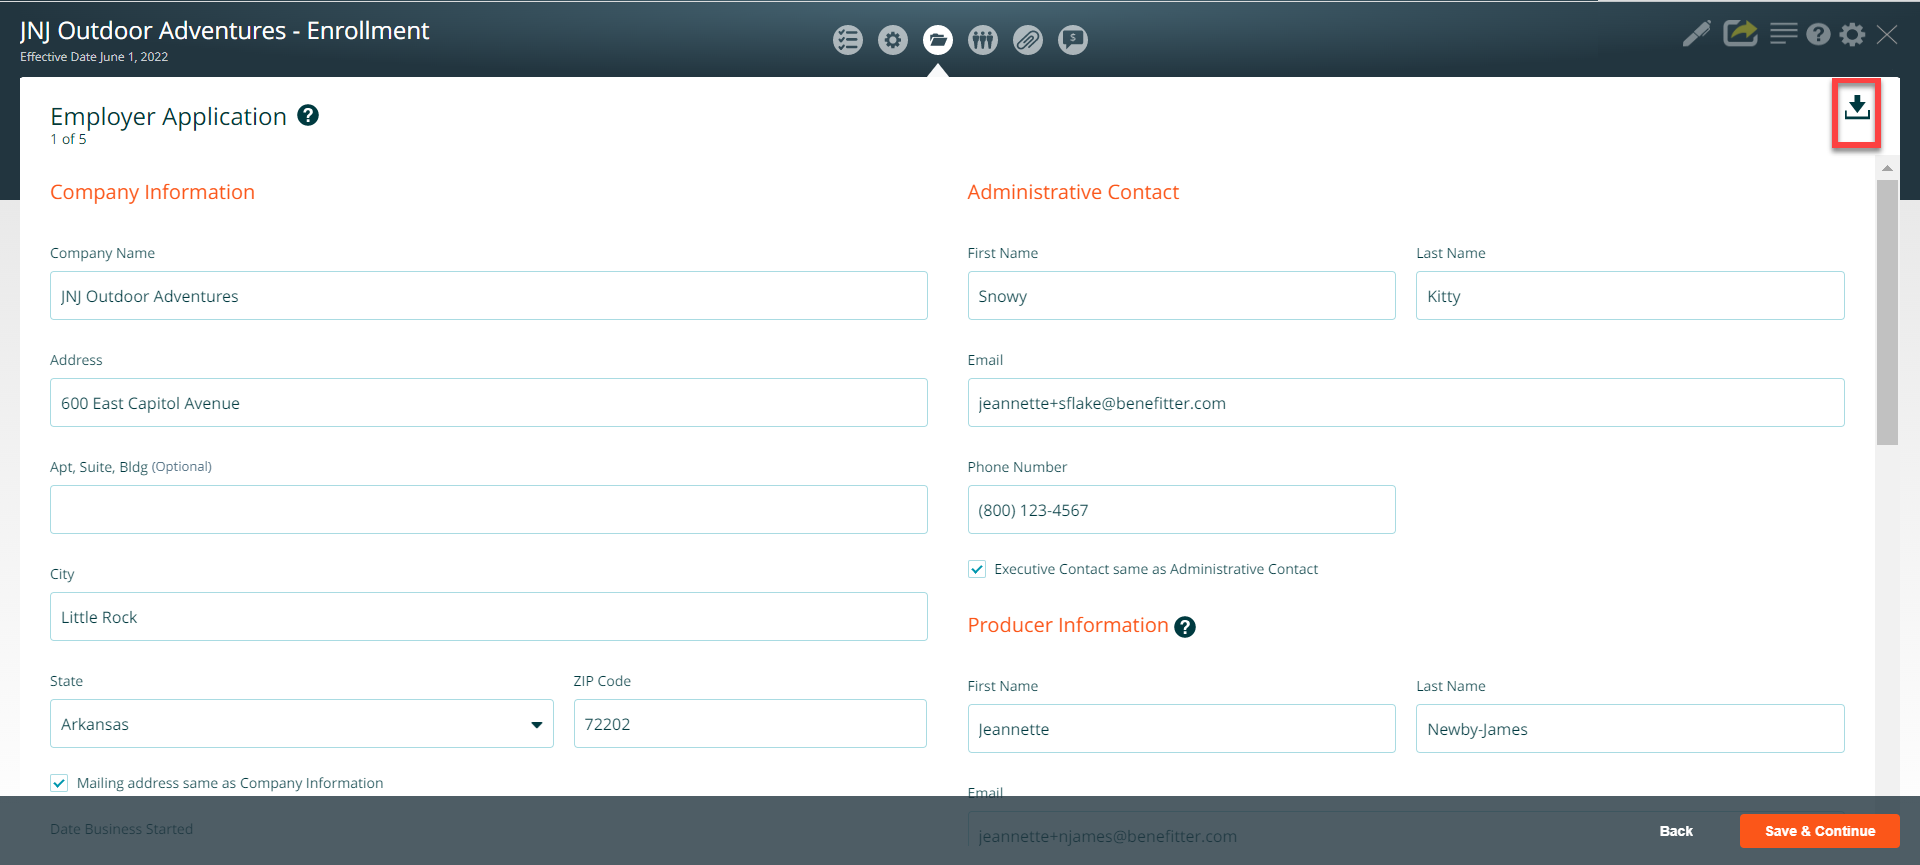
Note: You can download a copy of the Application by clicking on the download icon.
Company subject to COBRA Section – If your company is subject to COBRA, choose yes and select the former employees and dependents currently on/or eligible for COBRA. To add additional employees, click on the + icon.
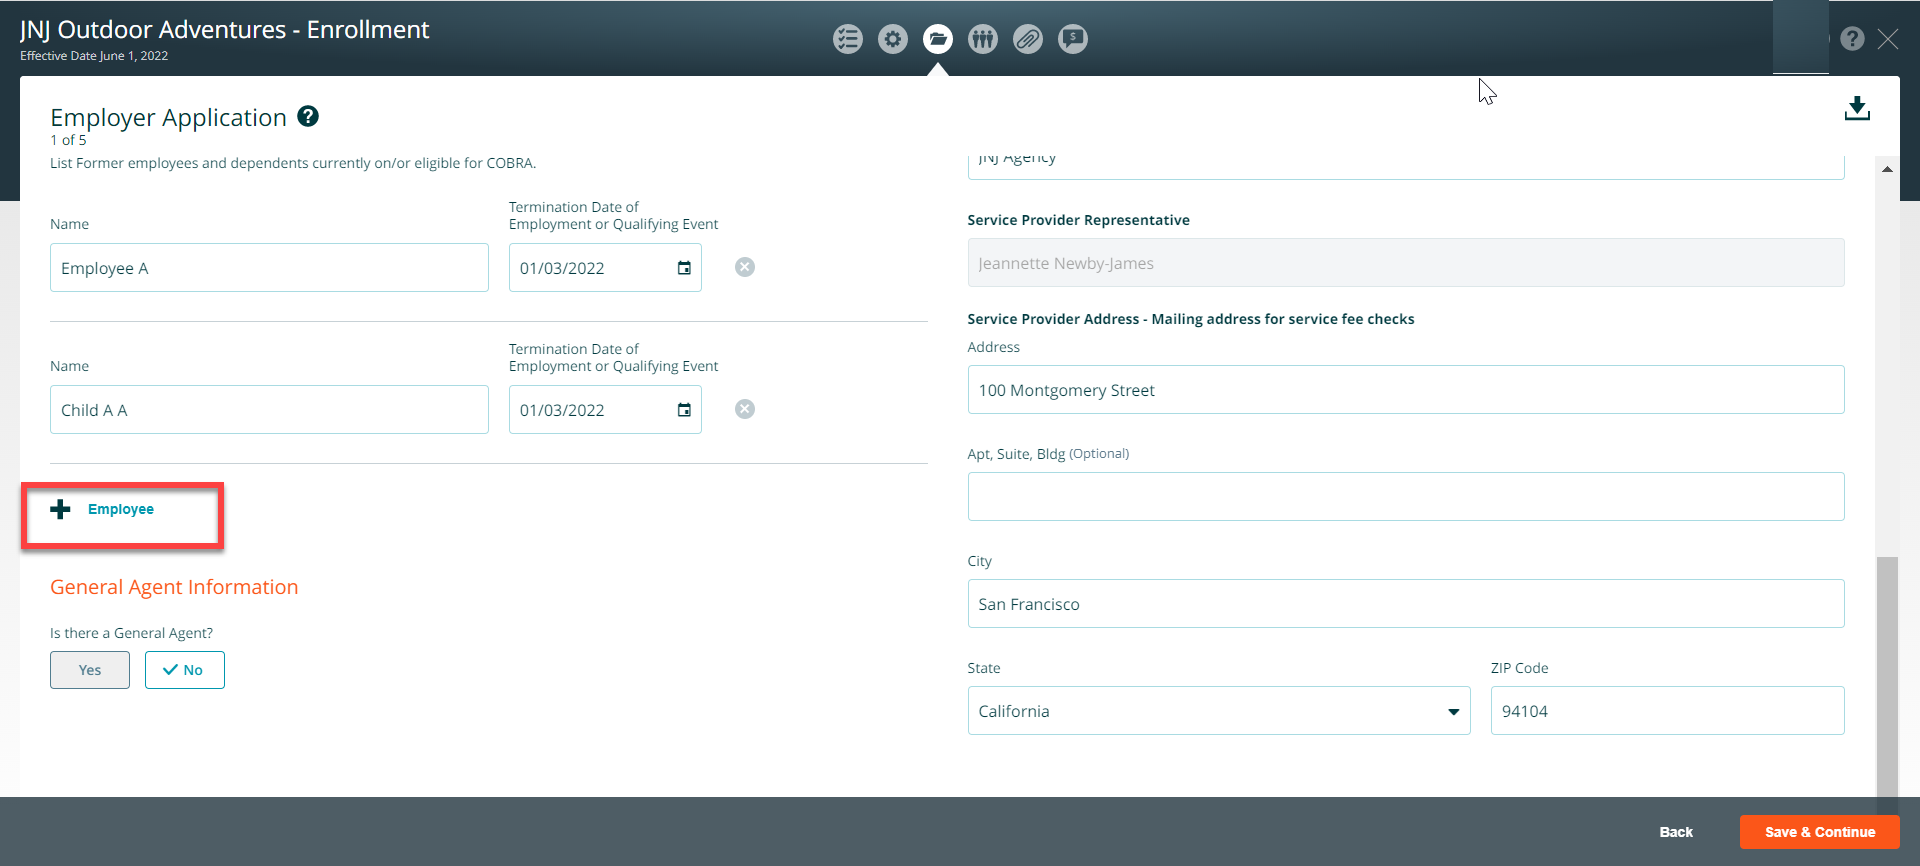
Choose the appropriate response to the General Agent question, then press Continue to advance to the next page of the application.
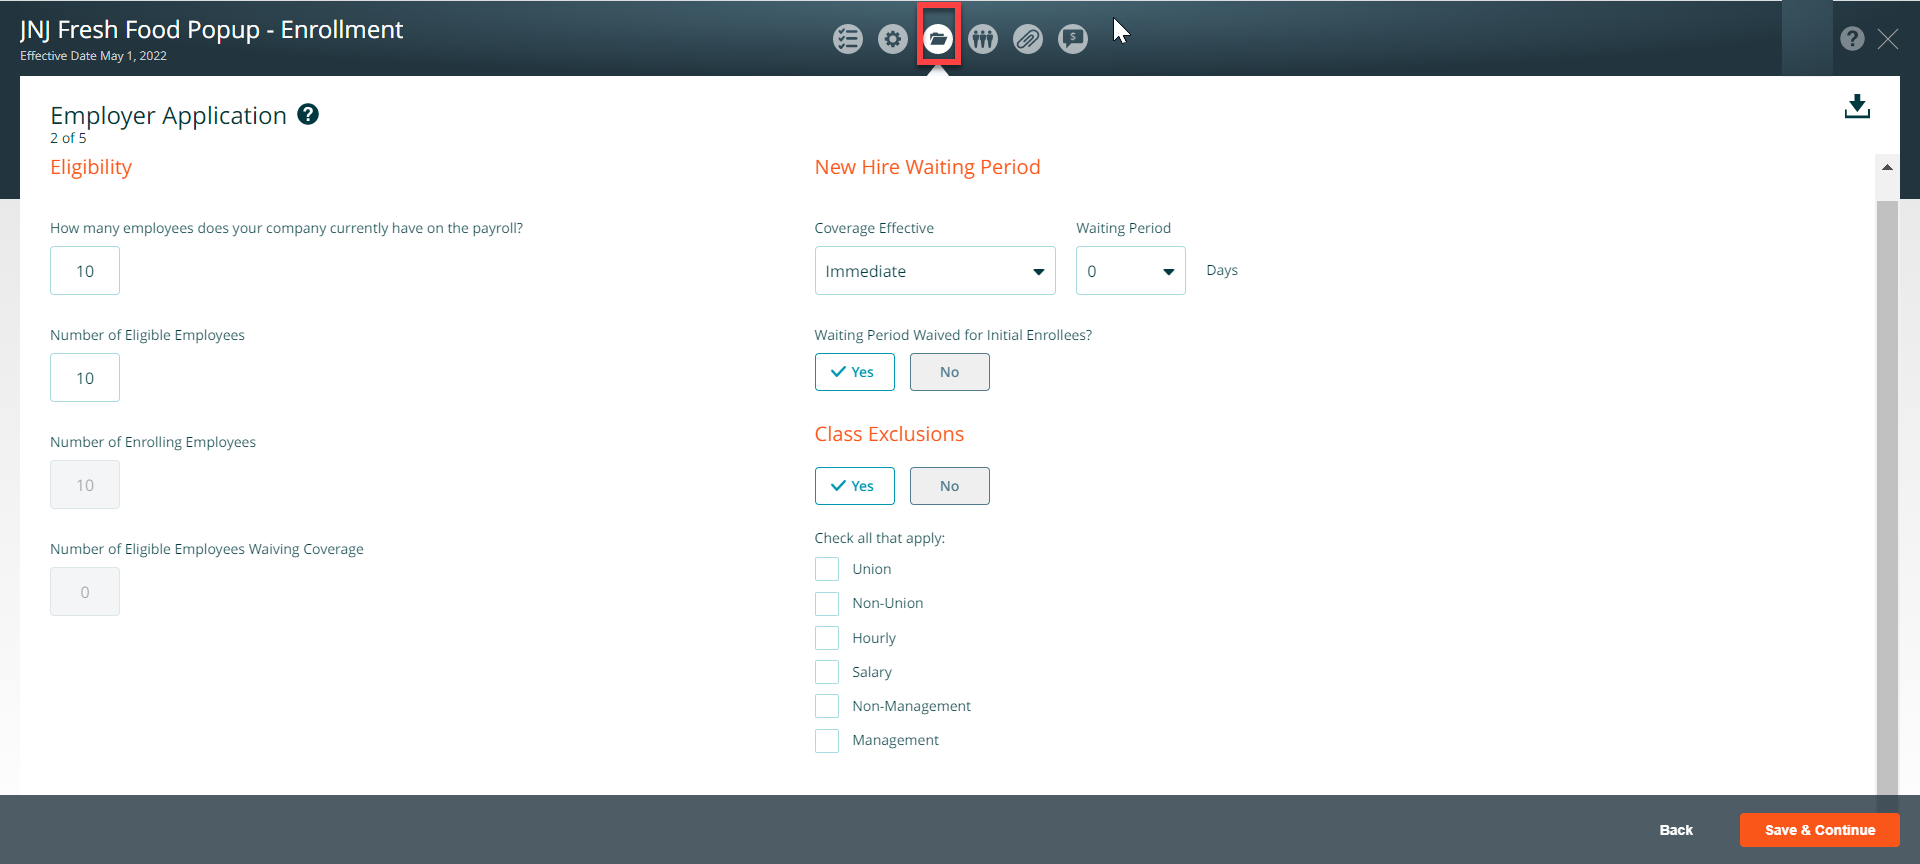
Page 2 of 5 Employer Application
- Enter values for the eligibility questions
- New hire waiting period – choose coverage effective date, waiting period, and waiting period waived for initial enrollees
- For the class exclusions if you choose yes, check all the categories that apply (e.g., union, non-union, hourly, salary, non-management, management)
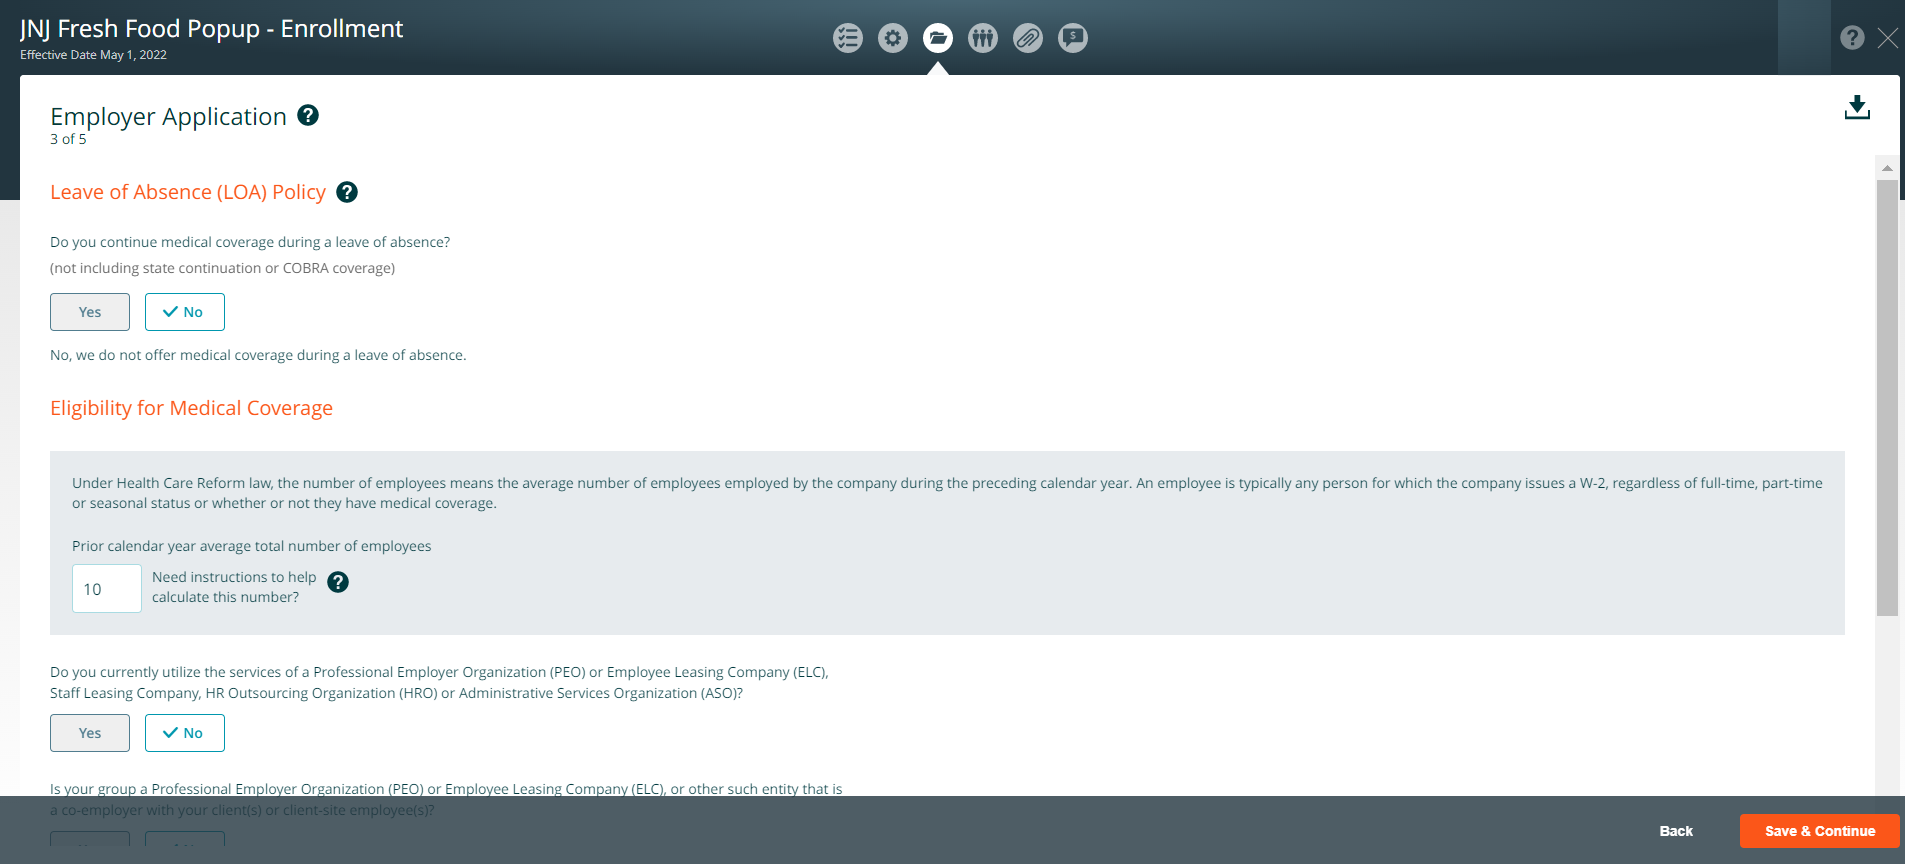
Page 3 of 5 Employer Application
- Enter the Prior calendar year average total number of employees
- Choose ‘Yes or No’ for the following questions:
- Professional Employer Organization (PEO), or Employee Leasing Company (ELC), Staff Leasing Company, HR Outsourcing Organization (HRO) or Administrative Services Organization (ASO)
- Professional Employer Organization (PEO) or Employee Leasing Company (ELC), or other such entity that is a co-employer with your client(s) or client-site employee(s)
- Group sponsor a plan that covers employees of more than one employer common ownership with any other businesses
- If the employer owns multiple companies, or a parent-subsidiary relationship exists between your company and another, this may indicate common ownership of businesses
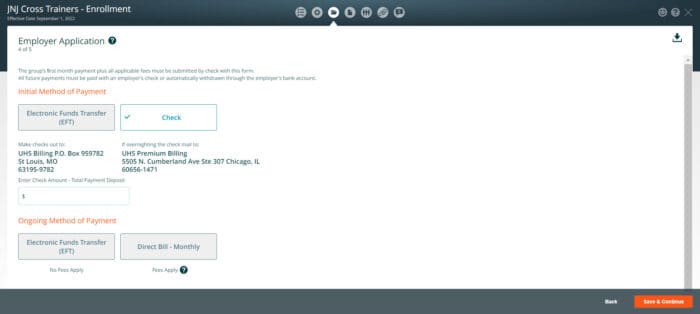
Page 4 of 5 Initial/Ongoing Methods of Payment
The group’s first month payment plus all applicable fees must be submitted by check with the application. Or via Electronic Funds Transfer (EFT). All future payments must be paid with an employer’s check or automatically withdrawn (EFT) through the employer’s bank account.
Page 5 of 5 New York Public Goods Pool
The New York Public Goods Pool is a fund created by the state of New York to finance health care initiatives and care for the indigent within that state. The Pool was started in 1997 and is funded by a surcharge tax on all health services rendered in the state of New York.
All health insurance plans, insured and self-funded, are required by law to pay the tax. This state law is not preempted by ERISA for a self-funded plan.
Choose one of the following options:
- Newly Enrolling in the New York Public Goods Pool
- Currently a participant in the New York Public Goods Pool with a different Third Party Administrator (TPA) or Administrative Service Only (ASO)
- Opting out of the New York Public Pool

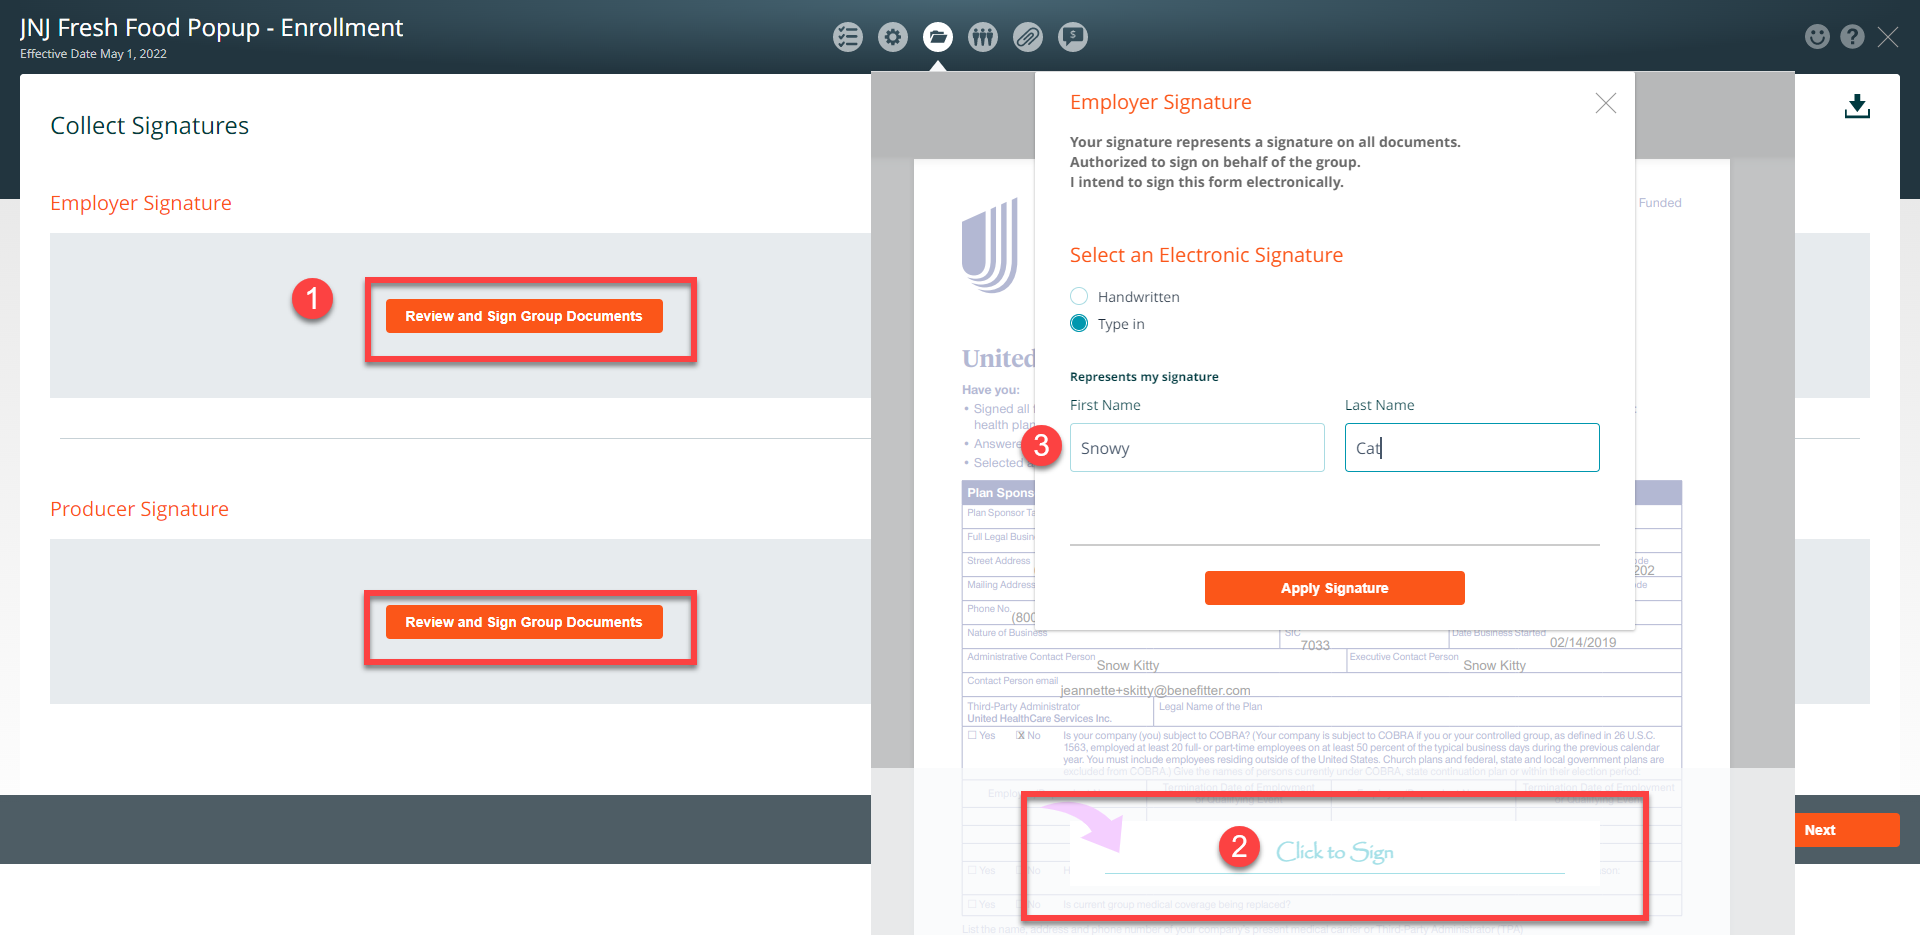
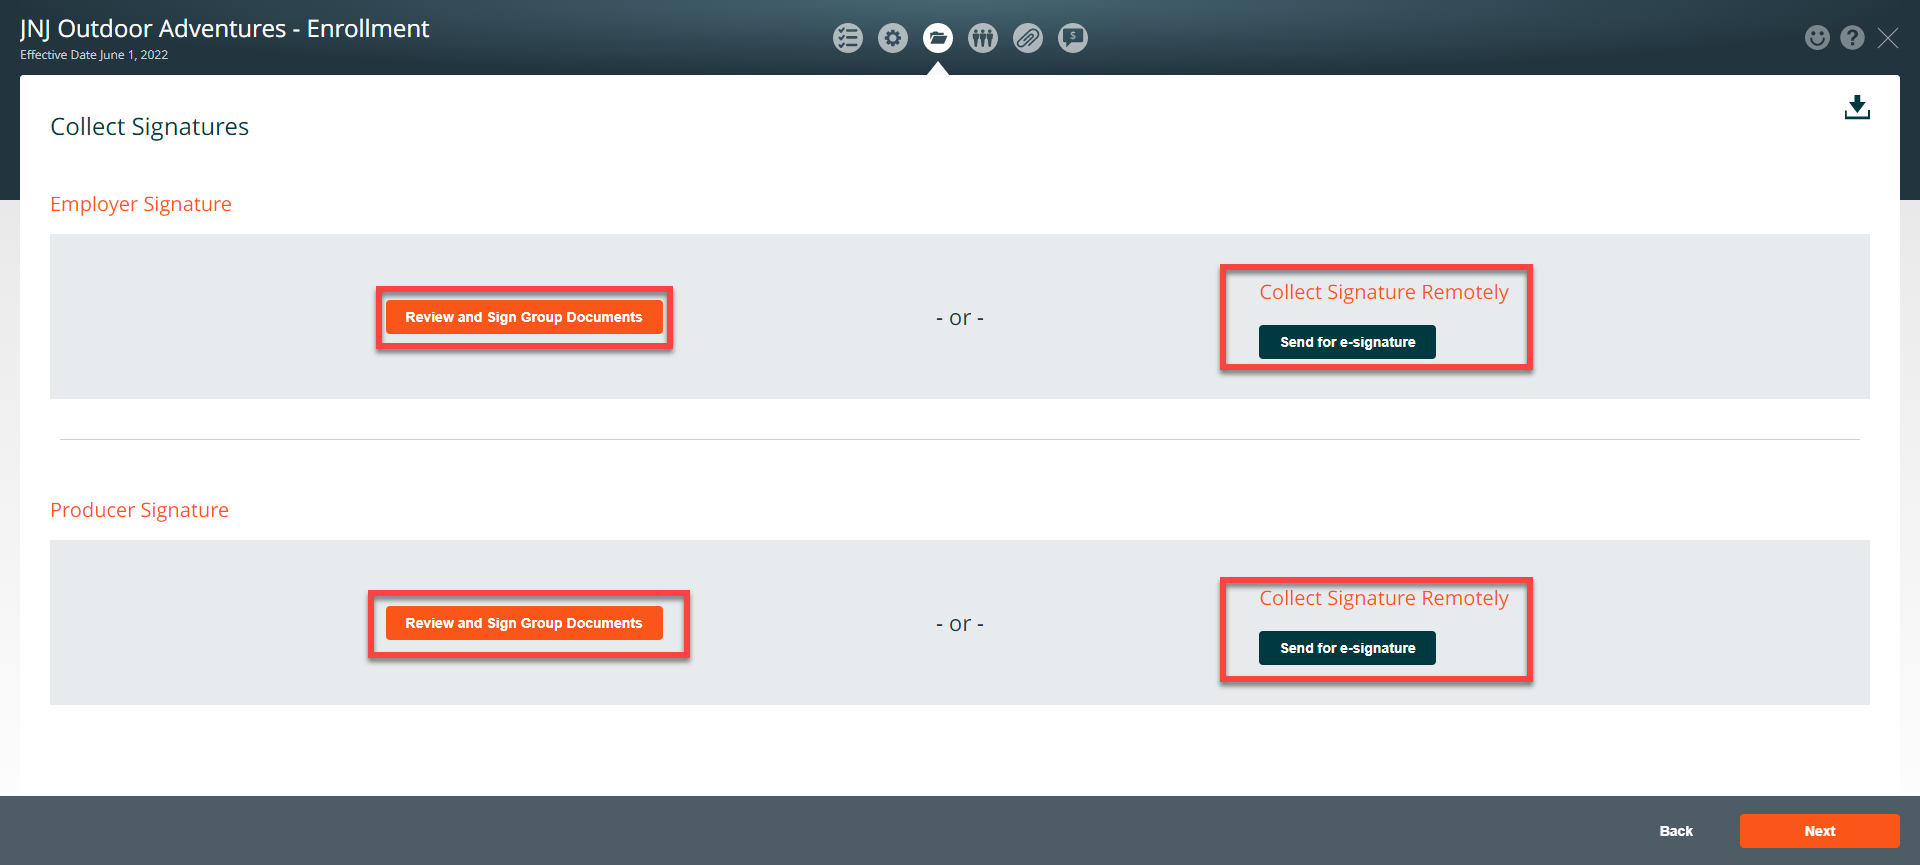
Collect Signatures
The Employer and Producer Signatures section can be accessed once the Employer Application section has been completed.
You can collect signatures in person (in the Benefitter interface) by:
- Clicking on the Review and Sign Group Documents
- Click on the ‘Click to Sign’ link
- Select an electronic signature option (handwritten or sign in)
Or you can send an email to the Employer and Producer and collect the signatures remotely. The Employer and Producer will receive an email. To sign the application, in the Level Funded signature email, the Employer and Producer needs to click on the signature button and review and sign the Application.
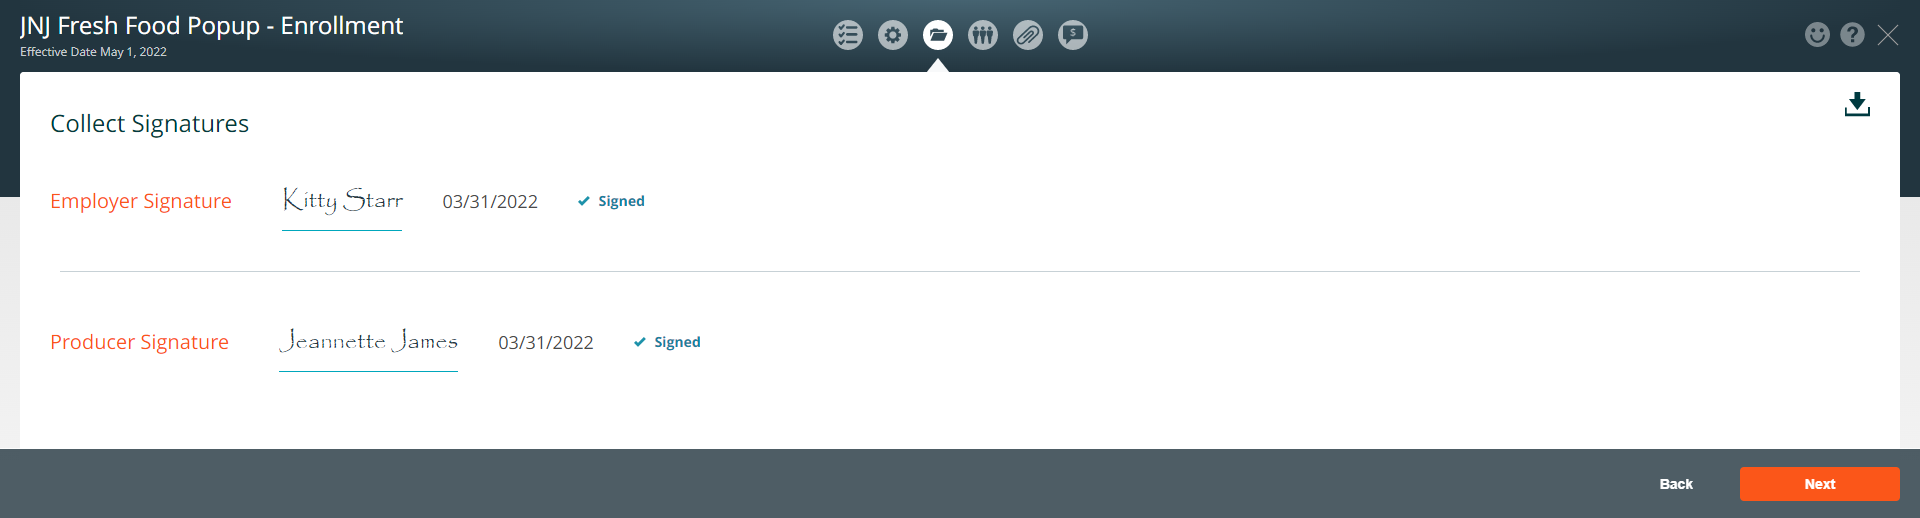
Collect Signatures
The Employer and Producer signatures will appear on the page. Click on the Next button.
Employer Application Upload Paper Option
If you choose to upload the paper application, click on the Upload Paper Application button. On the Attachment Selection, click on the checkbox next to the documents that you will be uploading. Click on the upload files button and choose the documents on your computer to add to the enrollment. Be sure to upload the required forms.
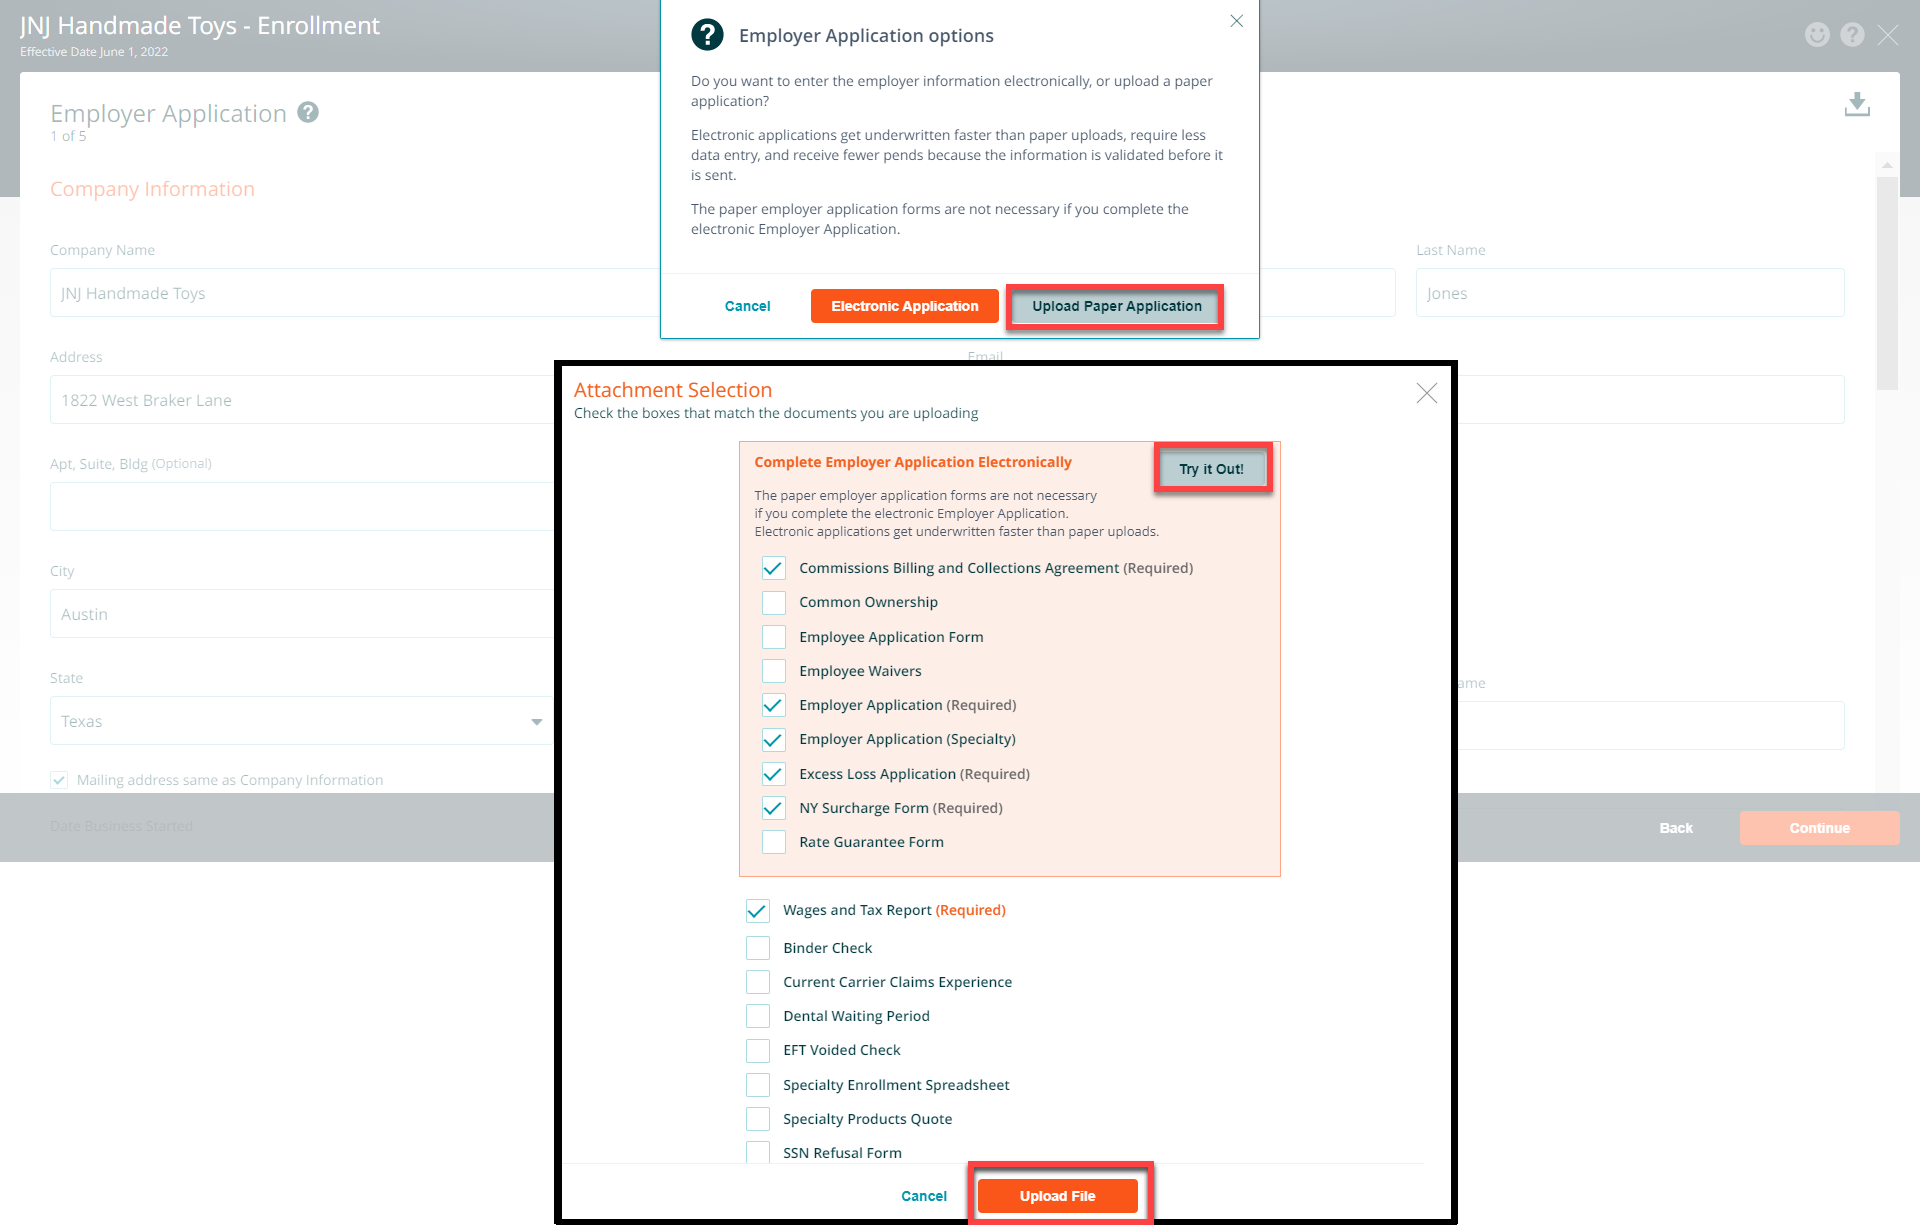
Hint: If you decide that you would like to complete the electronic application click the Try It Now button and choose the Electronic Application option.
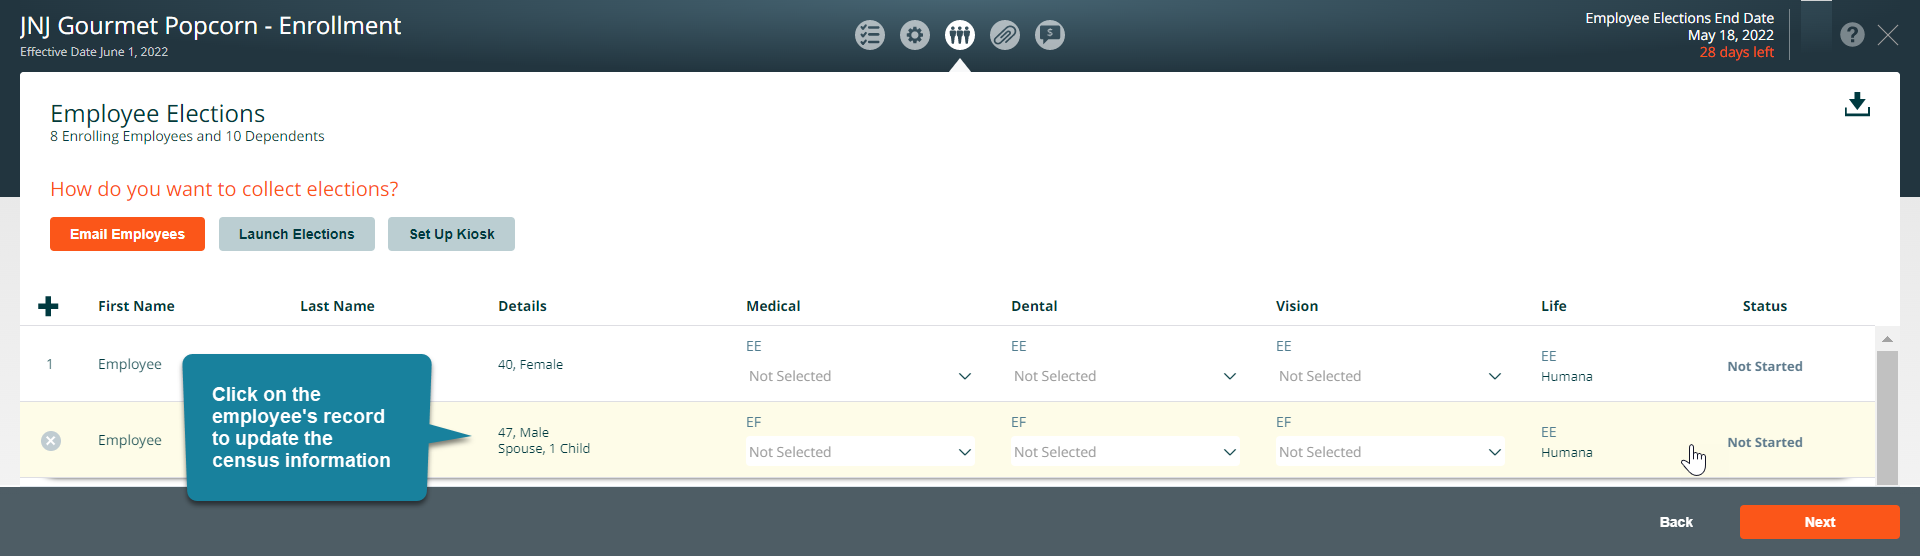
Managing Employee Elections
On the enrollment screen you can update an employee’s census information by clicking on their row on the Employee Elections page.
The system will display a window where you can view and edit the employee’s census information. Click on Show Additional Fields to look at the census information.
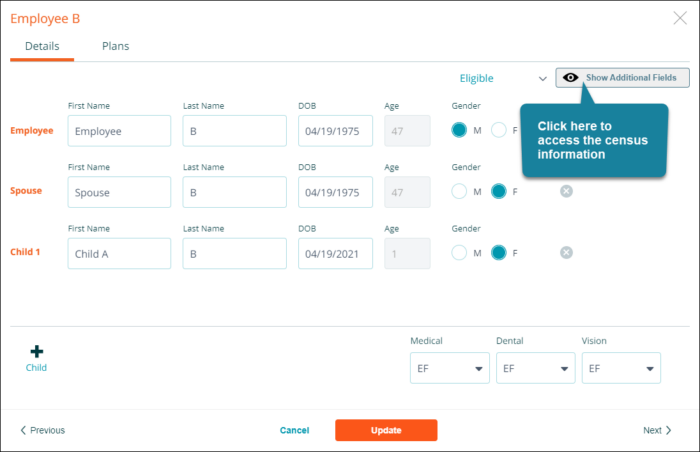
Note: Coverage choices and responses to carriers’ enrollment questions can only be entered in the employee experience.
Click here to review for more information about managing employee elections.
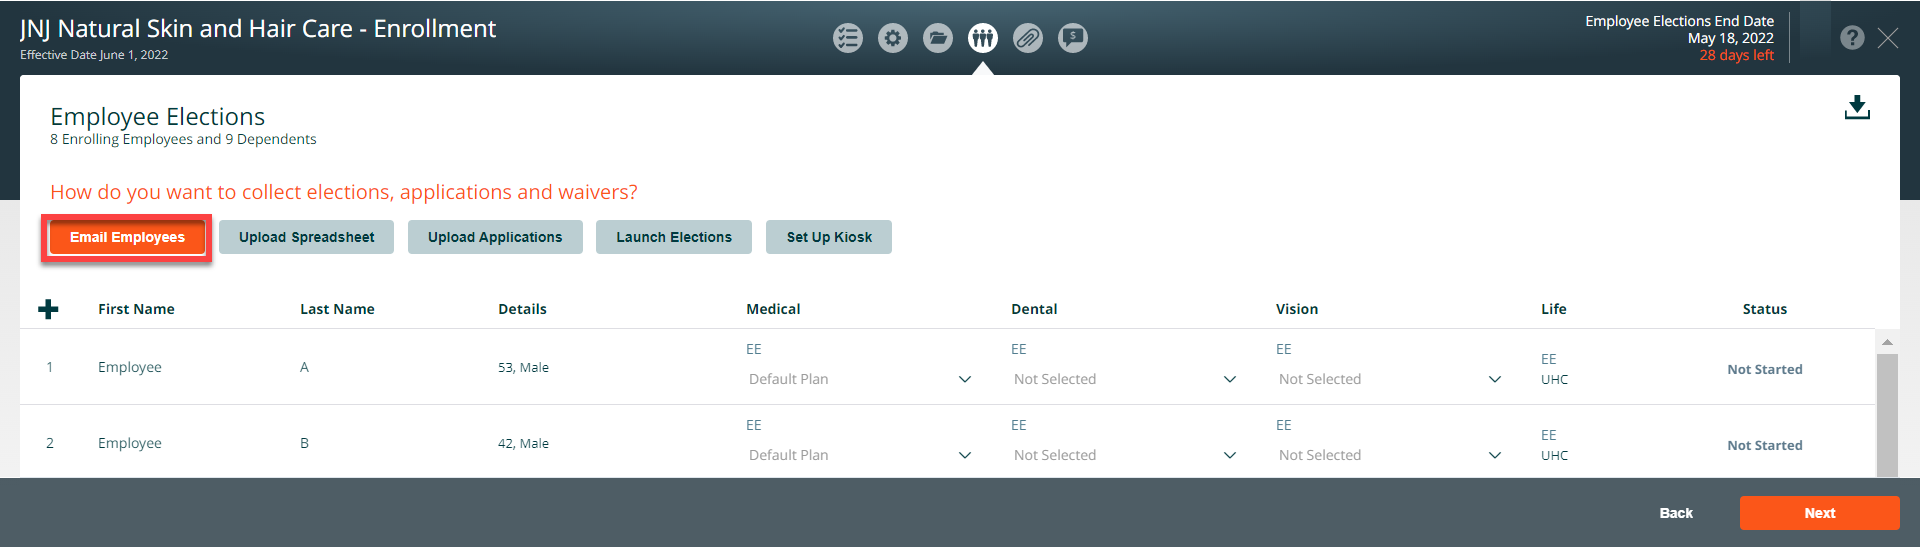
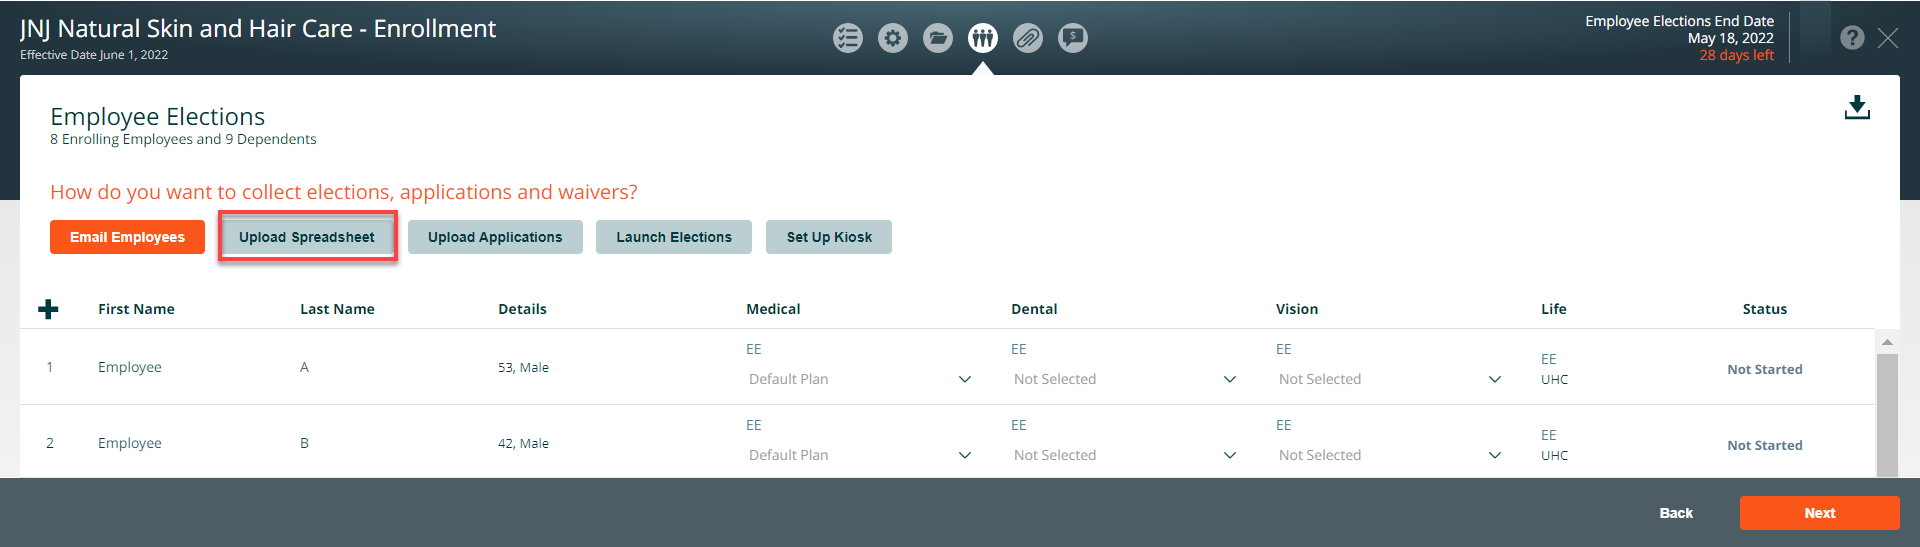
Employee Elections
The following options available to collect employee elections:
Email Employees
To give employees access to the employee experience and notify them that they can begin their benefit election, navigate to the Employee Election screen within the Enrollment module and select the Send Email button.
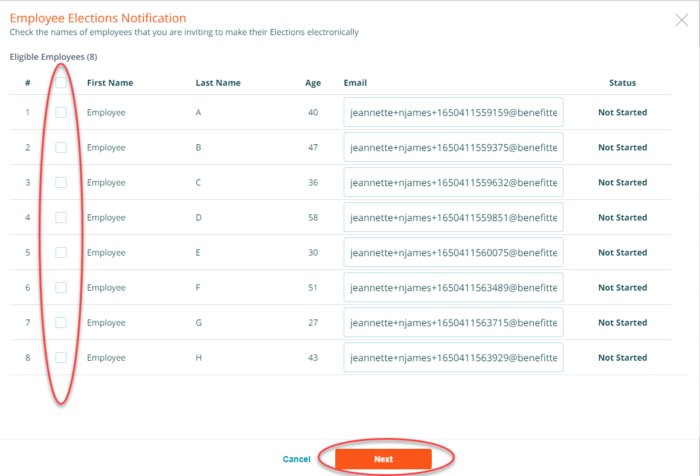
Click on the select all checkbox or select the employees who should receive an email notification, add any missing email addresses, and press next.
The message to be sent to the employees you selected will be displayed.
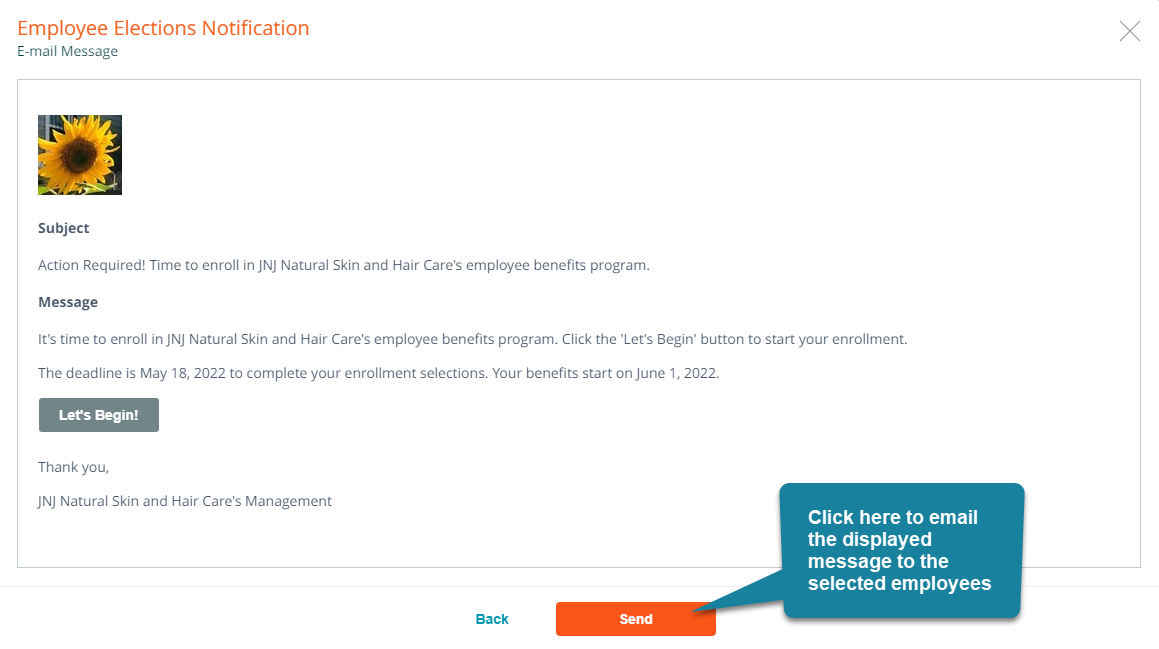
Note: You can return to the notification wizard at any time before the enrollment end date to send additional notifications to employees; you may wish to do so to remind them when the enrollment end date is approaching.
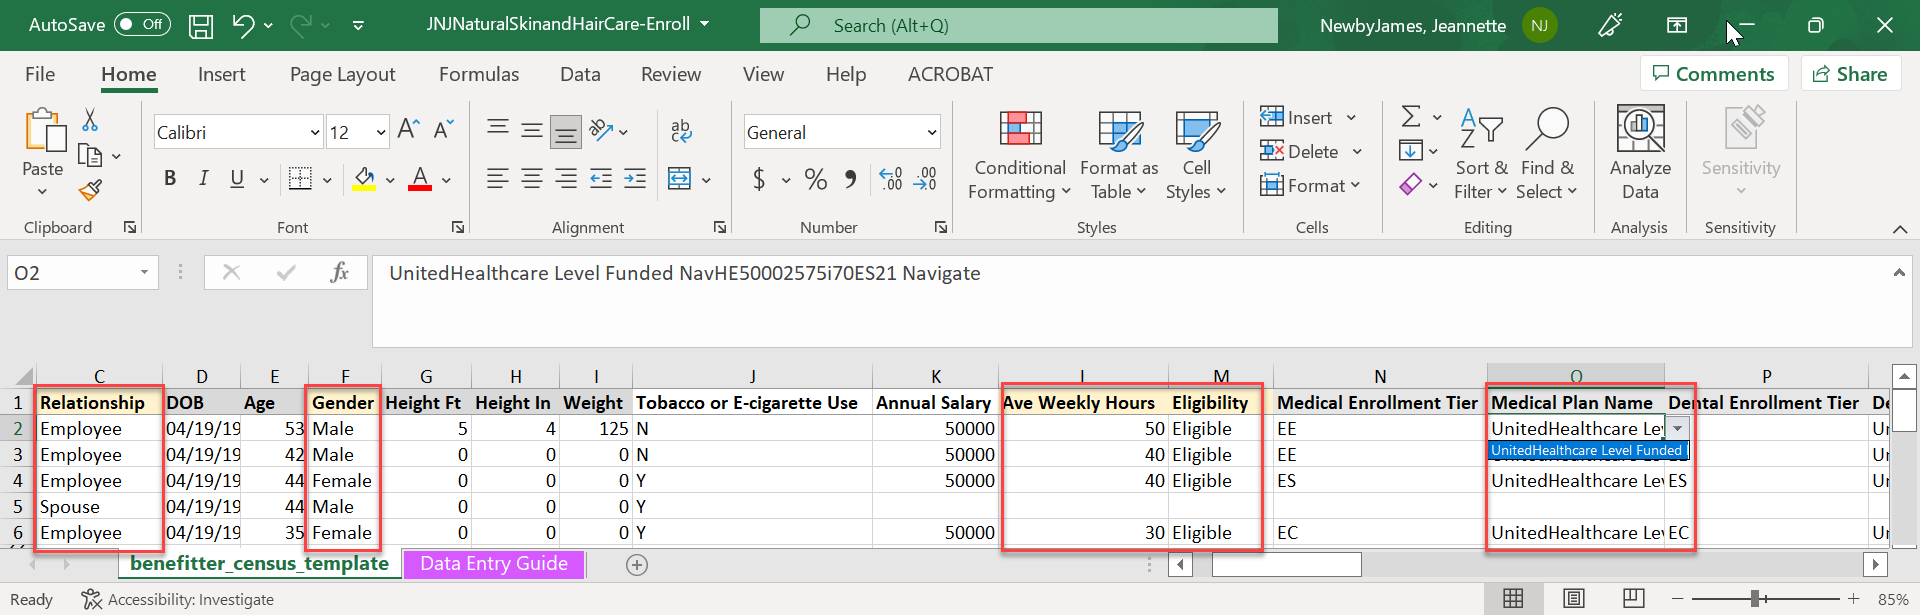
Download Employee Enrollment Spreadsheet (All Savers/Level Funded Groups only)
To download the enrollment election spreadsheet, click Upload Spreadsheet
Download the enrollment spreadsheet
Click on the Download Enrollment Spreadsheet link or download icon.
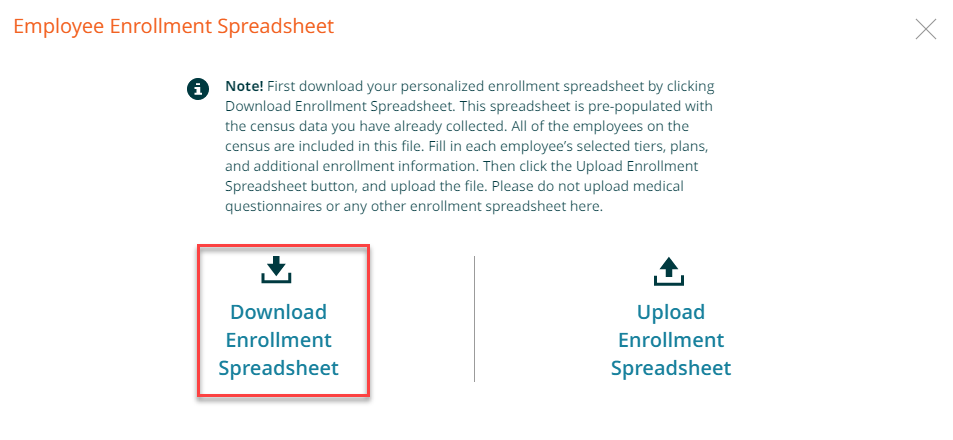
Please do not upload medical questionnaires or any other enrollment spreadsheet here.
Upload Employee Enrollment Spreadsheet (All Savers/Level Funded Groups only)
To upload the enrollment spreadsheet, click on the Upload Enrollment Spreadsheet link or click on the upload icon.
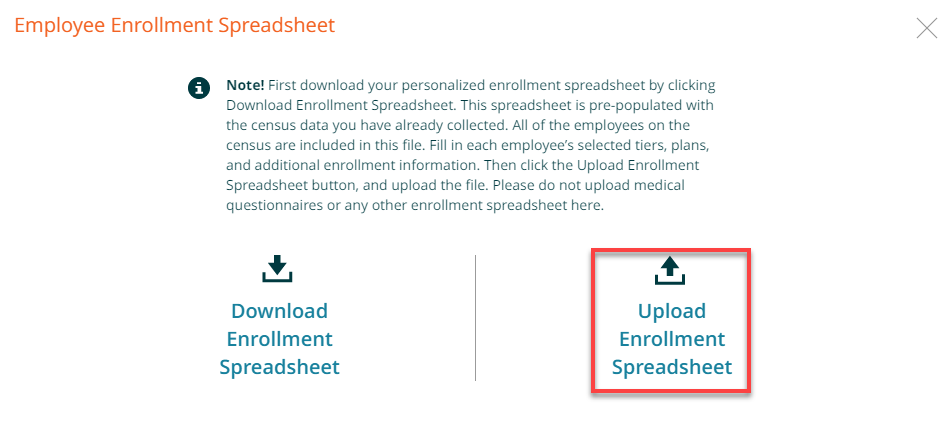
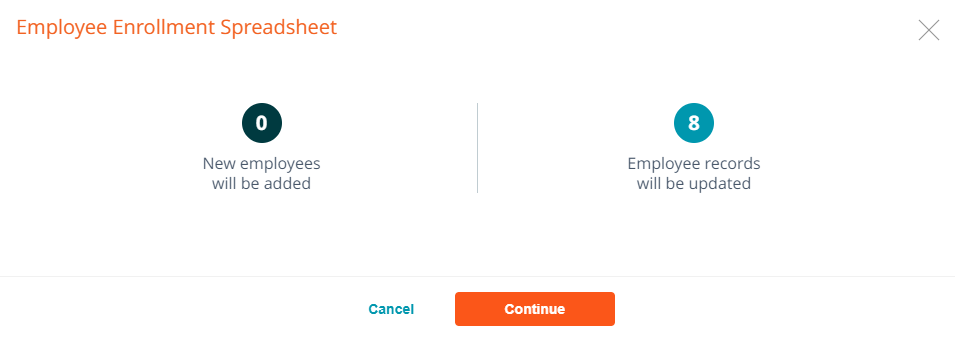
Press continue to upload the election spreadsheet, to add the enrollment elections to the enrollment.
/
Upload SAMx UHC Final Enrollment Spreadsheet – (All Savers/Level Funded Groups only)
You can upload the UHC Final Enrollment Spreadsheet, the same spreadsheet you use on SAMx. To upload the Final Enrollment spreadsheet
- Click on the upload application button
- Click on the upload employee election link or upload icon
- Press Continue
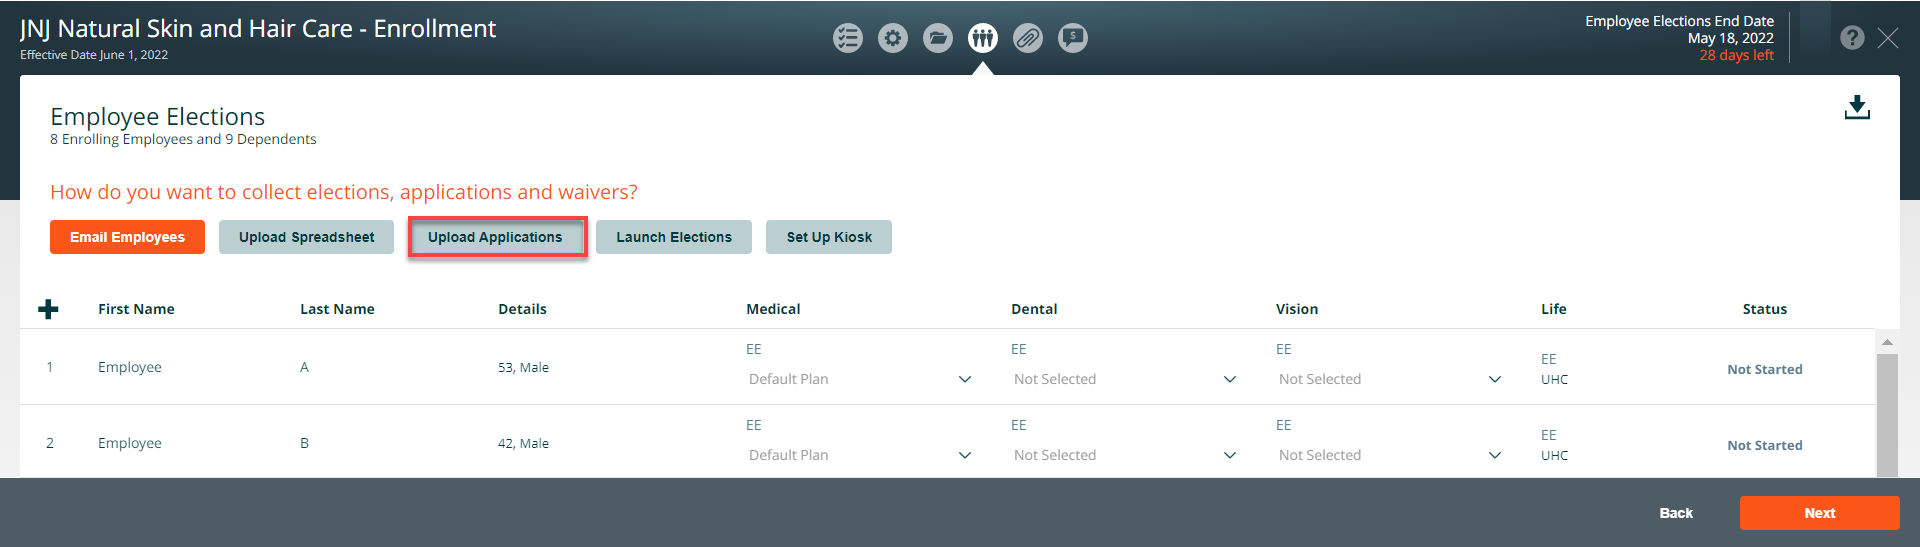
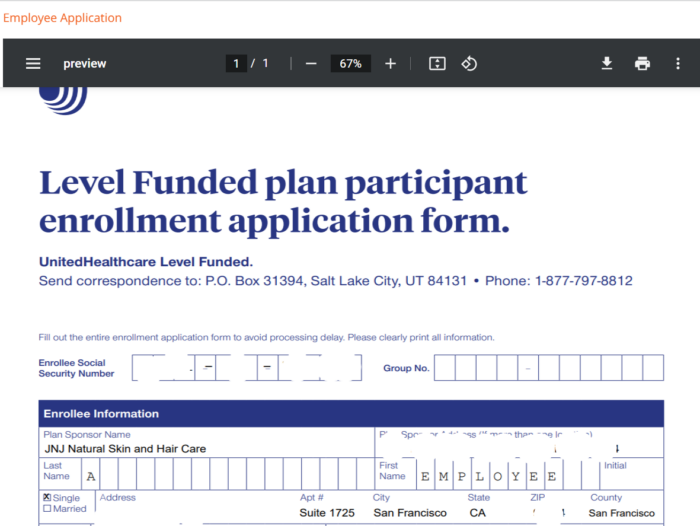
Upload Applications – (All Savers/Level Funded Groups only)
On the employee election page, click on the download indicator to download a blank copy of the employee application.
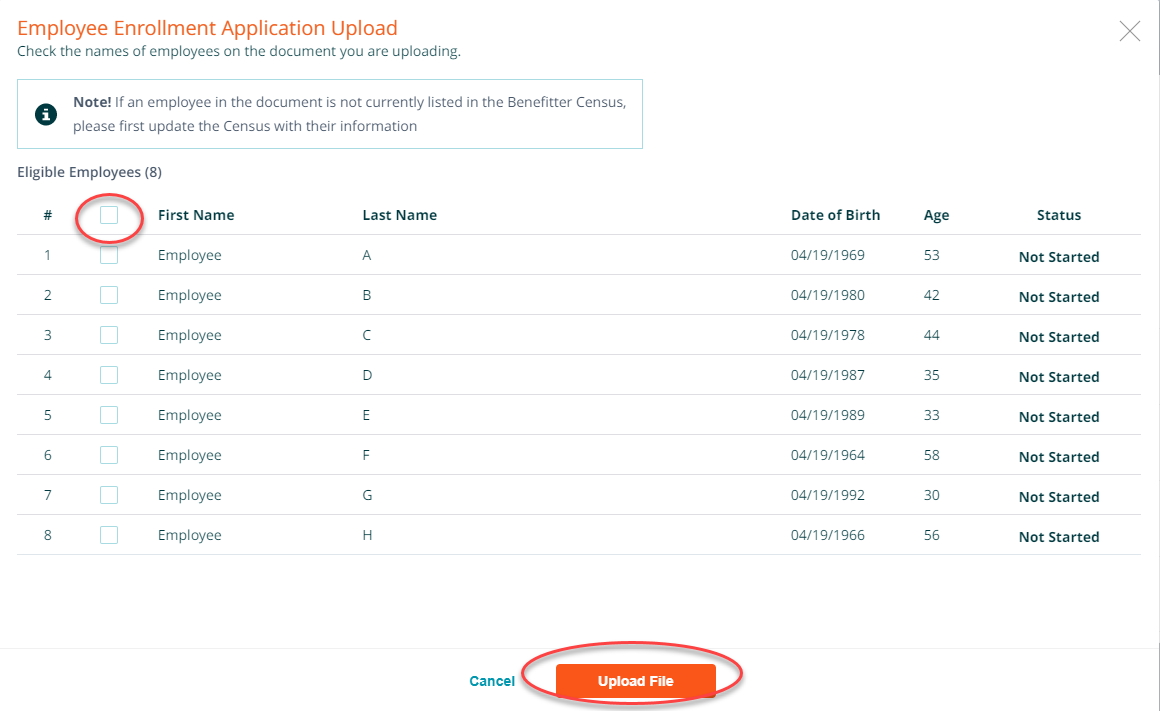
Attach a copy of the blank application to an email and send it to the employer/employees. When you receive the completed documents. On the employee elections page, click on the upload application button and upload the completed applications. To upload the completed applications, click on the upload application button.
Check the names of employees on the document you are uploading. If an employee in the document is not currently listed in the Benefitter Census, please first update the Census with their information
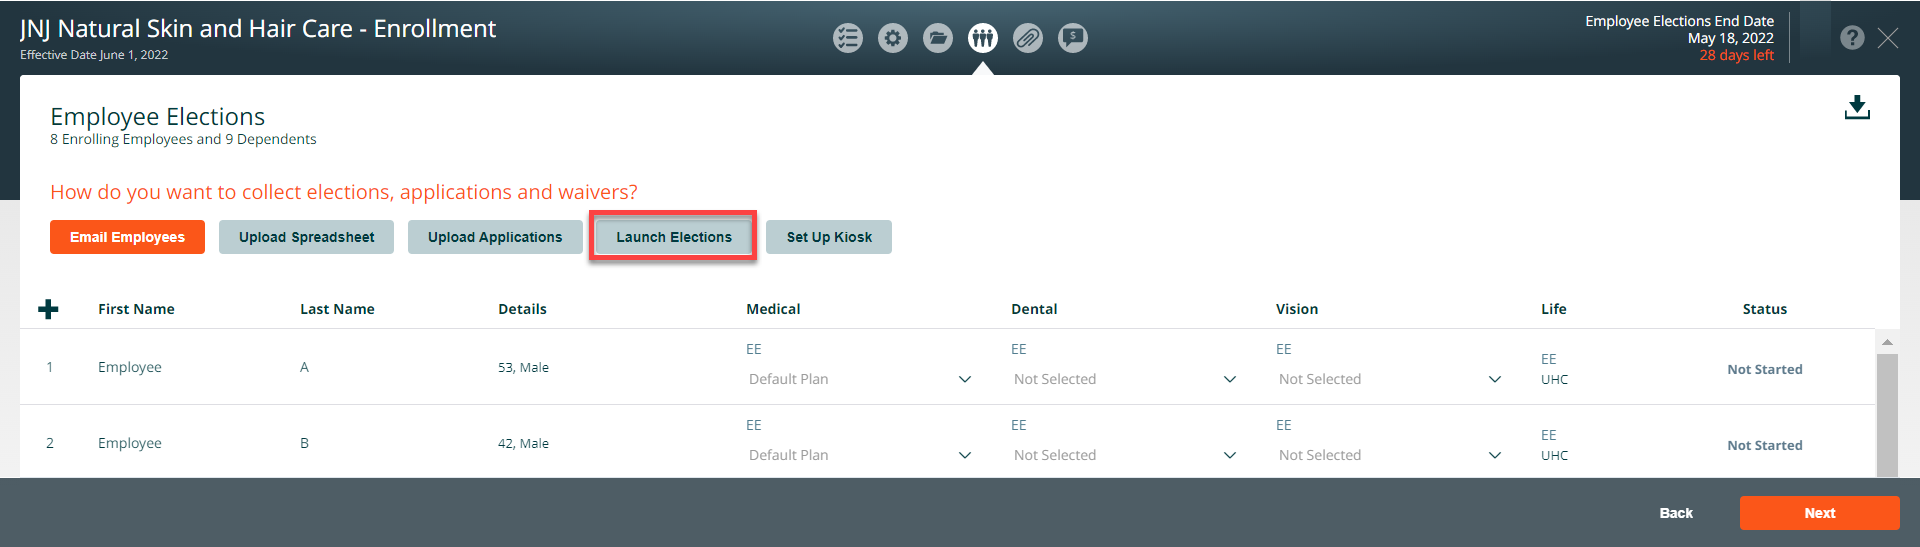
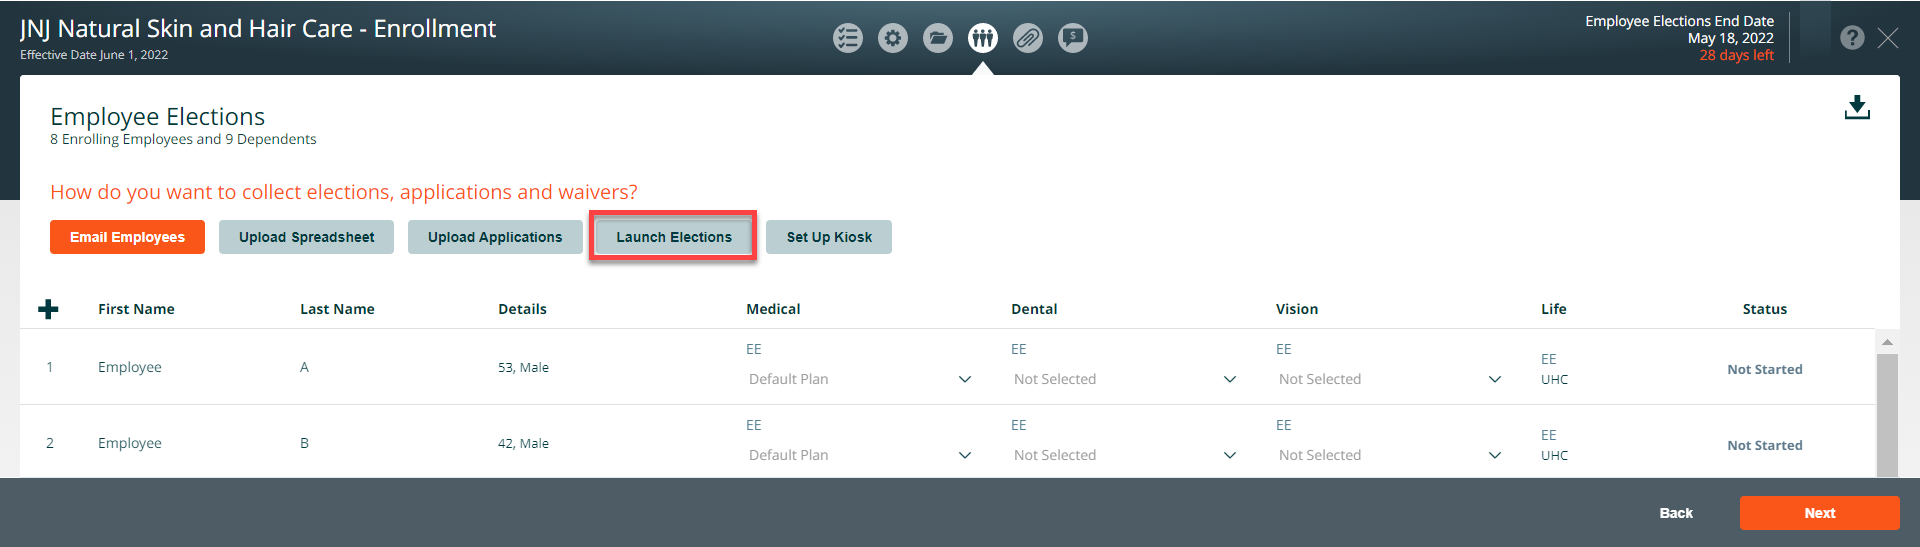
Launch Elections
You can access the employee experience to walk an employee through their benefit election, or so that you can complete or correct their responses. To complete their benefit election, the employee should have on hand (for themselves and their dependents):
- Dates of birth
- Social security numbers
- Home Addresses
- If enrolling in HMO plans their current primary care physician names & ID numbers.
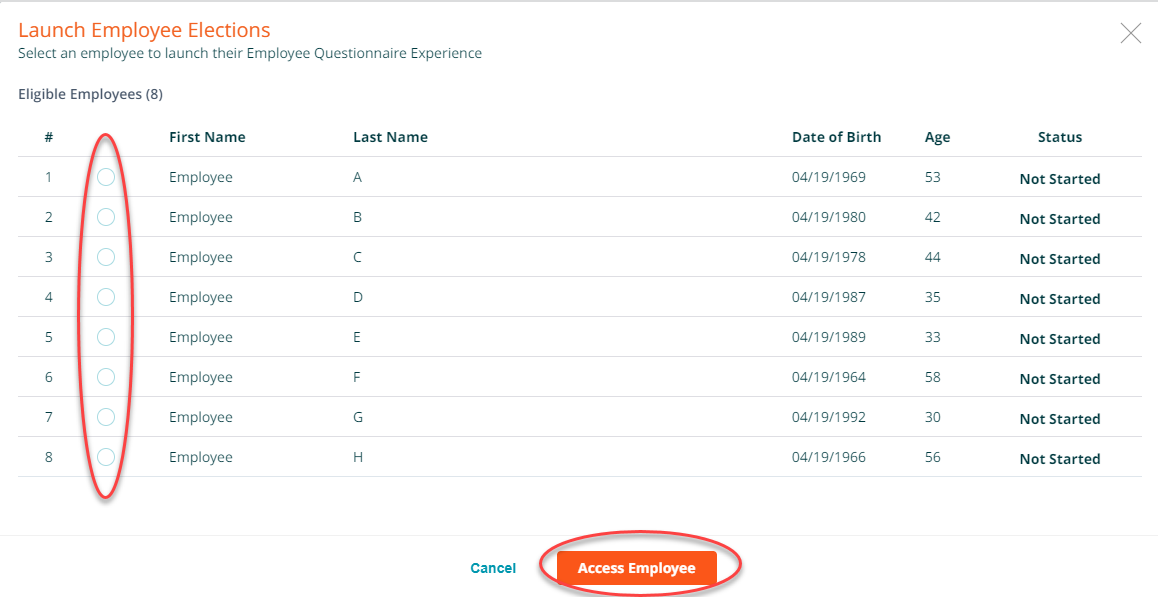
To access the employee experience on behalf of an employee click on Launch Elections.
Select an employee name and press access employee.
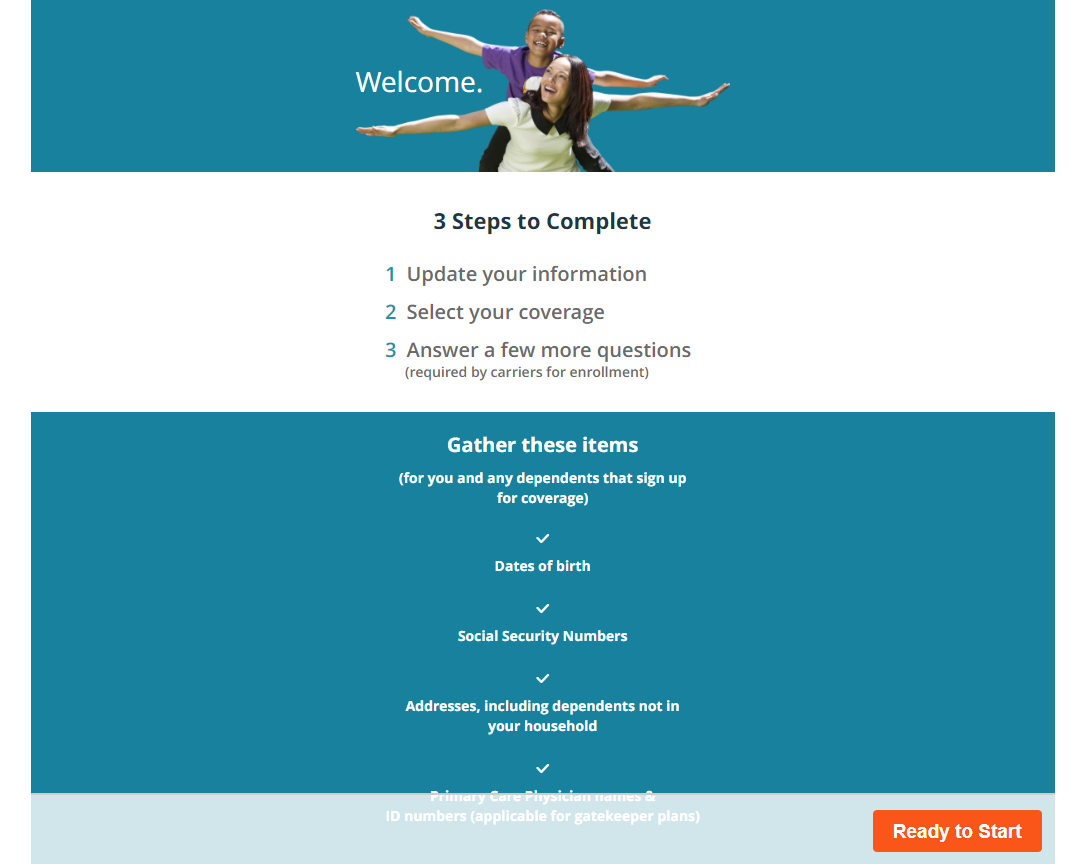
You will briefly see the employee login page; the system will automatically sign you in as the employee and take you to the Welcome screen.

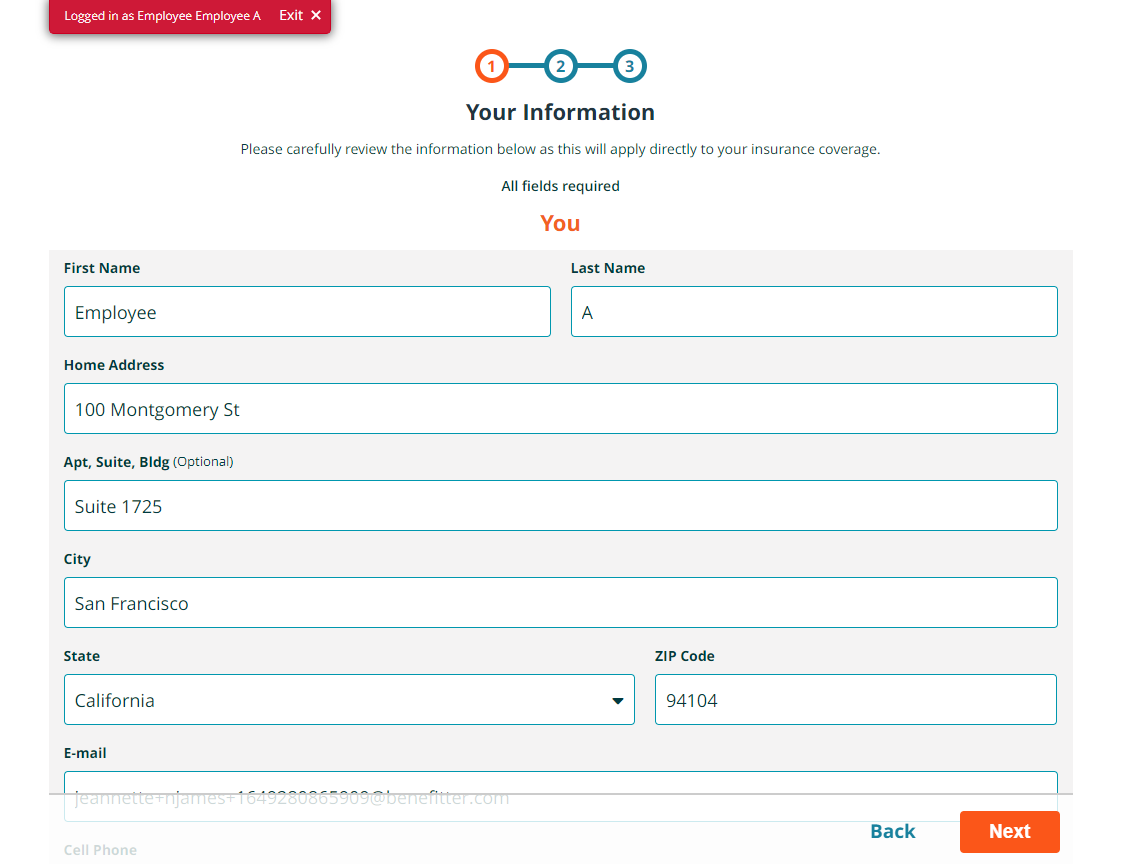
The employee’s name that you accessed will appear in the upper left corner of the screen.
You/and the employee) can:
1. Complete and correct their census information
2. Select the coverage they’d like for them and their family
3. Answer any additional questions required by the insurance companies for enrollment.
Reminder: Any changes that are made may impact which questions are asked in the Additional Questions state of the enrollment. Please be sure to review and complete all screens following any changes.
For more details on the employee experience, please see the Employee Benefit Elections Experience user guide.
Setting up a Kiosk
The kiosk functionality enables you or your client to set up a computer in the workplace where employees can access the employee experience. This is particularly useful when the client does not have an email address for all eligible employees. To access the kiosk feature, click on the Set Up Kiosk button.
Employees will need an access code to use the employee experience via the kiosk feature. To download letters with employee access codes, click on the Launch Kiosk button on the Employee Elections page, then select the download icon in the upper-right.
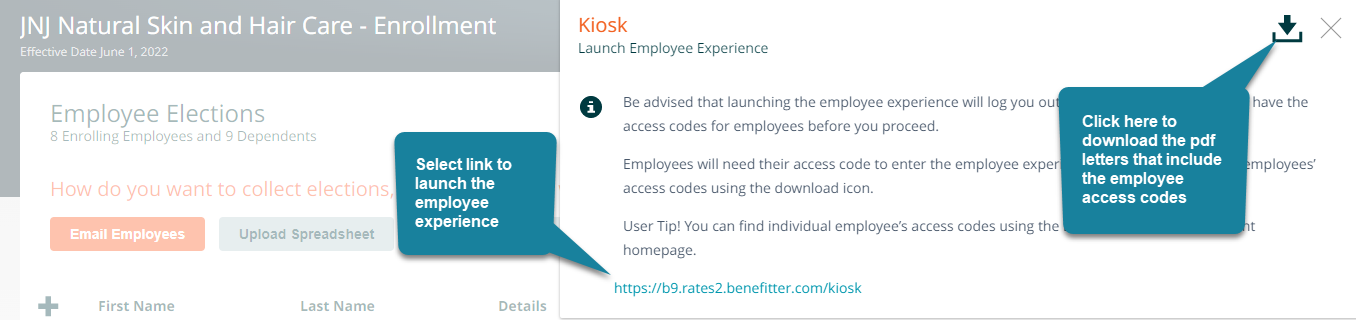
You can launch the kiosk functionality by clicking on the link on this screen. Doing so will log you out of Benefitter, so make sure you have the employee access codes before you proceed!
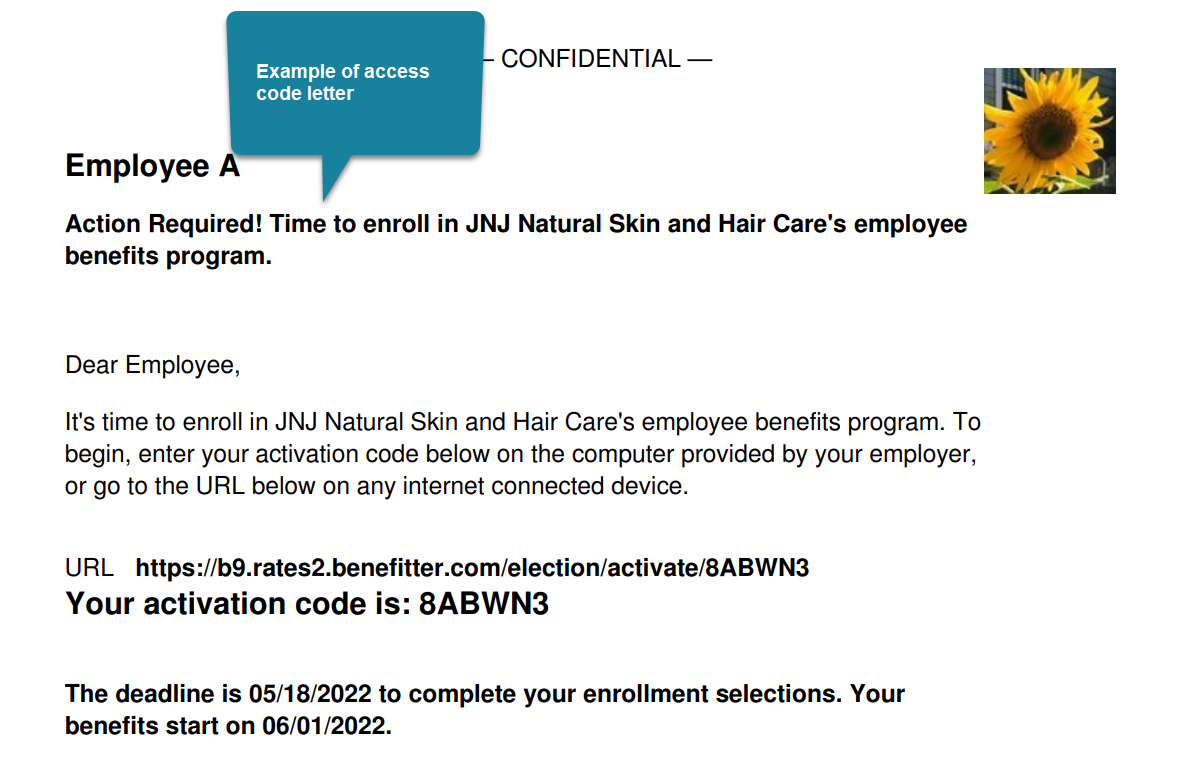
You (or your client) can also launch the kiosk by typing https://ei.benefitter.com/kiosk into an internet browser; you do not need to first log into Benefitter. The employee will enter the access code from the kiosk code pdf and press verify.

For more details on the employee experience, please see the Employee Benefit Elections Experience user guide (add link)
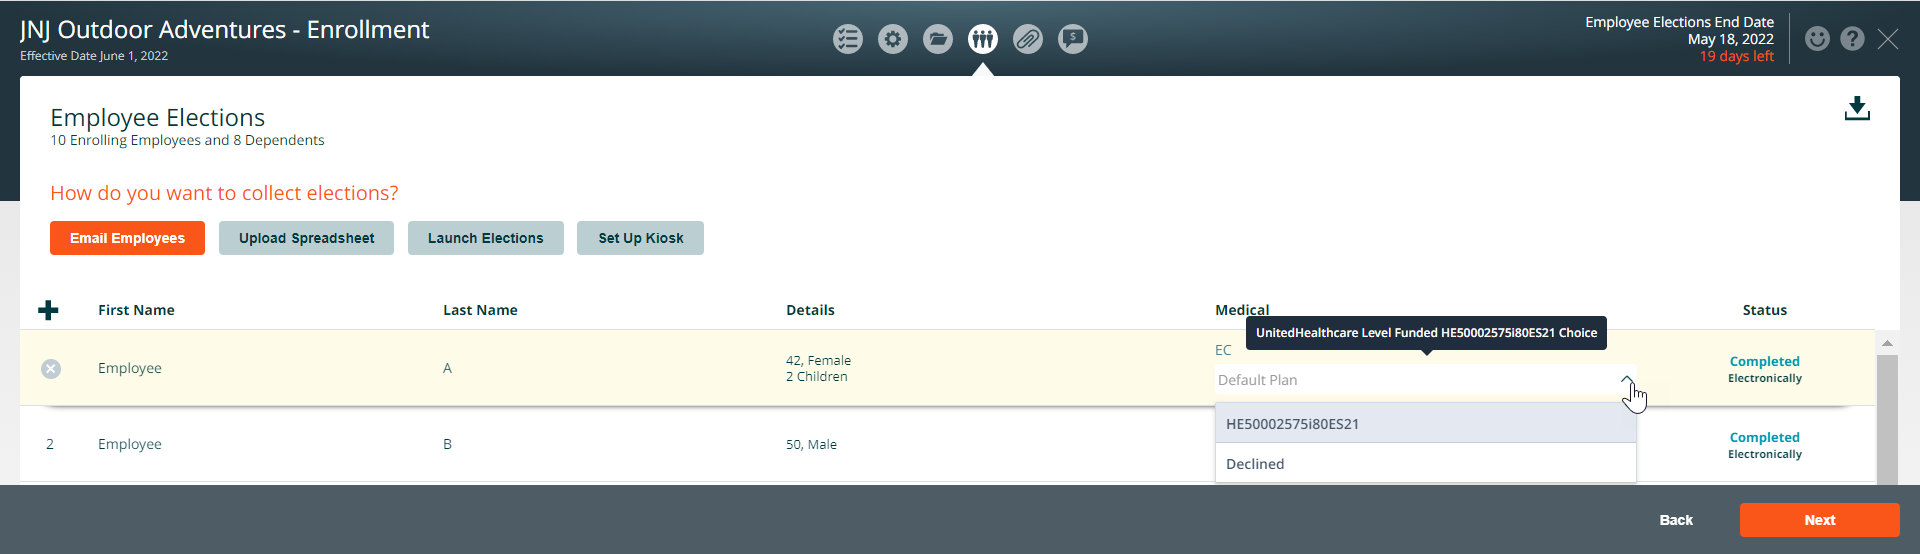
Enroll Employees in plans on the Employee Elections page
Click on the down arrow under each coverage tier and select the plan. Press save after enrolling the group in the plan(s).
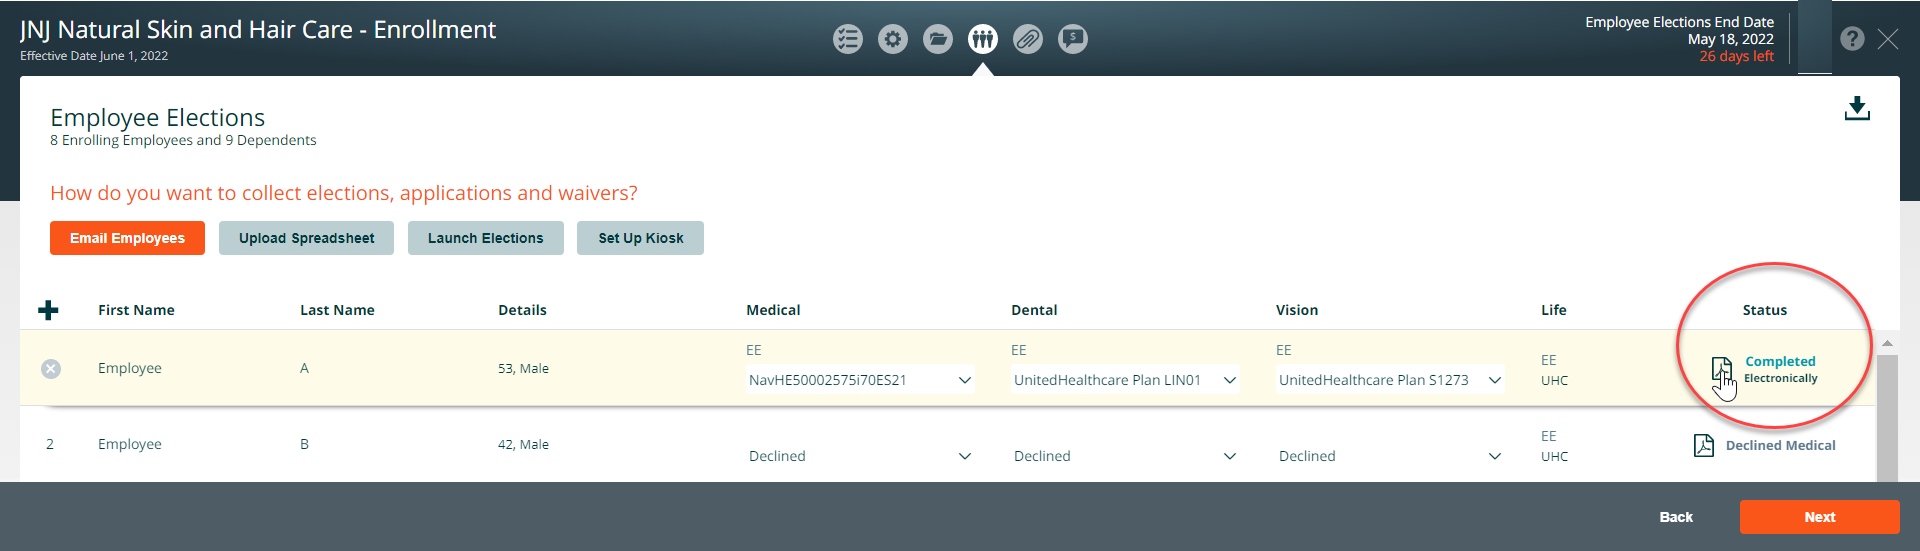
Track Employee Election Status
The Status field on the Employee Elections page shows where each employee is in the enrollment election process.
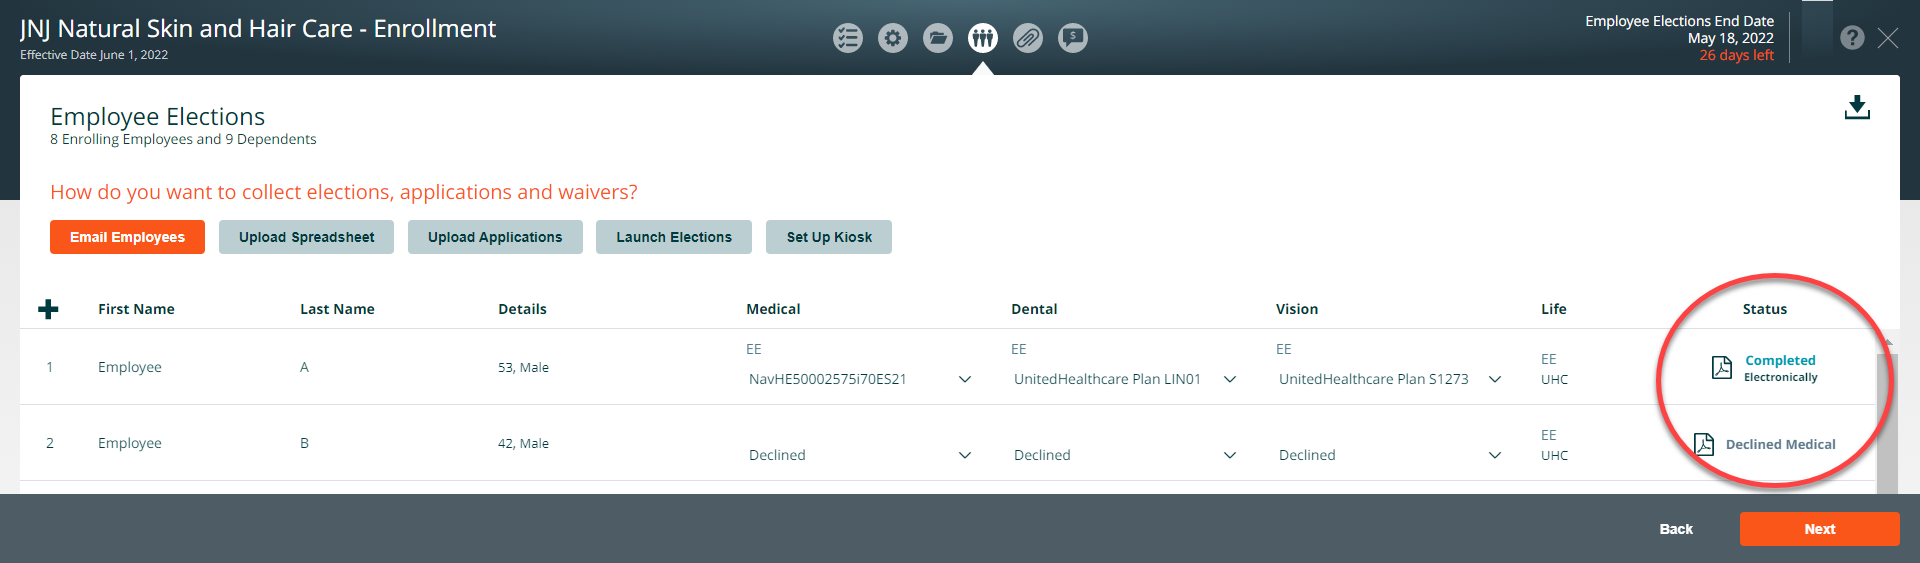
The enrollment statuses are as follows:
- Completed: The employee has made their coverage choices and provided all required additional information. They can still make changes to their coverage choices until the enrollment end date
- In Progress: The employee has logged into the employee experience
- Not Started: The employee has not been sent an email notification, nor have they logged into the employee experience
- Declined: The employee has logged into the employee experience and declined coverage
To encourage employees to complete their enrollment, you can resend the enrollment email notification to the employee by clicking on the envelope icon.
Click on the paper icon to review, download, and print out a copy of the employee’s application.
After the enrollments have been completed, click on the next button.
Communications & Documents
The system will advance to the communications & Document page. The uploaded documents will be visible on the page. To add additional enrollment documents on the attachment selection, click on the checkbox next to the documents that you will be uploading. Click on the upload files button and choose the documents on your computer to add to the enrollment. Be sure to upload the required forms. Press save & continue.

Submit Final Quote Application
When the check list items have been completed click the Submit For Final Quote
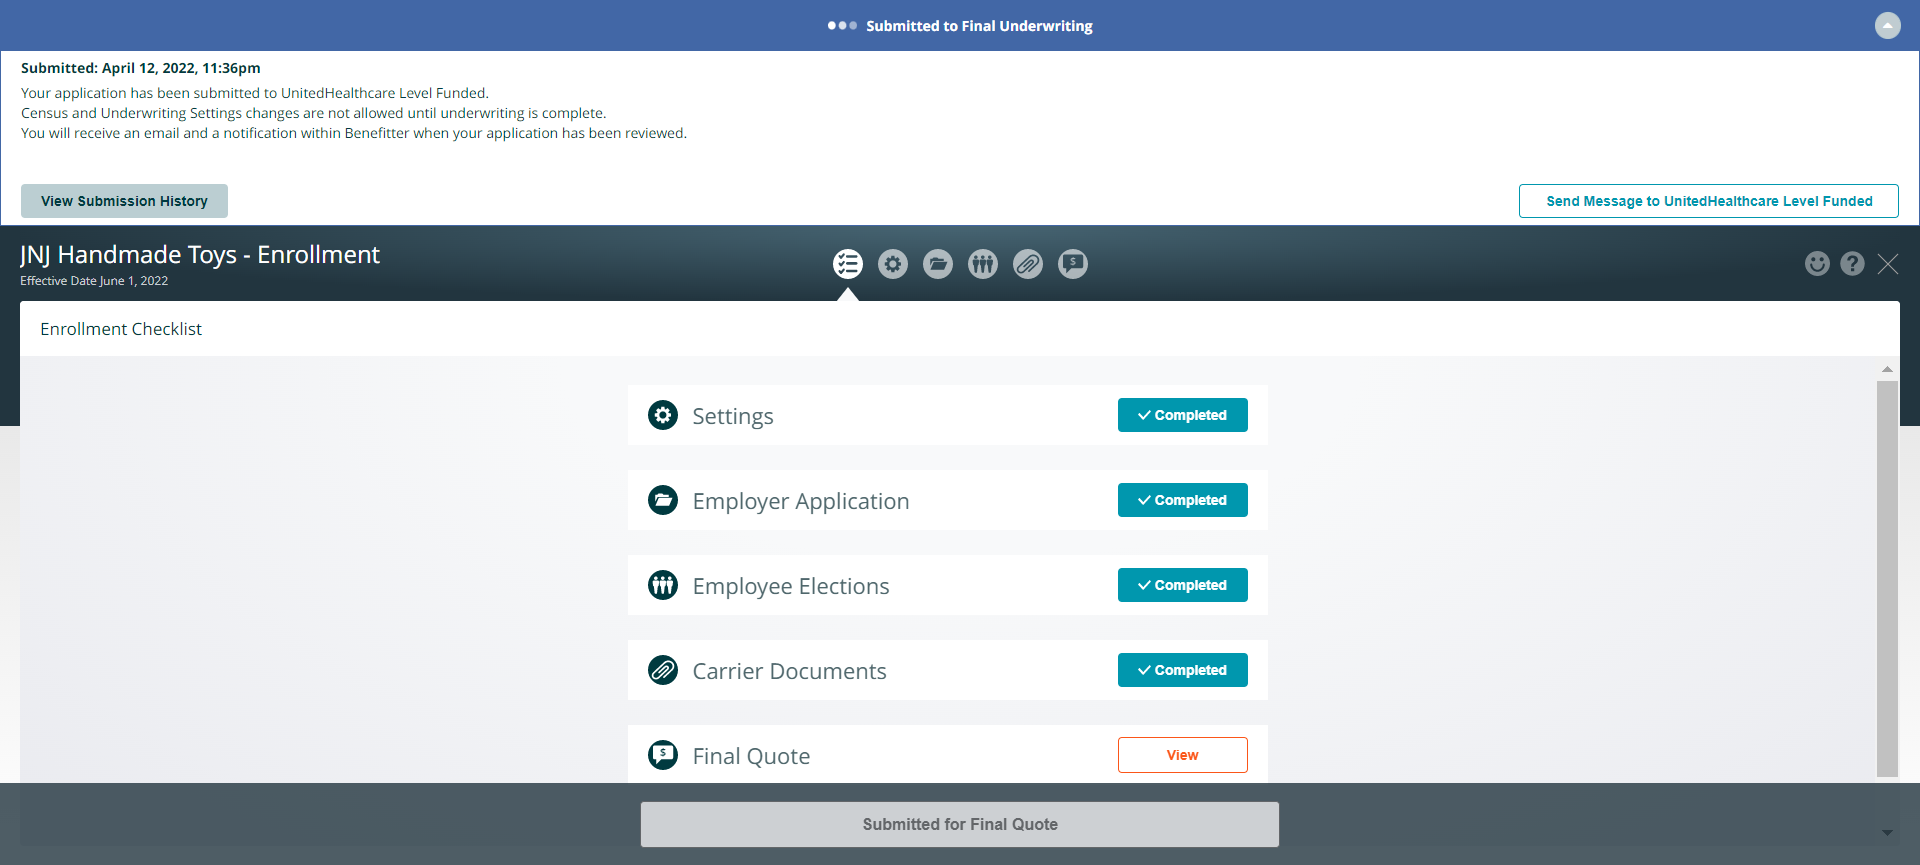
Persistent Header Message
Messages at the top of the page will alert you of where you are in the underwriting process, and what steps to take next. You can enter a note in the message box to communicate with the UnitedHealthcare Level Funded Team. At this stage, census and underwriting settings changes are not allowed until underwriting is complete. You will receive an email and a notification within Benefitter when your application has been reviewed.

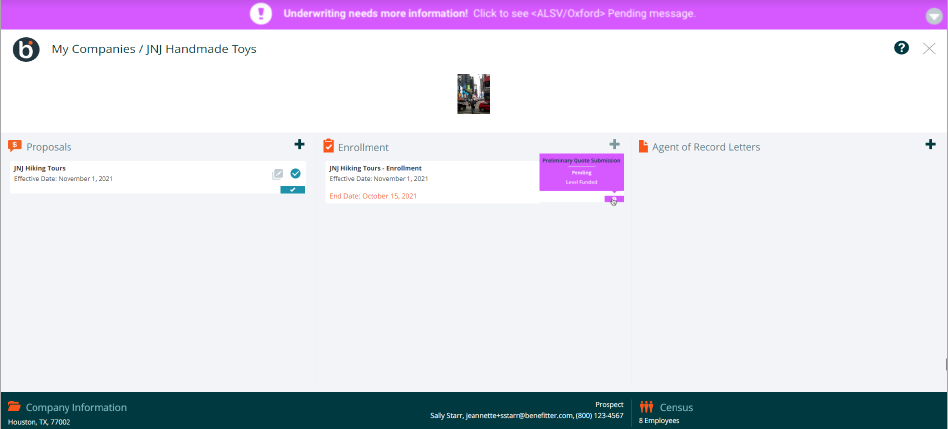
Resolve Underwriting Questions
As with the preliminary underwriting request, the All Savers® underwriting team may identify issues that need resolving before they can provide final rates. In this case, you will receive an email alerting you that the final quote submission requires your attention. You will also see a pending status indicator on the client’s homepage. A message on the Enrollment Checklist page will provide information about the issues that need to be addressed. Once you have entered the required information, click on Resubmit for Final Quote Application to have the All Savers underwriting team review the new information.
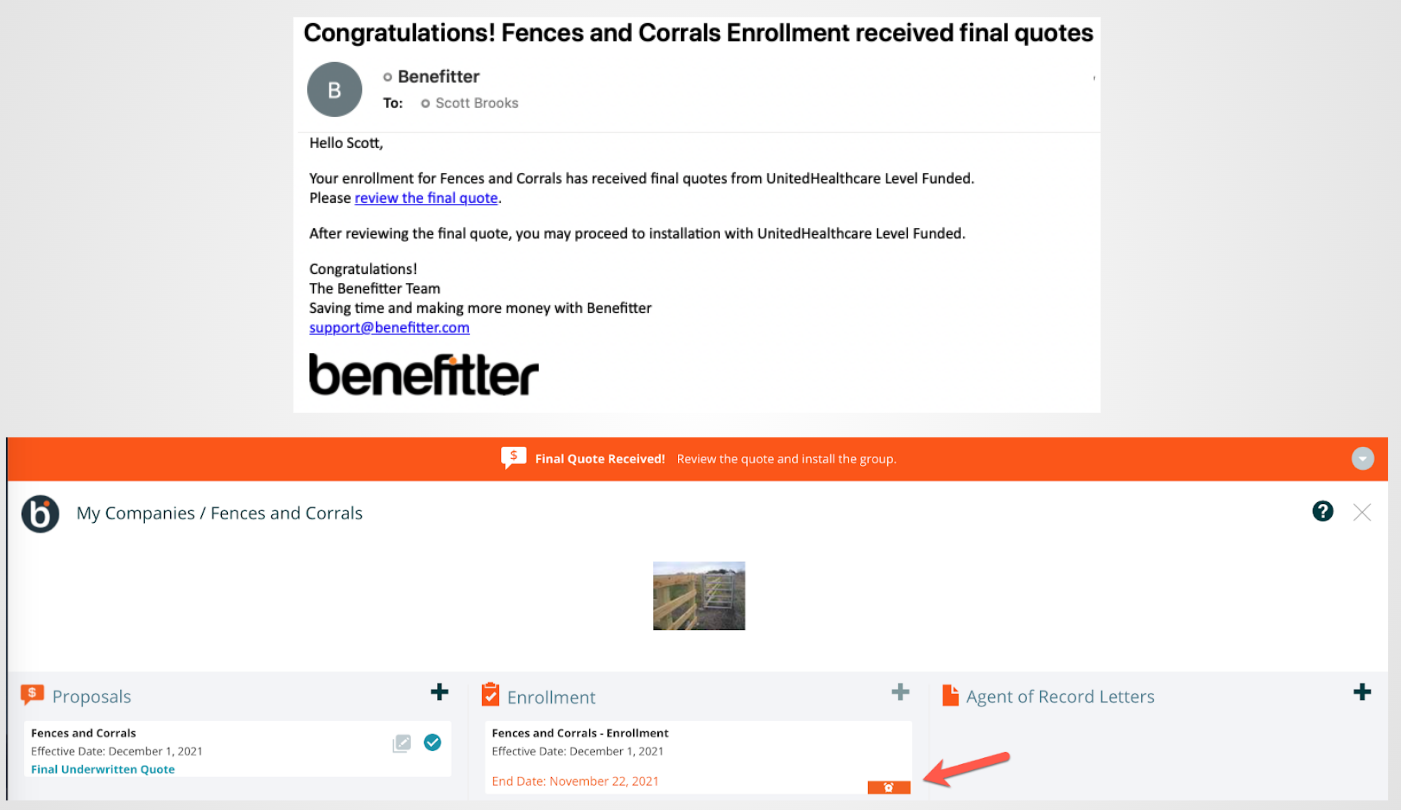
Receive and Approve Final Underwritten Rates
You will receive an email when final rates are available. To review the rates:
- Open the enrollment in Benefitter and navigate to the Enrollment Checklist, then select the Final Quote section, or
- Access the final quote by clicking on the Quotes icon in the Enrollment module header.
- The Quotes page displays a comparison between the preliminary and final underwritten rates
- Click on the download icon to save a copy of the preliminary and final quotes
- Accept the final quote and install the group by clicking Install -Approve & Accept Quote
Persistent Header- Final Quote Submitted
- Messages at the top of the page will alert you of where you are in the underwriting process, and what steps to take next
- You can enter a note in the message box to communicate with the UnitedHealthcare Level Funded Team, regarding policies and procedures
- At this stage, census and underwriting settings changes are not allowed until underwriting is complete
- You will receive an email and a notification within Benefitter when your application has been reviewed
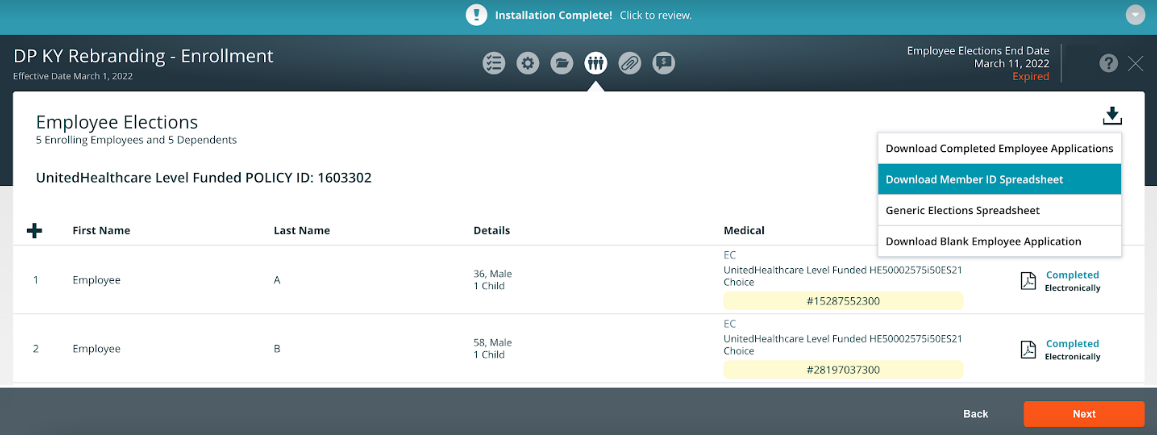
Confirmation of Successful Installation
After the group has been installed, we display a link in the persistent header which allows you to access the UHC eServices system. You can view more information about the group or make changes on the UHC eServices platform.
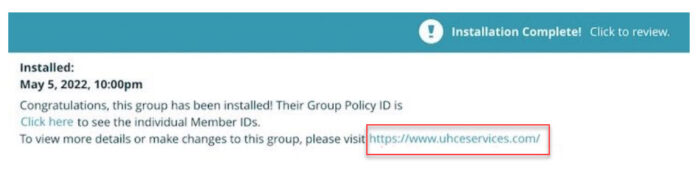
- From this point forward, you can review any part of the enrollment but can no longer make changes to it in Benefitter.
- The group will now appear in myAllSavers.com, where you can submit any needed adjustments
- The Member IDs will be added to the employee elections page
- Download Member ID spreadsheet
Next: Fully Insured